background image

  before plugging in

l

  Make sure your electricity supply is 

the same as the one shown on the 
underside of your toaster.

This appliance conforms to EC 
Regulation 1935/2004 on materials 
and articles intended to come into 
contact with food.

  Important – UK only

The wires in the cord are coloured 
as follows:

  Green and Yellow = Earth,
  Blue = Neutral,
  Brown = Live.

The appliance must be protected by 
a 13A approved (BS1362) fuse.

WARNING: THIS APPLIANCE 
MUST BE EARTHED.

 Note:

For non-rewireable plugs the fuse 
cover MUST be refitted when 
replacing the fuse. If the fuse 
cover is lost then the plug must 
not be used until a replacement 
can be obtained. The correct fuse 
cover is identified by colour and a 
replacement may be obtained from 
your Kenwood Authorised Repairer 
(see Service).

If a non-rewireable plug is cut 
off it must be DESTROYED 
IMMEDIATELY. An electric shock 
hazard may arise if an unwanted 
non-rewireable plug is inadvertently 
inserted into a 13A socket outlet.  

  before using for the first time

l

  Clip excess cord into the cord 

storage clips in the base 

1

.

l

  Operate the toaster once on a 

medium setting without bread. (The 
lever will not stay down unless the 
toaster is plugged in).

l

  As with all new heating elements, 

your toaster may emit a slight 
burning smell when it is first 
switched on. This is normal and not 
a cause for concern.

key

a


lever (with ‘Hi-Rise™’ for  
extra lift) x 2

b


defrost button with indicator lights

c


browning controls

d


cancel button with indicator lights

e


crumb trays

f


cord storage

to use your toaster

1  Plug the toaster into the power 

supply.

2  Turn the browning control until the 

desired setting aligns with the line up 
mark on the body of the toaster. Use 
a lower setting for light toasting and 
for thin or dry bread.

3  Insert the bread, muffins, bagels etc.
4  Lower the lever 

2

 until it locks. (The 

lever will not stay down unless the 
toaster is plugged in). The ‘cancel’ 
button will illuminate.

l

  To toast frozen bread, once the 

bread is lowered press the ‘defrost’ 
button. The ‘defrost’ button will 
illuminate.

l

 To 

stop

 toasting during the cycle, 

press the ‘cancel’ button, the toast 
will pop up and the ‘cancel’ button 
light will go off.

Your toast will pop up 
automatically, 

to raise it higher, lift 

the lever.

4

l


Only use the appliance for its intended 

domestic use. Kenwood will not accept 

any liability if the appliance is subject to 

improper use, or failure to comply with these 

instructions.  

Summary of Contents for TTM480

Page 1: ...English 2 7 w 8 2 1 HEAD OFFICE Kenwood Limited 1 3 Kenwood Business Park New Lane Havant Hampshire PO9 2NH 130077 1 instructions TYPE TTM480 ...

Page 2: ...crumbs can smoke or burn l To avoid electric shocks never let the toaster cord or plug get wet or put your hand or anything metal e g a knife or foil into the toaster l Always unplug the toaster when not in use before cleaning or attempting to clear jammed bread l Never cover your toaster with a plate or anything else it could overheat and catch fire l Never let the cord hang down where a child co...

Page 3: ...ance can result in injury l Children from 8 years and above can use clean and perform user maintenance on this appliance in accordance with the User Instructions provided they are supervised by a person responsible for their safety and have been given instruction concerning the use of the appliance and are aware of the hazards l Persons with reduced physical sensory or mental capabilities or lack ...

Page 4: ...ing without bread The lever will not stay down unless the toaster is plugged in l As with all new heating elements your toaster may emit a slight burning smell when it is first switched on This is normal and not a cause for concern key a lever with Hi Rise for extra lift x 2 b defrost button with indicator lights c browning controls d cancel button with indicator lights e crumb trays f cord storag...

Page 5: ... is damaged it must for safety reasons be replaced by KENWOOD or an authorised KENWOOD repairer If you experience any problems with the operation of your appliance before calling for assistance refer to the troubleshooting guide or visit www kenwoodworld com If you need help with l using your toaster or l servicing or repairs in or out of guarantee Z call Kenwood customer care on 023 9239 2333 Hav...

Page 6: ...health deriving from inappropriate disposal and enables the constituent materials to be recovered to obtain significant savings in energy and resources As a reminder of the need to dispose of household appliances separately the product is marked with a crossed out wheeled dustbin guarantee UK only If your toaster goes wrong within one year from the date you bought it we will repair or replace it f...

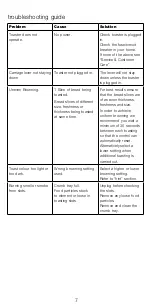
Page 7: ...me For best results ensure that the bread slices are of an even thickness freshness and size In order to achieve uniform browning we recommend you wait a minimum of 30 seconds between each toasting so that the control can automatically reset Alternatively select a lower setting when additional toasting is carried out Toast colour too light or too dark Wrong browning setting used Select a higher or...

Page 8: ... أهنا مكا خمتلفة أجحام بشلك المسك نفس ومن طازجة متساوي النتاجئ أفضل عىل للحصول اخلزب رشاحئ تساوي من تأكدي درجة نفس يف محتيصها املراد سواء والنوع واحلجم المسك قدميًا أو طازجًا اخلزب اكن محتري درجة عىل للحصول باالنتظار نويص متساوية األقل عىل ثانية ٣٠ زمنية فرتة حبيث محتيص مرة لك بني درجة حتمك تعيني إعادة يمت تلقائيًا التحمري اختاري أخرى بطريقة أو منخفض محتري درجة إعداد مزيد بتحميص قيامك حالة يف اخلز...

Page 9: ... F L b s Æ q D O O W N E K l L X _ L U N M b ß O W Ë B L O r s Æ q d Ø W d o o w n e K w L L K J W L b l Å M l w B O s w N U W F L d A G O K w K π N U π V b  ª K h s π N U w H U U L M U o C d W q π V î c Á v d Ø e π L O l î U π N W K O W ª B B W w ª K h s c Á M H U U Ë v U d I b  c Á ª b W ª K h s _ N e L M e O W K v u M H B q π M V ü U º K O W L L K W K v O µ W Ë B W Ë w M Z s ª K h s c Á M H U...

Page 10: ... e s i R i H L e b s d l x 2 t s o r f e D W K Z e Ë œ L R d u z O W H U O J r w œ W L O d l e c n a C G U e Ë œ L R d u z O W Å u w J º d a b c d e f J U Ê ª e s º K p ß ª b  L B W ª e 1 Ë Å K w L B W ª e l B b O U J N d w 2 H w H U Õ J r w œ W L O d v ù b œ L D K u O Y U È l F ö W L u u œ K v º r L L B W ß ª b w ù b œ L M ª H i K L O h ª H O n Ë l ª e d Æ O o Ë π U 3 œ î K w ª e Ë Ø F p L U O s...

Page 11: ...F w Æ º r B O U W Ë U W F L ö l c π N U O d ª B h O r A G O K t u ß D W R Æ X M w î U w Ë N U J r s F b î U w l Æ b R œ Í ß u ß ª b  π N U v b Ë À Å U U l L J s ú H U c s d Ë Õ L U r s 8 ß M u Ë U u ß ª b Â Ë M E O n Ë Å O U W π N U Ë I U Î F K O L U ô ß ª b  d D W Ê r ù d K O N r s Æ q ª h º µ u s ß ö N r Ë M N r F K O L U A Q Ê ß ª b  π N U Ë œ Ø N r K L ª U d L M D u W K v ß ª b t l _ ª U Ë ...

Page 12: ... W O e K v ß O q L U w U W ß I u A u Ë ù U U œ î q L L B W I b º V w b À d z o E H w Å O M O W J º d B u M E L W Æ b B b œ î U U Î s J º d Ë Æ b d l π M V ù Å U W B b U Ø N d U z O W c º L U Õ F d L L B W Ë º K p J N d w Ë I U f J N d w K K q Ë œ î U b p Ë Í º r F b w q º J O s Ë Æ U z o _ L u O u  œ î q L B W ª e l B K w L B W ª e œ z L U Î s B b O U J N d w w U W b Â ß ª b N U Ë Æ q M E O n Ë M...

Reviews: