124
13.3 Set Bit
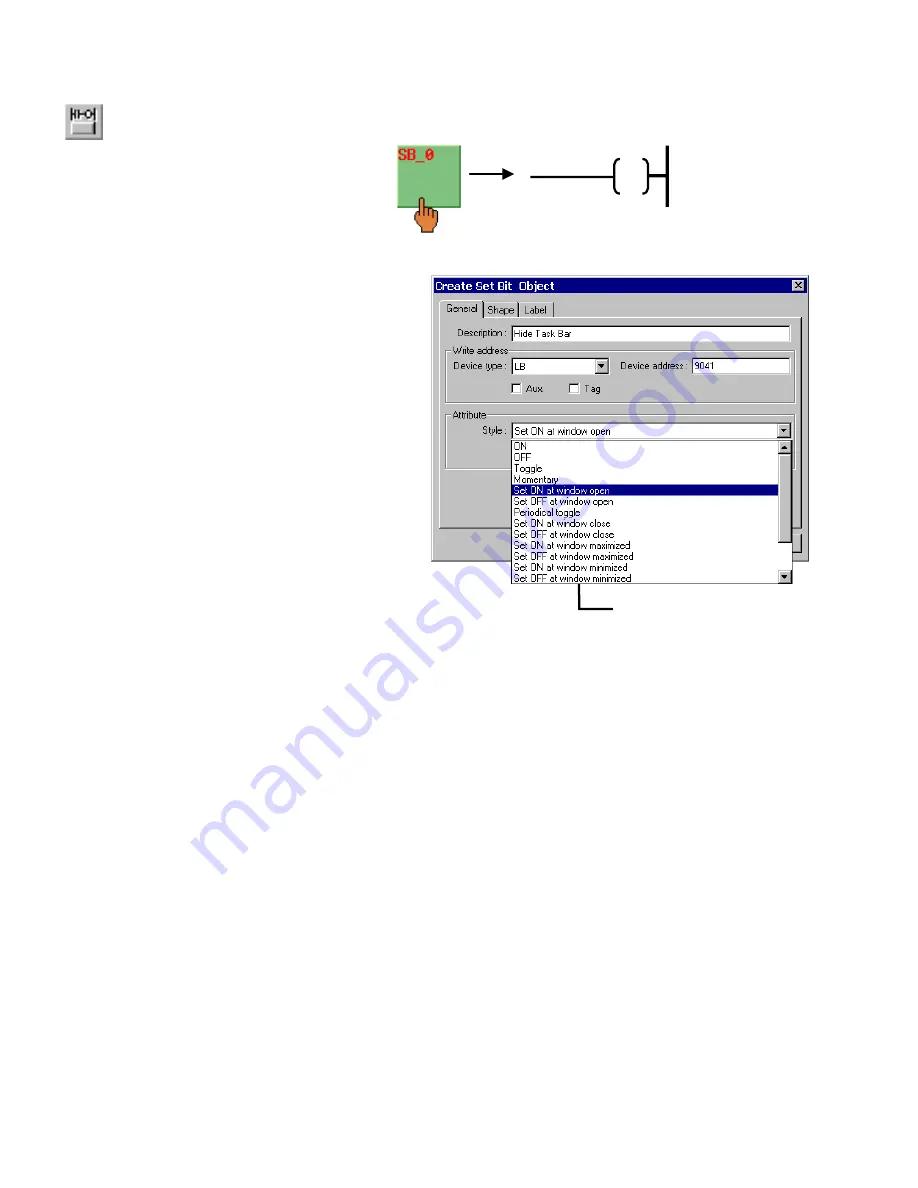
The Set Bit Part defines a touch area, that when activated, changes the state of a specified bit.
Procedure to place a Set Bit
1. Click Set Bit icon or select
Set Bit
from the
Parts
menu.
2. Fill in General Tab Items:
Description
: A reference name (not displayed) that you
assign to the Set Bit Part.
Write Address
: Bit that is acted on by the Set Bit action.
Device type
is the bit prefix.
Device address
is the bit number.
Tag
is used to select the Write address from a list
of predefined Tags.
Aux.
directs the Read address to be retrieved
from the Auxiliary Port.
Attribute: Style
: Defines the action performed by the
Set Bit part. See
Note
below.
3. Go to
Shape
Tab: Select Shape or Bitmap to display
graphics that represent the touch area.
Note:
Refer to Bit Lamp procedure for more details on filling out the Shape tab.
Note:
Shapes and bitmaps assigned to Set Bit parts change state only when the part is touched. They do not change
state according to the Write address' state.
4. Go to
Label
Tab: Fill in fields to denote states.
Note:
Refer to Bit Lamp procedure for more details on filling out the Label tab.
5. Click
OK
to place the Set Bit part on the window. Position the Set Bit part and resize it if necessary. Adjust the label
position as desired.
Note:
Refer to Section 2: Software Reference Guide, Part Placement for details about completing each tab item.
Style: Defines the action
performed by the Set Bit part.
See
Note
below.
Y0
Y0
Summary of Contents for MMI-1500
Page 2: ...ii...


