SELENA
Multifunctional LED Clock
USER MANUAL V32D
KERA TECHNOLOGIES INC. 2013
www.ledclocks.com
45
restoring it ).
2.
Using the
UP
and
DN
keys, select the function number that is to be enabled or disabled.
3.
Press the
NXT
key to toggle the dot in the lower, right corner of the display. When the dot is ON, the selected function
is enabled. Set the functions as required for the application.
4.
If necessary, using the
UP
and
DN
keys, select another function number that is to be enabled or disabled and follow
the step 3.
5.
When finished, wait several seconds until the display goes back to the regular operating mode.
Temperature Control and Alarm activation
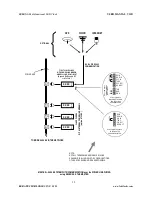
The Temperature Alarm function is active when the function
Fn 29
is enabled. If the Alarm is to control an external load, the
Internal Relay, option # 727, must also be installed.
The Temperature Control function is active when the function
Fn 30
is enabled and the Internal Relay is installed. For this
function to operate the option # 713 must be installed.
To enable / disable the necessary functions, follow the steps as listed in the previous section.
Control and Alarm Temperature programming
1.
Invoke the Data Programming mode by pressing the
NXT
key after the remote programming mode has been
activated ( by pressing the
MUTE
key 5 times within 3 seconds or by removing the supply power for 2 seconds and
restoring it ).
2.
Press the
FUN
key until the display shows the present temperature reading with the flashing
“C”
or
“F”
character. If
necessary, toggle between CELSIUS or FAHRENHEIT unit by pressing the
UP
or
DN
key.
3.
Press the
NXT
key until the display shows the text
“LoAL”
and then set the desired LOW TEMPERATURE ALARM
using the
UP
and
DN
keys.
4.
Press the
NXT
key until the display shows the text
“HiAL”
and then set the desired HIGH TEMPERATURE ALARM
using the
UP
and
DN
keys.
5.
Wait for several seconds without pressing any keys. The clock will resume regular operation.
NOTE: In order to deactivate either the Low Alarm or the High Alarm, set that alarm value to the lowest ( -40F ) or
the highest ( +255F ) temperature.
NOTE: If the temperature options are not installed, random readings may show.
NOTE: Whenever the display shows the text: “Prob”, one or both of the temperature probes is malfunctioning or
its wiring became faulty.
MIN / MAX TEMPERATURE MEMORY
This function may be activated by enabling the function
Fn 20.
External (or Internal) temperature historical Maximum and Minimum readings are saved in the internal memory and may be
recalled for display via the remote control at any time.
To read the
MAXIMUM recorded Temperature
press the
UP
key.
To read the
MINIMUM recorded Temperature
press the
DN
key.
The memory contents will be displayed for appx. 4 seconds.
To
RESET either the Minimum or the Maximum temp. Memory
contents, press the
CLR
key
while
either the
Minimum or the Maximum temperature is on the display. The respective memory will be reset to the
current reading
.


