background image

Gebrauchs- und Montageanleitung 09/2018 - 6917266

Thermostat FKS

DE

 – Gebrauchs- und Montageanleitung 

Thermostat FKS

EN 

– Instructions for installation and use 

Thermostat FKS

IT

 – Istruzioni d‘uso e di montaggio del 

termostato FKS

FR

 – Instructions d‘utilisation et de montage 

du thermostat FKS

Summary of Contents for FKS

Page 1: ...917266 Thermostat FKS DE Gebrauchs und Montageanleitung Thermostat FKS EN Instructions for installation and use Thermostat FKS IT Istruzioni d uso e di montaggio del termostato FKS FR Instructions d utilisation et de montage du thermostat FKS ...

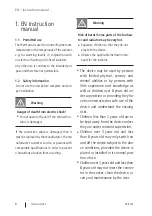
Page 2: ...le des Heizlüfters und des Heizkörpers können sehr heiß werden W Beaufsichtigen Sie Kinder damit diese nicht mit dem Gerät spielen W Beachten Sie mitgeltende Anleitungen des Heizkörpers W Das Gerät kann von Personen mit beschränkten körperlichen sensori schen und geistigen Fähigkeiten oder mangelnder Erfahrung und Wissen sowie Kindern ab 8 Jahren und darü ber benutzt werden wenn sie beauf sichtigt...

Page 3: ...2 Funktion Bedienung Abb 1 Bedienelemente 1 2 3 4 5 1 Schalter Ein Aus 2 Temperaturregler Raumtemperatur ca 7 27 C Heizkörpertemperatur ca 40 65 C 3 Skala des Temperaturreglers 4 Boost Taste 5 LED Leuchtring 2 1 Inbetriebnahme Mit dem Schalter Ein Aus 1 können Sie das Gerät von der Stromversorgung trennen z B außerhalb der Heizperiode 2 2 Einstellung der Betriebsart Der Thermostat ist im Ausliefer...

Page 4: ...er App Funktiona lität muss sich das Gerät im Modus Raumtemperaturregelung befinden 2 3 Gerätefunktionen 2 3 1 Komfort Modus Temperatur regelung Im Komfortmodus hält der Thermostat das Temperaturniveau durch Ein und Ausschalten des Heizstabes konstant Stellen Sie am Tem peraturregler 2 die gewünschte Raumtempe ratur bzw das gewünschte Temperaturniveau des Heizkörpers ein und nehmen Sie bei Bedarf ...

Page 5: ...tungen Schutzbereiche gemäß nationalen Installationsnormen in Deutschland DIN VDE 0100 701 beachten Darüber hinaus alle örtlichen Vorschriften beachten W Bei der Installation eine bauseitige Fehlerstromschutzeinrichtung vorsehen Auslösegrenze kleiner gleich 30 mA W Wird ein Gerät ohne Stecker direkt an die fest verlegte elektrische Installation angeschlossen Trennvorrichtung gemäß den örtlichen Ei...

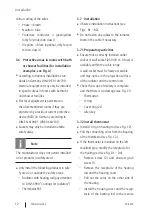
Page 6: ...h 2 oder außerhalb der Schutzbereiche montieren Heizkörper mit Heizstab DIN 55900 Be schichtungen für Raumheizkörper be achten Thermostat FKS 3 7 Montage W Montagehinweise beachten siehe Abb B1 B2 W Keine Kabel am Heizkörper befestigen Kabel bei Bedarf kürzen 3 7 1 Vorbereitende Tätigkeiten W Sicherstellen dass in Kabelreichweite eine vorschriftsmäßig installierte Schalterdose bzw Wandsteckdose 23...

Page 7: ...iehe Abb C6 W Verbundene Anschlussadern in das Gehäuse des Thermostats zurück drücken und Gehäuse des Thermostats bis zum Anschlag auf die Basis des Heizstabs schie ben Thermostat ausrichten siehe Abb C7 W Gehäuse gegen die Basis des Heizsta bes drücken und Gewindestift handfest Anziehdrehmoment ca 0 5 Nm anziehen siehe Abb C8 3 8 Elektrischer Anschluss Das Gerät darf nur von einer Elektrofachkraf...

Page 8: ...rning Risk of burns Some parts of the fan hea ter and radiator may be very hot W Supervise children so that they do not play with the device W Observe the applicable instruction ma nuals for the radiator W The device may be used by persons with limited physical sensory and mental abilities or by persons with little experience and knowledge as well as children over 8 years old un der supervision or...

Page 9: ...nction Operation Fig 1 Operating elements 1 2 3 4 5 1 Switch On Off 2 Temperature control Room temperature approx 7 27 C Radiator temperature approx 40 65 C 3 Scale of the temperature control 4 Boost button 5 LED light ring 2 1 Commissioning The on off switch 1 can be used to disconnect power supply to the device for example outsi de the heating period 2 2 Setting the operating mode In the as deli...

Page 10: ...ady to operate Note W When using the App functionality the device must be in Room temperature control mode 2 3 Device functions 2 3 1 Comfort mode Temperature control In comfort mode the thermostat retains the temperature level by constantly switching the heating rod on and off Set the desired room temperature or the temperature level of the radiator on the temperature control 2 and if required us...

Page 11: ...wer facilities comply with protective areas according to national installation standards in Germany DIN VDE 0100 701 Also follow all local regulations W During installation a residual current ope rated protective device with trigger limit less than or equal to 30 mA must be provided on site W If a device is connected directly to the fixed electrical installations incorporate a disconnecting device...

Page 12: ... pay attention to DIN 55900 Coatings for radiators Thermostat FKS 3 7 Installation W Observe installation instructions see Figs B1 B2 W Do not fasten any cables to the radiator shorten the cable if necessary 3 7 1 Preparatory activities W Ensure that a correctly installed outlet socket or wall socket 230 V B 16 A fuse is available within the cable range A wall socket must be freely accessible and ...

Page 13: ... push the housing of the thermostat until the end stop on the base of the heating rod Align the thermostat see Fig C7 W Press housing against the base of the hea ting rod and hand tighten the grub screw tightening torque approximately 0 5 Nm see Fig C8 3 8 Electrical connections The device may only be connected by an elec trical specialist 3 8 1 Connection cable variant with connector Connect the ...

Page 14: ...e e con l apparecchio posizionato o installato nelle sua po sizione d uso normale W I bambini dai 3 agli 8 anni non pos sono inserire la spina nella presa pulire l apparecchio e non possono eseguire la manutenzione ad opera dell utente 1 IT Istruzioni per l uso 1 1 Uso consentito Il termostato serve per la regolazione della temperatura ambiente o della temperatura del radiatore ad esempio per il r...

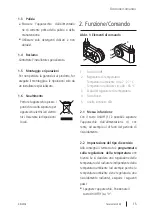
Page 15: ... Elementi di comando 1 2 3 4 5 1 Tasto On Off 2 Regolatore di temperatura Temperatura ambiente circa 7 27 C Temperatura radiatore circa 40 65 C 3 Scala del regolatore di temperatura 4 Tasto Boost 5 Anello luminoso LED 2 1 Messa in funzione Con il tasto On Off 1 è possibile separare l apparecchio dall alimentazione di cor rente ad esempio al di fuori del periodo di riscaldamento 2 2 Impostazione de...

Page 16: ...ra ambiente L anello luminoso LED 5 lampeggia in giallo tipo di esercizio riscaldamento asciugamano W Premere di nuovo brevemente il tasto Boost 4 La visualizzazione del tipo di esercizio scompare Il termostato è pronto all esercizio Nota W Se si utilizza la funzionalità app l ap parecchio deve trovarsi nella modalità Regolazione temperatura ambiente 2 3 Funzioni dell apparecchio 2 3 1 Modalità co...

Page 17: ...di tensione W Non inserire alcun oggetto metallico o le dita nella zona prevista per il collega mento della barra termica 3 2 Condizioni di utilizzo W Montare il termostato solo in combina zione con barre termiche elettriche dalla gamma di fornitura del produttore W Assicurarsi che la potenza della barra ter mica non superi la potenza del termostato ambiente vedere targhetta identificativa W Con i...

Page 18: ...rotezione in locali con vasca o doccia esempi di applicazi one vedere fig A W In base alle norme di installazione nazi onali in Germania DIN VDE 0100 701 in locali con vasca o doccia i mezzi di esercizio elettrici possono essere montati solo in zone specifiche W Gli apparecchi elettrici nei locali sopra citati sono ammessi solo se sono protetti tramite un dispositivo di protezione dalle correnti d...

Page 19: ...ll alloggiamento Montare in senso opposto il coperchio dell alloggiamento e la sede della barra termica Avvitare e serrare la vite 2 Avvitare i perni filettati 1 Rimuovere con cautela l anello con la scala e innestarlo nuovamente ruotato di 180 W Mettere l anello di copertura adatto all in volucro del termostato vedere fig C4 C5 W Collegare i blocchetti del connettore piatto dei conduttori di colle...

Page 20: ... Certains éléments de la ventilation chauffante et du radiateur peuvent être brûlants W Surveiller les enfants afin d éviter qu ils ne jouent avec l appareil W Respecter également les instructions relatives au radiateur W L appareil peut être utilisé par des personnes présentant un handicap physique sensoriel et mental ou manquant de connaissances et d ex périence ainsi que par des enfants à parti...

Page 21: ...nnement Commande Fig 1 Éléments de commande 1 2 3 4 5 1 Interrupteur Marche Arrêt 2 Régulateur de température Température ambiante env 7 27 C Température radiateur env 40 65 C 3 Graduation du régulateur de température 4 Touche Boost 5 Cercle lumineux LED 2 1 Mise en service L interrupteur Marche Arrêt 1 permet de couper l appareil de l alimentation électrique par ex en dehors de la période de chau...

Page 22: ... de fonctionnement Régula tion de la température ambiante Le cercle lumineux LED 5 clignote en jaune mode de fonctionnement Chauf fage de serviettes W Réappuyer brièvement sur la touche Boost 4 Le témoin du mode de fonctionnement s éteint Le thermostat est prêt à fonctionner Remarque W Lors de l utilisation de la fonctionnalité de l application l appareil doit être en mode Régulation de la tempéra...

Page 23: ...on W Monter et raccorder l appareil unique ment lorsqu il est hors tension W N introduire aucun objet métallique ou doigt dans la zone destinée au raccorde ment de la cartouche chauffante 3 2 Conditions d utilisation W Monter le thermostat uniquement en association avec les cartouches chauffan tes électriques du programme de livraison du fabricant W S assurer que la puissance de la cartouche chauf...

Page 24: ... 6 Zones de protection dans les pièces avec installation de bain ou de douche exemples d application voir fig A W Conformément aux normes nationales d installation en Allemagne DIN VDE 0100 701 les appareils électriques ne peuvent être installés que dans des zones définies dans les pièces équipées d une baignoire ou d une douche W Les appareils électriques sont admis dans les pièces mentionnées ci...

Page 25: ...nter le couvercle du boîtier et le lo gement de la cartouche chauffante du côté opposé Visser et serrer la vis 2 Introduire les tiges filetées 1 Ôter avec précaution le disque gradué et le replacer en effectuant une rotation à 180 W Placer une bague de recouvrement adaptée sur le boîtier du thermostat voir fig C4 C5 W Raccorder les douilles du connecteur plat des conducteurs de raccordement aux con...

Page 26: ...26 Thermostat FKS 09 2018 C2 C3 6 mm 9 mm Ø 28 mm C4 2x 1 5 C1 1 0 2 2 1 0 A B2 B1 ...

Page 27: ...Thermostat FKS 27 09 2018 C6 C5 C7 0 5 Nm 1 5 C8 D2 1 1 2 D3 D4 1 1 2 1 5 TX 10 D1 1 2 3 180 ...

Page 28: ... 28 Thermostat FKS 09 2018 E2 E1 EcoTimer App Store Play Store E3 1 2 Thermostat FKS Verbindung Connection E5 E6 t 3 s E4 ...

Reviews: