4
Ź
Durch die Bohrungen der Standkonsolenfüße die
Bohrlöcher anreißen (Abb. 16).
Ź
Den Heizkörper entfernen und die Löcher an den ge-
kennzeichneten Stellen bohren (Abb. 17).
Ź
Den Heizkörper in Position bringen, aus richten und
mit geeigneten Dübeln und Schrauben (4 Schrauben
pro Konsole, max. Ø 10 mm) am Boden befestigen
(Abb. 18).
Ź
Heizkörper horizontal ausrichten: Bei der
zu verstellenden Seite den Gewindestift (9)
und die Sechskantmutter (8) lösen. Heiz-
körper ausrichten. Danach den Gewinde-
stift (9) und die Sechskantmutter (8) wieder festziehen
(Abb. 19).
Ź
Bodenabstand korrigieren: An beiden Seiten den Ge-
windestift (9) und die Sechkant-mutter (8) lösen und
den Abstand korrigieren sowie horizontal ausrichten.
Danach die Gewindestifte (9) und die Sechskantmut-
tern (8) wieder festziehen (Abb. 19).
Ź
Die Verpackung wieder vollständig über den Heizkör-
per ziehen (Abb. 20).
EN – Installation instructions
Permitted use
The stand bracket is intended solely for fixing FTP, PTP and
PLP Kermi steel panel radiators type 20-33 and of length
500-2600 for application class 2 on finished flooring.
Any other use is considered improper and therefore im-
permissible!
Maintenance and cleaning
The stand bracket does not require special maintenance.
Ź
Only clean the stand brackets with mild, nonabrasive
commercially available cleaners.
Complaint
Please contact your specialist in case of damage!
Ź
Allow only a specialist to carry out installation and
repairs, as otherwise your legal right to a warranty
claim for defects in material or workmanship will be
invalidated.
Disposal
Ź
Packaging and any parts that are not needed should
be recycled or disposed of properly. Observe local re-
gulations.
5
6
1
2
4
3
7
8
9
4
3
EN – Installation instructions
The stand brackets may be installed only by a heating
engineer.
They may only be used in closed heating systems.
Safety information
Ź
Read the instruction installations thoroughly prior to
installation.
Ź
Observe all information regarding installation loca-
tion, technical data, limitations on use, floor condition
and distance from wall.
Ź
After installation, pass the instructions on to the end
user.
Ź
Only store and transport the installation material in
the protective packaging.
WARNING
Risk of injury!
Ź
Note the weight of the radiator (see manufacturer's
data).
Ź
At 25 kg and above, the work should be carried out
with lifting equipment or by several persons.
Packaging and scope of delivery
Ź
Remove radiator packaging on the bottom and rear
side in the area of the bottom lugs (Fig. 2)
Ź
Inspect the contents of the stand bracket package for
completeness and damage.
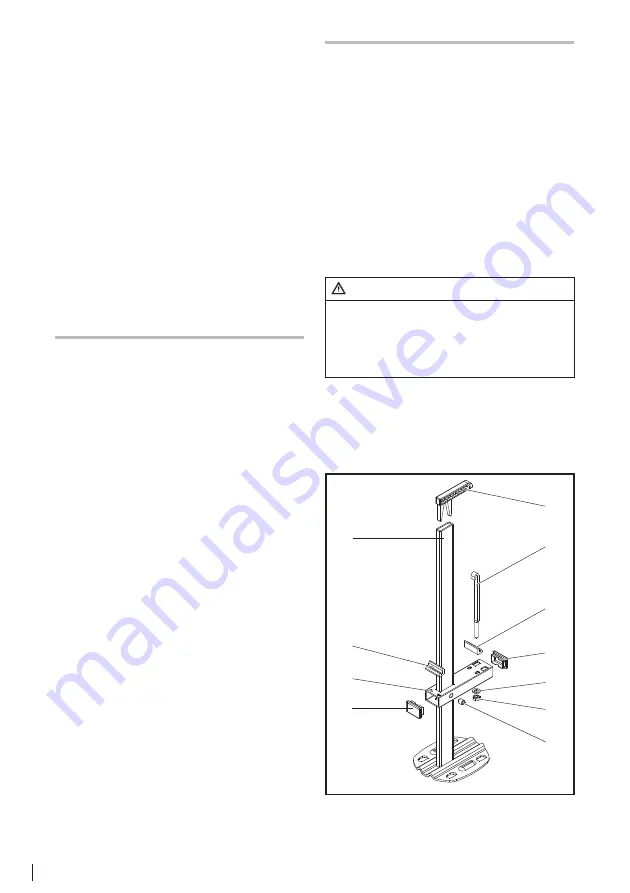
Figure stand bracket (SK)
Summary of Contents for ZB04620001
Page 34: ...34 14b 15 16 17 18 19 20 3 Nm ...


