3. Installation and Assembly
Procedure for installing the
SonicControl
grease separator.
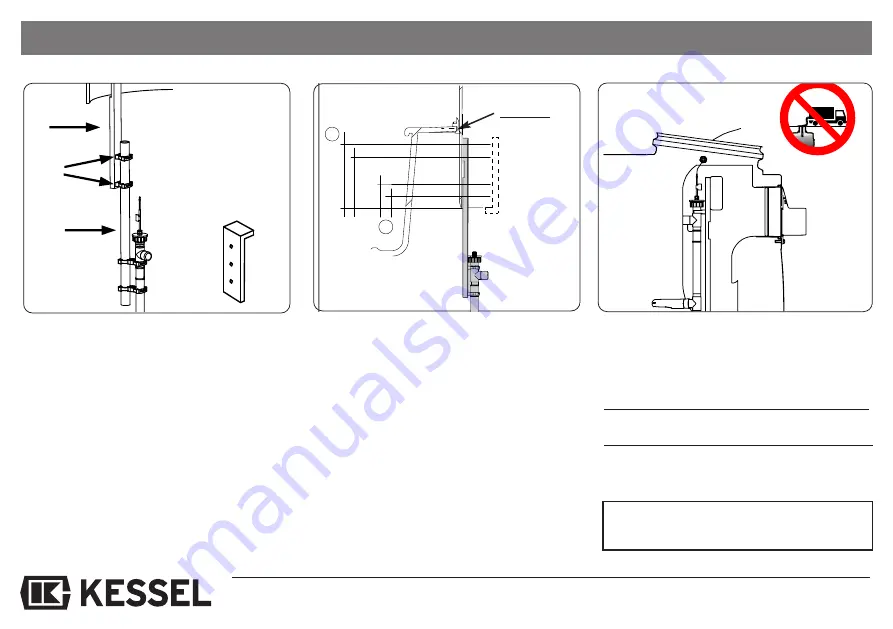
1. Open the separator cover.
2. Attach the drilling template stop at the bot-
tom end of the upper section, mark 2 holes
on the upper section (A) through the drilling
template and pre-drill these using a 6 mm
diameter drill.
3. Screw the 2 stainless steel screws provided
into the upper section in such a way that a
gap of approx. 25mm remains between the
screw head and the upper section.
4. If the separator is installed deep in the
ground, you can also use the pipe provided
(D) as an extension. To do this, fasten the
pipe (D) to the retaining clips (C) and fasten
the SonicControl sensor using the size 8
clips (E) provided.
5. Clip the sensor into the retaining clips (C) of
the installation bracket (B) and fasten the
installation bracket to the 2 screws. Then
tighten the screws so that the installation
frame has a firm seat.
6. Now adjust SonicControl on the red marking
at the sensor using the calm surface of the
water.
The enclosed sticker serves as a reminder for
the disposer, in order to avoid damage to the
sensor during disposal.
The sticker must be attached as follows
Grease separator for free standing installation:
at eye level on the outside of the tank.
Grease separator for installation in the ground:
on the inside of the upper section.
Note: Draw the respective disposers’
attention to the sensor!
Caution:
The SonicControl’s
cable should not be
in the way or above
any of the sensor
probes.
Caution
do not drill
through
sealing
gasket!
46
1
2
A
B
D
C
Summary of Contents for 917824
Page 32: ......
Page 64: ...64 ...
Page 96: ...96 ...
Page 128: ...128 ...
Page 160: ...168 ...
Page 193: ...193 NOTIZEN ...
Page 194: ...194 NOTIZEN ...
Page 195: ...195 ...


