G
H
I
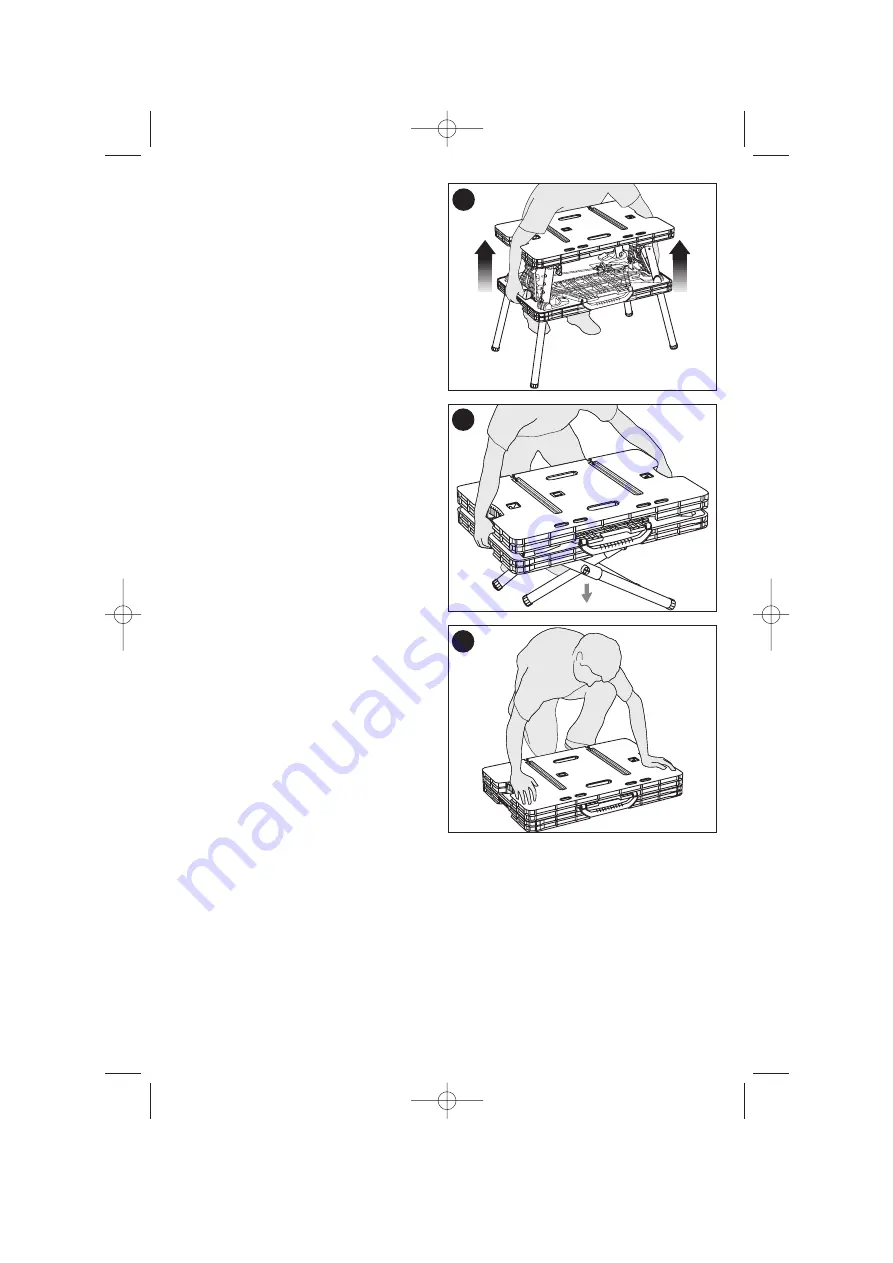
2. Reach through the openings in the table
top and grasp the lower section of the
bench. Pull up on the lower section to begin
collapsing the legs. (
figure
G
)
3. Lower the unit to the ground as shown in
figure
H
.
4. Once the unit is
flat
on the ground, press
down on the table top to place the unit into
its fully closed position as shown in
figure
I
.
FSWM1000 17/08/08 10:58 AM Page 4
ADJUSTABLE CLAMPS
The two adjustable clamps can be used in both a vertical and horizontal mode. The long
channels in the table top allow the clamps to be anchored in a stationary horizontal
position. The shorter slots in the table top allow for the clamps to be used in a vertical
position. (
figure
J
).
J1
through
J6
illustrate how to use the clamps in both horizontal
and vertical modes.
J1 -
To expand the opening of the clamp jaws, press in on the release lever and move
the jaw as shown. The jaw that is attached to the handle can also be moved in the
samemanner or by squeezing and releasing the front handle.
J2 -
Line up the round post on the end of the clamp bar with the mating openings on
bothsides of the main slot in the tabletop as shown.
J3 -
To lock the clamp in a horizontal position, squeeze the front handle and line up
theround protruding tabs with the mating openings in the tabletop
(behind the openingsmentioned in
J2
above).
4


