background image

24

Importante: Las pilas gastadas no est·n incluidas en la garantÌa.

No se deben echar las baterÌas energeticas gastadas en
la basura domestica. Por favor contribuya usted por su
parte a la protecciun del medio ambiente y deposite las
pilas gastadas en los comercios especializados o en los
puntos de recogida de su localidad, para que se puedan
posteriormente eliminar y reciclar debidamente.

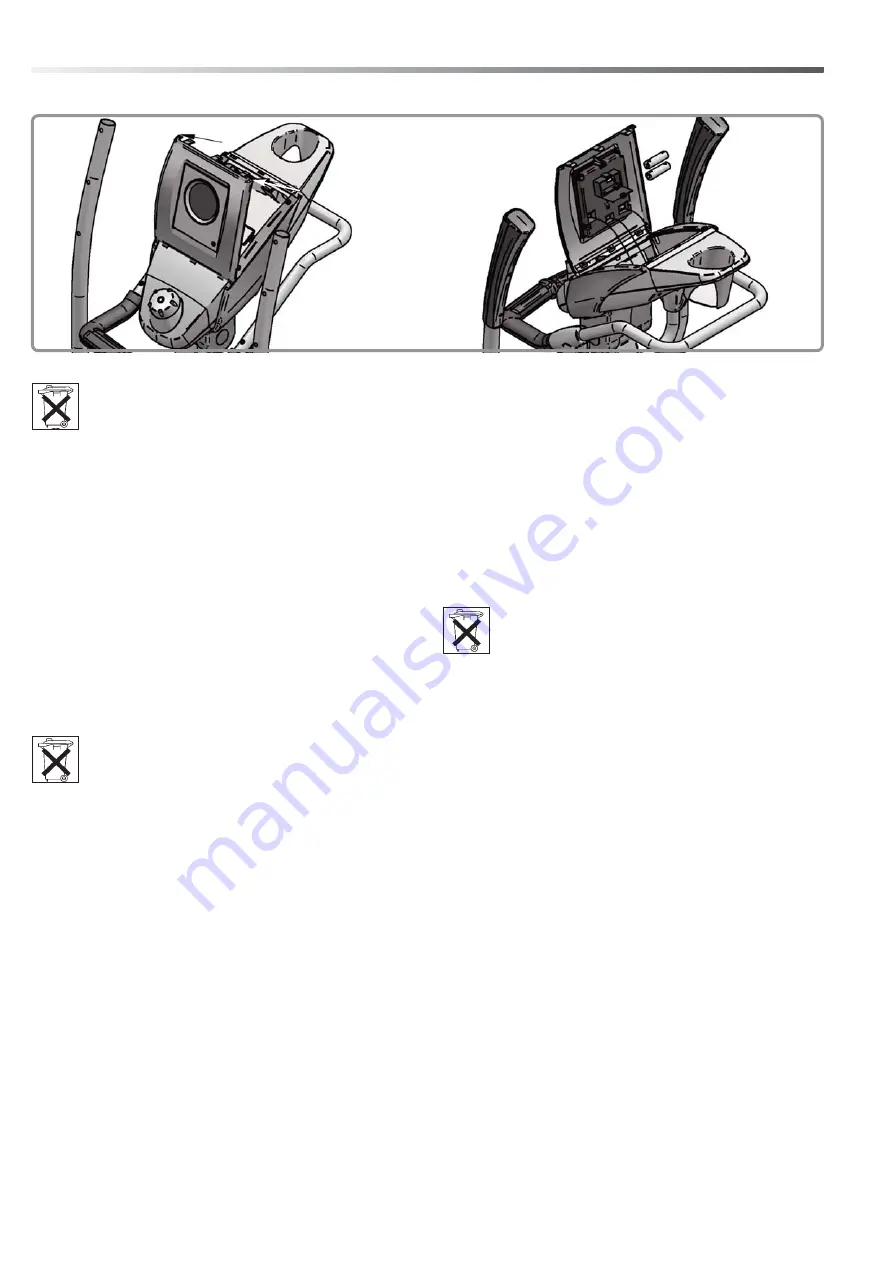
– I – Cambio delle batteria

Una visualizzazione debole o spenta del computer richiede il
cambio della batteria. Il computer è munito di due batterie.
Procedete al cambio delle batterie nel modo seguente:

■ 

Togliete il coperchio della batteria e sostituite le batterie con 2

nuove del tipo AA, 1,5V

■ 

Fate attenzione nel montaggio al contrassegno nel suolo del

vano batteria.

■ 

Se dopo l'inserimento ci dovessero essere funzioni sbagliate,

staccate di nuovo le batterie per poco e attaccatele di nuovo.

Importante: Le batterie usate non rientrano nelle condizioni di garanzia.

Le batterie usate non devono essere gettate nella spa-
zzatura.
Vi preghiamo di contribuire alla salvaguardia dell‘ambiente
e di consegnare le batterie usate ai punti pubblici di rac-
colta, che provvederanno al loro smaltimento o a riciclarle
senza provocare danni all‘ambiente.

– PL – Wymiana baterii

Słaby lub gasnący wyświetlacz komputera oznacza konieczność
wymiany baterii. Komputer wyposażony jest w
dwie baterie. Baterie wymienia się w sposób następujący:

■ 

Zdjąć osłonę baterii i wymienić baterie na dwie nowe typu AA

1,5 V.

■ 

Wkładając baterie należy przestrzegać oznakowania na dnie

zagłębienia na baterie.

■ 

Jeżeli po ponownym włączeniu stwierdzi się niewłaściwe

działanie, to baterie należy na chwilę wyjąć i potem ponownie
włożyć.

Uwaga: Zużyte baterie nie podlegają pod warunki gwarancyjne.

Zużytych baterii nie wyrzucać do domowych śmieci.
Mając na uwadze ochronę środowiska naturalnego
należy baterie oddać w sklepie lub w lokalnym punkcie
zbiórki zużytych baterii. W ten sposób baterie zostaną
prawidłowo usunięte i poddane ekologicznemu
recyclingowi.

Batteriewechsel

– GB – Battery change

– F – Changement de piles

– NL – Omwesseln van de Batterijen

– E – Cambio de la pilas

– I – Cambio delle batteria

– PL – Wymiana baterii

Summary of Contents for 07651-500

Page 1: ...Montageanleitung Satura M EXT Art Nr 07651 500 Abb ähnlich deutsch english française nederlands español italiano polski A 163 cm B 58 cm C 164 cm 78 kg A B C max 150 kg ...

Page 2: ...nutzung immer alle Schraub und Steckverbindungen sowie die jeweiligen Sicherungseinrichtungen auf ihren korrekten Sitz Achtung Halten Sie während der Montage des Produktes Kinder fern verschluckbare Kleinteile Machen Sie sich vor dem ersten Training mit allen Funktionen und Einstellmöglichkeiten des Gerätes vertraut Tragen Sie bei der Benutzung geeignetes Schuhwerk Sportschuhe Beachten Sie auch un...

Page 3: ...ind s Checkliste und ob Transportschäden vorliegen Sollte es Anlaß für Beanstandungen geben wenden Sie sich bitte an Ihren Fachhändler Sehen Sie sich die Zeichnungen in Ruhe an und montieren Sie das Gerät entsprechend der Bilderfolge Innerhalb der einzelnen Abbildungen ist der Montageablauf durch Großbuchstaben vor gegeben Beachten Sie dass bei jeder Benutzung von Werkzeug und bei handwerklichen T...

Page 4: ...ll screws and plug in connections as well as respective safety devices fit correctly Caution While assembly of the product keep off children s reach Choking hazard contains small parts Before beginning your first training session familiarize yourself thoroughly with all the functions and settings of the unit Always wear suitable shoes when using Before beginning your program of training study the ...

Page 5: ... finally tighten nuts completely against resistance locking device Then check that all screw connections have been tightened firmly Attention once locknuts have been unscrewed they no longer function correctly the locking device is dest royed and must be replaced For technical reasons we reserve the right to carry out preliminary assembly work e g addition of tubing plugs List of spare parts page ...

Page 6: ...spécialiste revendeur spécialisé Avant chaque utilisation vérifier toujour les vis et les parties emboîtables afin que les éléments correspondent et soient sécu risés Attention Pendant le montage du produit maintenir les enfants à l écart petites pièces risquant d être avalées Avant le premier entraînement de course familiarisez vous avec toutes les fonctions et possibilités de réglage de l appare...

Page 7: ...es les parties sans serrer les vis et con trôlez leur bonne mise en place Serrez à la main les écrous indes serrables jusqu à perception de la résistance Ensuite serrez les à fond contre la résistance sûreté de serrage à l aide d une clé Après cet étape de montage contrôlez le serrage de tous les assemblages à vis Attention des écrous de sûreté desserrés ne peuvent pas être réutilisés destruction ...

Page 8: ...apparaat of alle schroef en steekverbindingen nog vast zitten en of de desbetreffende vei ligheidsvoorzieningen nog voorhanden zijn Let op Houd tijdens de montage van het product kinderen uit de buurt de kleine delen kunnen makkelijk ingeslikt worden Zorgt u ervoor dat u vóór de eerste training vertrouwd bent met alle functies en afstelmogelijkheden van het toestel Draag bij het gebruik van het to...

Page 9: ... Draai de borgmoeren met de hand vast tot u weerstand voelt vervolgens schroeft u ze met een sleutel tegen de weerstand in klemborg goed vast Controleer na elke montagestap of de schroefverbindingen goed vast zitten Pas op borgmoeren die weer los zijn gegaan zijn onbruikbaar de klemborg is ver nield en moet door een nieuwe vervangen worden Om productietechnische redenen behouden wij ons het recht ...

Page 10: ...a especializada Antes de usar el aparato asegúrese siempre de que todas las cone xiones de tornillo y de tipo macho hembra y todos los mecanismos de seguridad estén puestos correctamente Atención Durante el montaje del producto mantener alejados a niños contiene piezas pequeñas que se pueden tragar Estudie todas las funciones y posibilidades de ajuste del aparato antes de comenzar el entrenamiento...

Page 11: ...Todas las herramientas necesarias las encontrará en la bolsita de piezas pequeñas Al principio atornille todas las piezas de forma floja y controle si todas están en su posición correcta Primero atornille las tuercas autofijadores con la mano hasta la resistencia percep tible después atorníllelas bien contra la resistencia frenado de tuerca con una llave Después de este paso de montaje controle si...

Page 12: ...lla posizione corretta e ben fissi Attenzione Durante il montaggio del prodotto non fare avvicinare i bambini le piccole parti potrebbero essere ingerite Prima di effettuare il primo allenamento guardatevi tutte le fun zioni e le possibilità di regolazione dell attrezzo Quando lo utilizzate indossate scarpe adatte scarpe da gin nastica Osservate anche assolutamente le indicazioni relative alla pro...

Page 13: ...cole Avvitate prima tutti i pezzi senza stringere e controllate che siano nella posizione corretta Girate i dadi auto fissanti con le mani finché non fanno resistenza quindi stringeteli oltre il punto di resi stenza con una chiave arresto di sicurezza Dopo ogni parte di montaggio controllate che tutte le viti siano fisse Attenzione i dadi di sicurezza svitati sono inutilizzabili una seconda volta ...

Page 14: ... określonego poziomu bezpieczeństwa przyrządu powinien on być regularnie raz do roku sprawdzany i konserwowany przez specjalistę specjali styczne placówki handlowe Przed każdym użyciem należy sprawdzić wszystkie połączenia śrubowe i wtykowe oraz zabezpieczenia pod względem ich pra widłowego osadzenia Uwaga Podczas montażu produktu trzymaj dzieci z daleka drobne części które mogą zostać połknięte P...

Page 15: ...j ilustracji Stosuj materiał mon tażowy dokładnie według ilustracji Potrzebne narzędzia zna jdziesz w torebce z drobnymi częściami Na początku należy poprzykręcać wszystkie części luźno i spra wdzić ich prawidłowe osadzenie Nakrętki samozakleszczające dokręć ręcznie do chwili aż opór stanie się odczuwalny a następnie mocno dokręć kluczem przeciwko oporowi zabez pieczenie zaciskowe Po tej fazie mon...

Page 16: ...t pour système de serrae NL Meethlp voor schroefmateraal E Ayuda para la medición del material de atornilladura I Misura per materiale di avvitamento PL Wzornik do połączeń śrubowych 0 10 20 30 40 50 60 70 80 90 100 110 120 130 140 150 160 170 M5x40 M8x40 M8 ø22 ø16 ø12 M6 M5 ø3 9x13 M5x40 ...

Page 17: ... de l emballage NL Checklijst verpakkingsinhoud E Lista de control contenido del paquete I Lista di controllo contenuto del pacco PL Lista kontrolna zawartość opakowania 2x M10x105 4x M10x20 2x M10 4x ø18x11 3x2 4x ø10 7x 3 9x13 2x 4x35 6x 3 9x32 1x 1x 1x 1x 2x 1x 1x 2x 4x 4x 2x 2x 2x 1x SW 17 2x ...

Page 18: ...18 1 A B B A B B B 4x A 2x klick klick klick ...

Page 19: ...ehen GB IMPORTANT Due to technical reasons the screws D have to be tightend first Tighten the screws E last F ATTENTION Pour des raisons techniques il faut d abord serrer les deux vis D Serrez ensuite seulement les vis E NL LET OP Om technische redenen moeten de beide schroeven D eerst vastgedraaid worden Pas daarna de schroeven E vastdraaien E ATENCIÒN Por razones técnicas los dos tornillos D deb...

Page 20: ...20 3 4 A B C A 2x 3 9x13 C 2x 4x35 2x M10x105 ø18x11 3 M10 ...

Page 21: ...21 5 C 1x 3 9x13 klick 6 7 8 B 6x 3 9x32 A 4x 3 9x13 B B C A A ...

Page 22: ...22 Handhabungshinweise GB Handling F Utilisation NL Handleiding E Aplicación I Utilizzo PL Zastosowanie ...

Page 23: ...ement comme suit Enlevez le couvercle du logement des piles et remplacez les par deux piles neuves du type AA 1 5V Veillez au marquage au fond du logement lors de la mise en place des piles En cas de dysfonctionnement après la remise en marche enlevez brièvement les piles et remettez les ensuite Important Les piles usées sont exclues des dispositions de garantie Il est interdit de mettre les piles...

Page 24: ...evono essere gettate nella spa zzatura Vi preghiamo di contribuire alla salvaguardia dell ambiente e di consegnare le batterie usate ai punti pubblici di rac colta che provvederanno al loro smaltimento o a riciclarle senza provocare danni all ambiente PL Wymiana baterii Słaby lub gasnący wyświetlacz komputera oznacza konieczność wymiany baterii Komputer wyposażony jest w dwie baterie Baterie wymie...

Page 25: ...s de rechange NL Bestelling van reserveonderdelen E Pedido de recambios I Ordine di pezzi di ricambio PL Zamówiene części zamiennych Crosstrainer 07651 500 Pos Satura M EXT weiß grizzly Nr Bezeichnung Stück Bestell Nr 1 Grundrahmen 1 94317915 2 Kugellager 6203 ZZ 2 33100023 3 Welle ø17x114 5 4 7208C 1 11300055 4 Tellerfeder ø31 5x16 3x1 25 mm 3 10600004 5 Distanzring ø22 2x2x5 A887 1 97201470 6 Bo...

Page 26: ...01482 60 Zentrierhülse 3781 2 70128347 61 Achsabdeckung UT 4870 1 70130096 62 Achsabdeckung OT 4869 1 70130095 63 Schraubenabdeckung 4871 2 70130094 64 Führungsbuchse 4001 1 70128698 65 Handpuls sensoren einteilig 1 67000925 66 Drehpunktabedckung v 4896 1 70129157 67 Drehpunktabdeckung h 4897 1 70129158 68 Rastscheibe links 4943 1 70129160 69 Rastscheibe rechts 4942 1 70129159 70 Cockpit OT 4888 1...

Page 27: ...27 Ersatzteilbestellung ...

Page 28: ...HEINZ KETTLER GmbH Co KG Postfach 1020 D 59463 Ense Parsit www kettler net docu 2248 06 08 28 ...

Reviews: