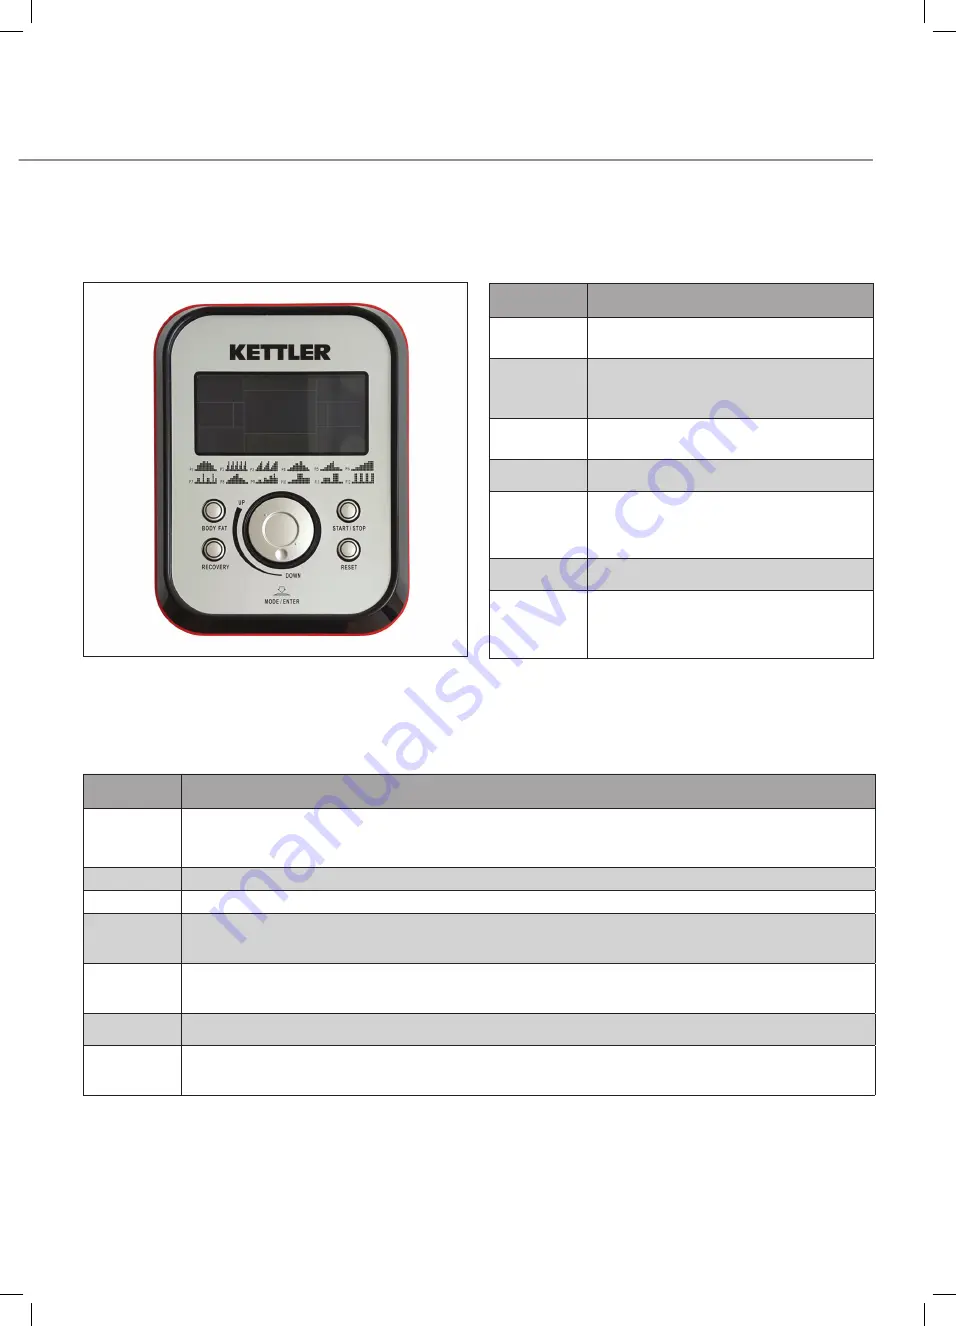
background image

15

Exercise Monitor   

Appearance:

Button Functions:

Functions:

FUNCTION

DESCRIPTION

JOGGLE 

WHEEL - UP

To make upward adjustment to each function 

data or increase training resistance.

JOGGLE 

WHEEL -

DOWN

To make downward adjustment to each 

function data or decrease

training resistance.

MODE/ 

ENTER

To confirm all settings.

START/STOP

To start or stop workout.

RESET

To reset current setting and have the 

monitor switch to initial

training mode for selection.

RECOVERY

To test heart rate recovery status.

BODY FAT

To test body fat %.

Press the BODY FAT button in standby 

mode and modify user data.

FUNCTION

DESCRIPTION

TIME

Count up - no preset target, time will count up from 00:00 to maximum 99:59 with each increment is 1 minute.

Count down - if training with preset time, time will count down from preset to 00:00. Each preset increment or 

decrement is 1 minute between 01:00 to 99:00.

SPEED

Displays current training speed. Maximum speed is 99.9 KM/H or ML/H.

RPM

Displays the rotation per minute. Display range 0~15~999

DISTANCE

Accumulates total distance from 00:00 up to 99.99 KM or ML. The user may preset target distance data by 

pressing UP/DOWN button. Each increment is 0.1KM or ML.

CALORIES

Accumulates calories consumption during training from 0 to maximum 9999 calories. (This data is a rough 

guide for comparison of different exercise sessions which can not be used in medical treatment.)

RECOVERY

To test heart rate recovery status.

PULSE

User may set up target pulse from 0 - 30 to 230; and computer buzzer will beep when actual heart rate is over 

the target value during workout.

Summary of Contents for ALPINE8964-500

Page 1: ...ALPINE CROSS TRAINER Instruction Manual Product Code 8964 500 Instruction Manual Product Code 8964 500 Product Code 8964 500...

Page 2: ...2 Important saftey information 3 Warranty information 3 Safety Information 4 Before you start 5 List of spare parts 6 9 Assembly 10 12 Fitness guide 13 14 Computer Instructions 15 19 Contents...

Page 3: ...TTLER fitness machine is covered by a three year warranty on all parts and labour Our customer service department is ready to assist should you have any problems with your machine Simply call us on 01...

Page 4: ...e UK Northern Ireland or Eire Warranty is invalid if KETTLER fitness products are used in a non domestic environment or if any other conditions explained within the instruction booklet are broken Impr...

Page 5: ...regularly inspect it for damage and worn parts Before the first use and on a regular basis ensure that all screws bolts and other joints are properly tightened and secure Before you start your workou...

Page 6: ...6 6 Parts List...

Page 7: ...0 1 Arc washer D5 x 16 x 1 SPS 8964500 30 5057229963024 31 1 Screw M5 x 40 SPS 8964500 31 5057229963123 33 2 Upring post SPS 8964500 33 5057229963321 34 12 Washer D8 x 16 x 1 5 SPS 8964500 34 50572299...

Page 8: ...8 8 Parts List...

Page 9: ...229969224 93 2 Bolt M6 20 SPS 8964500 93 5057229969323 94 2 Spring washer D6 SPS 8964500 94 5057229969422 Part Qty Description Article number Barcode 95 2 Washer d6 12 1 SPS 8964500 95 5057229969521 9...

Page 10: ...ith carriage bolt 39 and arc washer 34 The washers are already connected to the bolt inside the installation tool pack The rear stabiliser has no wheels the front has wheels attached 2 a Connect the s...

Page 11: ...late using the same holes on each side Install the pedal 52 on the pedal tube 51 with hex head bolt 52 and knob 67 4 Tip The bolts 57 64 appear the same but they are not Number 57 has to be used on th...

Page 12: ...small to the back of the lower pedal tube to cover the exposed bolt head Add nut cover 63 large to the inner left and right pedal arms at rear c Attach the pedal tube cover 48 49 to lower handlebar t...

Page 13: ...ion of workouts For aerobic exercise benefits it s recommended that you exercise from between 25 and 60 minutes per session But start slowly and gradually increase your exercise times If you ve been s...

Page 14: ...Warm up The first 2 to 5 minutes of a workout should be devoted to warming up The warm up will limber your muscles and prepare them for more strenuous exercise Make sure that you warm up on your prod...

Page 15: ...ith each increment is 1 minute Count down if training with preset time time will count down from preset to 00 00 Each preset increment or decrement is 1 minute between 01 00 to 99 00 Speed Displays cu...

Page 16: ...T and WEIGHT 4 In standby mode console will display SELECT WORKOUT user may press the MODE ENTER key to enter into selection mode And use joggle wheel to select MANUAL PROGRAM USER PROGRAM H R C Opera...

Page 17: ...IME counts down to zero console will beep for 8 seconds and LCD will display the racing result PC WIN or USER WIN Workout in User pogram mode In standby mode select USER PRO and press the MODE ENTER b...

Page 18: ...test and have the BODY FAT advice when the console is in STOP mode Please follow the steps as below 1 Press the BODY FAT button and user should hold on the handgrip with both hands tightly to start b...

Page 19: ...y status from F6 to F1 Press the RECOVERY button again to return to the main menu NOTE 1 This console requires 9V 1A or 9V 0 5A adaptor 2 When user stops pedaling for 4 minutes console will enter into...

Page 20: ...mple don t leave any tools lying around Always dispose of packaging material in such a way that it may not cause any danger There is always a risk of suffocation if children play with plastic bags We...

Reviews: