88
Follow these easy steps:
Open the carton so the sides fall down. You can use the
base of the cardboard to assemble the exercise bike on
to avoid damaging your floor surface.
Please tighten all bolts loosely until final stage.
Assembly
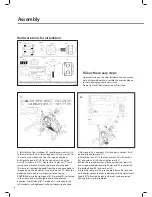
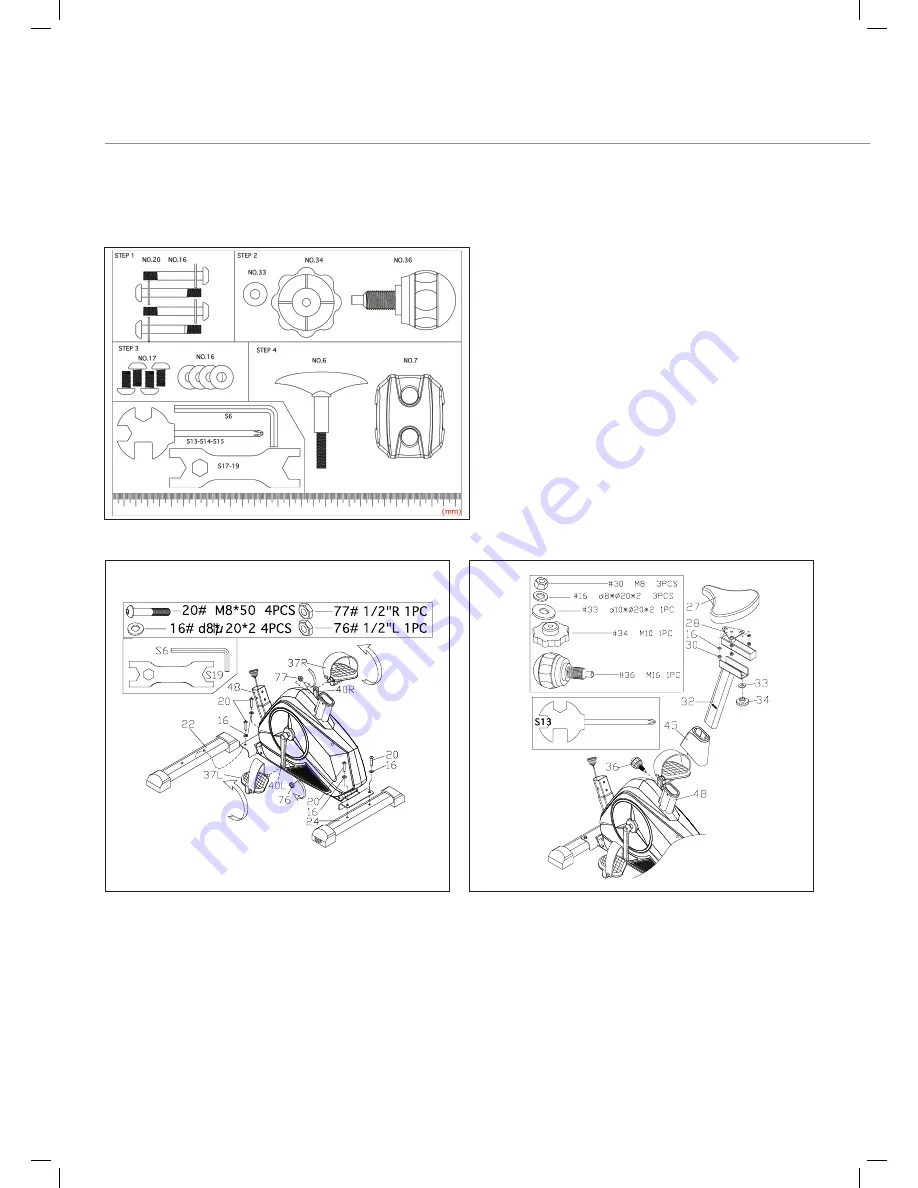
Hardware tools for installation.
1.
2.
1. a)
Attach the front stabiliser (22) and the rear stabiliser (24)
to the main frame (48) with carriage bolt (20) and washer (16).
The rear has no wheels, the front has wheels attached.
b)
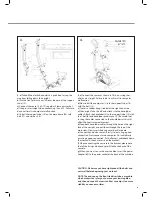
Attach the pedal (37L/R) to the crank arms with nylon
nut (L/R) as shown in FIG.1. Please note: 18mm nut (77) and
spring washer are pre-fitted to the thread of each pedal.
These are for securing the pedal from the inside once pedal is
threaded onto the crank arm. To release the nut (77) from the
pedal you may need to use a spanner for extra grip.
CAUTION:
be sure the right pedal (37R) marked (R) is attached
to the right crank arm and tightened in the clockwise
direction. The left pedal (37L) marked (L) is attached to the
left crank arm and tightened in the anticlockwise direction.
2.
Please note: Part number 30 (x3) and part number 16 (x3)
are pre-fitted to the seat (27).
a)
Attach the seat (27) to the seat bracket (28) with washer
(16) and nylon nut (30), then tighten seat (27).
b)
Slide the seat and bracket into the vertical seat post (32)
and at the desired position, align holes and fix in place with
the locking knob (34) and washer (33).
c)
Insert the seat post (32) into the main frame (48) and line
up the holes. Secure the seat in position with the adjustment
knob (36). The correct height for the seat can be adjusted
after the bike is fully assembled.


