background image

5

Handling the equipment

Before using the equipment for exercise, check carefully to en-

sure that it has been correctly assembled.

It is not recommended to use or store the apparatus in a damp

room as this may cause it to rust. Please ensure that no part

of the machine comes in contact with liquids (drinks, perspi-

ration etc.). This may cause corrosion.

The machine is designed for use by adults and children

should not be allowed to play with it. Children at play beha-

ve unpredictably and dangerous situations may occur for

which the manufacturer cannot be held liable. If, in spite of

this, children are allowed to use the equipment, ensure that

they are instructed in its proper use and supervised accor-

dingly.

This device is an RPM-independent training device

A slight production of noise at the bearing of the centrifugal

mass is due to the construction and has no negative effect

upon operation. Possibly occurring noise during reverse pe-

dalling result from engineering and are absolutely safe.

The training device has a magnetic brake system.

To operate correctly, the pulse function requires a minimum

voltage of 2,7 volts (only for computers working with batte-

ries).

Before beginning your first training session, familiarize yours-

elf thoroughly with all the functions and settings of the unit.

Care and Maintenance

Damaged components may endanger your safety or reduce

the lifetime of the equipment. For this reason, worn or dama-

ged parts should be replaced immediately and the equipment

taken out of use until this has been done. Use only original

KETTLER spare parts.

To ensure that the safety level is kept to the highest possible

standard, determined by its construction, this product should

be serviced regulary (once a year) by specialist retailers.

Use for your regular cleaning, maintenance and care our ap-

pliance maintenance set (Article no. 07921-000) specifically

licensed for KETTLER Sports apparatus and available from the

Sport specialized trade.

Please ensure that liquids or perspiration never enter the ma-

chine or the electronics.

List of spare parts page 22-24

When ordering spare parts, always state the full article number,

spare-partnumber, the quantity required and the S/N of the pro-

duct (see handling).

Example order:

Art. no. 07652-450 / spare-part no. 94318757

/ 2 pieces / S/N .................... Please keep original packaging

of this article, so that it may be used for transport at a later date,

if necessary.
Goods may only be returned after prior arrangement and in (in-

ternal) packaging, which is safe for transportation, in the original

box if possible. It is important to provide a detailed defect de-

scription / damage report!

Important:

spare part prices do not include fastening material if

fastening material (bolts, nuts, washers etc.) is required, this

should be clearly stated on the order by adding the words „with

fastening material“.

Waste Disposal

KETTLER products are recyclable. At the end of its

useful life please dispose of this article correctly and

safely (local refuse sites).


KETTLER GB Ltd.


Kettler House, Merse Road 

 North 

Moons 

Moat


Redditch, Worcestershire B98 9HL

www.kettler.co.uk

GB

+44 1527 591901

+44 1527 62423

sales@kettler.co.uk

e-mail:


KETTLER International Inc.


1355 London Bridge Road 


Virginia Beach, VA 23453

www.kettlerusa.com

USA

+1 888 253 8853

+1 888 222 9333

sales@kettler.co.uk

e-mail:

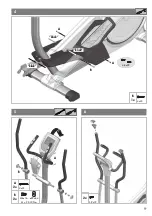
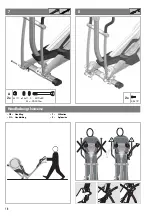
wn in the diagram inset. Use the fastening material exactly as

instructed. 

Bolt all the parts together loosely at first, and check that they

have been assembled correctly. Tighten the locknuts by hand

until resistance is felt, then use spanner to finally tighten nuts

completely against resistance (locking device). Then check that

all screw connections have been tightened firmly. Attention:

once locknuts have been unscrewed they no longer function

correctly (the locking device is destroyed), and must be repla-

ced.

For technical reasons, we reserve the right to carry out preli-

minary assembly work (e.g. addition of tubing plugs).

GB

Summary of Contents for Unix P LTD

Page 1: ...Montageanleitung Crosstrainer Unix P LTD Art Nr 07652 450 Abb ähnlich Auf 100 Altpapier gedruckt A 138 cm B 58 cm C 155 cm 64 5 kg max 150 kg 30 45 Min A C B D GB F NL E ...

Page 2: ...bgesichert Das Trainingsgerät entspricht der DIN EN 957 1 9 Klasse HB Im Zweifelsfall und bei Fragen wenden Sie sich bitte an Ihren Fachhändler Führen Sie ca alle 1 bis 2 Monate eine Kontrolle aller Gerä teteile insbesondere der Schrauben und Muttern durch Dies gilt insbesondere für die Griffbügel und Trittplattenbefesti gung sowie Lenker und Vorderrohrbefestigung Lassen Sie vor Aufnahme des Train...

Page 3: ...en Sie sich die Zeichnungen in Ruhe an und montieren Sie das Gerät entsprechend der Bilderfolge Innerhalb der einzelnen Abbildungen ist der Montageablauf durch Groß buchstaben vorgegeben Die Montage des Gerätes muss sorgfältig und von einer er wachsenen Person vorgenommen werden Nehmen Sie im Zweifelsfall die Hilfe einer weiteren technisch begabten Per son in Anspruch Das für einen Montageschritt ...

Page 4: ...s thoroughly every 1 2 months Pay particular attention to the tightness of bolts and nuts This is particularly true for the attachment of grip strap running plate and fastening of the handlebar and front tube Before beginning your program of exercise consult your doc tor to ensure that you are fit enough to use the equipment Base your program of exercise on the advice given by your doctor Incorrec...

Page 5: ...pecifically licensed for KETTLER Sports apparatus and available from the Sport specialized trade Please ensure that liquids or perspiration never enter the ma chine or the electronics List of spare parts page 22 24 When ordering spare parts always state the full article number spare partnumber the quantity required and the S N of the pro duct see handling Example order Art no 07652 450 spare part ...

Page 6: ...s vous entraînez avec un appareil dont la technique et la sécurité correspondent aux exigences modernes Les sources possibles de danger qui pourraient entraîner des blessures ont été soit supprimées soit sécurisées L appareil d entraînement répond à la norme DIN EN 957 1 9 classe HB On cas de doute on est prié de s adresser à son conces sionnaire KETTLER En cas d entraînement régulier et intensif ...

Page 7: ...s bruits éventuellement perceptibles lors du rétropédalage sont dus à la technique et absolument sans conséquence L appareil est équipé d un système de freinage magnétique Pour le bon fonctionnement du capteur du pouls la tension de la caisse de batterie doit être 2 7 V au moins appareilles sans fiche de contact Avant le premier entraînement de course familiarisez vous avec toutes les fonctions et...

Page 8: ...ondingen zouden kunnen veroor zaken zijn zoveel mogelijk vermeden of beveiligd Het trainingsapparaat voldoet aan DIN EN 957 1 9 klasse HB Wend u in geval van twijfel of met vragen tot uw vakhande laar Controleer elke maand of elke twee maanden alle onderde len bijzondere aandacht verdienen daarbij de bouten en mo eren Dit geldt vooral voor de bevestigingen van de greep beugel de treeplaten het stu...

Page 9: ...ctie Eventueel optredende geluiden bij het achteruit trappen van de pedaalarmen hebben een technische achtergrond en kunnen absoluut geen kwaad et apparaat beschikt over een magnetisch remsysteem Voor het correct functioneren van de polsslagmeting is een spanning van minstens 2 7 Volt aan de batterijklemmen ver eist toestellen zonder netstekker Maak u voor de eerste training vertrouwd met alle fun...

Page 10: ...vances tecnológicos en cuanto a seguridad Han sido evitados y asegurados de la mejor forma posible todos los puntos peligrosos que podrían causar lesiones El aparato de entrenamiento cumple con las normas DIN EN 957 1 9 clase HB En casos de duda o posibles preguntas diríjase a su vende dor especializado Controle cada mes o cada 2 meses todas las piezas en es pecial los tornillos y las tuercas Esto...

Page 11: ...la construcción del aparato y no afecta a sus funciones Los rui dos que puedan producirse al pedalear hacia atrás también tienen motivos técnicos y son absolutamente inofensivos El aparato dispone de un sistema de frenos magnéticos Se necesita una tensión de por lo menos 2 7 voltios en los ter minales para una correcta medición del pulso aparatos sin clavija de red Estudie todas las funciones y po...

Page 12: ...eraal E Ayuda para la medición del material de atornilladura Messhilfe für Verschraubungsmaterial Beispiel Examples Examples Voorbeeld Ejemplos D Benötigtes Werkzeug Gehört nicht zum Lieferumfang GB Tools required Not included F Outils nécessaires Ne fait pas partie du domaine de livraison NL Benodigd gereedschap Is niet bij de levering inbegrepen E Herramientas necesarias No forma parte del volum...

Page 13: ...cklist contents of packaging F Liste de vérification contenu de l emballage NL Checklijst verpakkingsinhoud E Lista de control contenido del paquete Checkliste Packungsinhalt 1x 1x 1x 1x 1x 1x 1x 1x 1x 1x 1x 1x ...

Page 14: ...14 Checkliste Packungsinhalt ø 25x8 4 ø 18x11 3 ø 16x8 3 2x 4x 4x M10x80 M8x16 M10 2x 6x 3 9x19 4x 4x35 3x 2x ...

Page 15: ...15 1 2 klick 4 8x22 klick klick A klick klick B C C C 2x ...

Page 16: ... regelmäßig kontrollieren GB The screwed connections must be controled at regular intervals F Resserrer le raccord à vis à intervalles réguliers NL Schroefverbinding moet regelmatig opnieuw vastgedraaid worden E La atornilladura debe ser apretada con regularidad ...

Page 17: ...17 17 4 5 6 B A B 2x M8x16 ø25x8 4 M 25 30 Nm 4x35 A 2x klick klick klick A A B 4x35 B 1x 4 8x22 3 9x19 2x ...

Page 18: ...18 18 8 3 9x19 2x 7 M 10 ø18x11 3 M10x80 M 25 30 Nm A 2x GB Handling F Utilisation NL Handleiding E Aplicación Handhabungshinweise ...

Page 19: ...19 Handhabungshinweise B A ...

Page 20: ... in damage F Attention Exploiter uniquement l appareil avec son 6V 9V bloc secteur original Sinon risque de détérioration NL Let op Gebruik alleen toegestaan met de orginele 6V 9V transformator Anders gevaar voor beschadiging E Atención Funcionamiento solamente autorizado con la fuen te de alimentación 6V 9V original De lo contrario podría ocasionar daños PRI 100 240 V 50 60Hz 0 6A SEC DC9V 1000mA...

Page 21: ...e de KETTLER voir liste des pièces de rechange Sinon risque de détérioration NL Bij apparaten met transformator ATTENTIE gebruik alleen toegestaan met de bijgeleverde originele transformator of ori gineel KETTLER onderdeel zie onderdelenlijst Anders be staat er beschadiginggevaar E En aparatos con fuente de alimentación Atención Funcio namiento solamente autorizado con la fuente de alimentación or...

Page 22: ...e aantal en het serienummer van het apparaat E Indicar con los pedidos de piezas de repuesto el número com pleto del artículo el número de la pieza de repuesto las unidades solicitadas y el número de serie del aparato D Beispiel Typenschild Seriennummer GB Example Type label Serial number F Example Plaque signalétique Numèro de serie NL Bij voorbeeld Typeplaatje Serien nummer E Ejemplo Placa ident...

Page 23: ...23 Ersatzteilbestellung ...

Page 24: ...27 16 1x 94601164 17 1x 94601165 18 1x 94601166 19 1x 91140379 10 20 1x 94600461 21 1x 25635052 22 1x 25605891 23 1x 94313102 24 1x 97200127 25 1x 67000690 07652 450 CROSSTRAINER UNIX P LTD 26 1x 43009234 27 1x 94603464 28 1x 94603463 29 2x 70130112 30 2x 94600226 31 1x 94603469 32 2x 70129511 33 1x 94600228 34 1x 67005127 35 1x 94600229 36 1x 10900092 37 1x 94600230 38 1x 10900091 39 1x 91180557 ...

Reviews: