background image

WHEN USING ELECTRICAL APPLIANCES,  

BASIC SAFETY PRECAUTIONS SHOULD BE FOLLOWED, 

INCLUDING THE FOLLOWING: 

1.

   Carefully read all instructions before using. 

2.

   Remove and safely discard any packaging materials and 

promotional labels before using the appliance for the first 

time.

3.

   To eliminate a choking hazard for young children, remove and 

safely discard the protective cover fitted to the power plug of 

this appliance. 

4.

   WARNING: This appliance must be grounded using a 3-hole 

properly grounded outlet. In the event of an electrical short 

circuit, grounding reduces the risk of electrical shock.

5.

   Operate appliance only through a professionally installed plug 

socket supplying the correct voltage.

6.

   The appliance is not intended to be operated by means of  

an external timer or separate remote control system.  

Do not use extension cables.

7.

   Do not operate this appliance with a damaged cord or plug. 

If the power cord is damaged, it must be replaced by the 

manufacturer or its authorized service personnel, or similarly 

qualified professional in order to avoid any risk.

8.

   This appliance has a polarized plug (one blade is wider than 

the other). To reduce the risk of electric shock, this plug is 

intended to fit into a polarized outlet only one way. If the plug 

does not fit fully into the outlet, reverse the plug. If it still 

does not fit, contact a qualified electrician. Do not attempt 

to modify the plug in any way.

9.

   To protect against fire, electric shock and injury and to 

prevent any risk of short-circuiting, do not immerse in water 

or any other liquids. 

10.

  Never let the main cable hang loose, nor remove plug with 

wet hands, nor lay or hang on hot surfaces, nor let it come 

into contact with oil.

11.

  Never operate damaged appliances.

12.

  Do not place the appliance on a polished wood surface,  

it could damage the wood.

13.

  Unplug the appliance after each use, or when the appliance 

is not in use, before changing accessories or cleaning 

the appliance.

14.

  This appliance is not intended for use by persons (including 

children) who are with reduced physical, sensory or mental 

capabilities, or lack of experience and knowledge, unless they 

are supervised or have been given instructions regarding the 

use of the appliance by a person responsible for their safety.

15.

  Children should be supervised to ensure they do not play with 

the milk frother.

16.

  Close supervision is necessary when any appliance is used by 

or near children.

17.

  THIS APPLIANCE MUST BE ATTENDED AT ALL TIMES 

DURING USE.

18.

  Never touch live parts.

19.

  Do not touch the metal parts, the whisk support or its 

housing when the appliance is in use, as this may cause 

burning or scalding.

20.

  To protect against injury, never touch rotating parts. 

21.

  Do not insert any objects and/or fingers in the appliance’s 

openings.

22.

  The appliance must only be used with the base unit provided. 

The underside of the appliance must always be clean and dry 

before being placed on the base unit.

23.

  Do not operate without milk in the jug.

24.

  Never exceed the capacity of the jug, contents may overflow.

25.

  Turn the appliance and main power off when not in use.

26.

  Do not operate outdoors.

27.

  Never operate appliance on uneven or wet surfaces.

28.

  Keep the appliance clear of walls, curtains and other heat or 

steam sensitive materials.

IMPORTANT SAFEGUARDS 

Summary of Contents for 043-2715-6

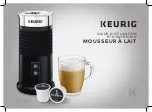
Page 1: ...1 USE CARE GUIDE MILK FROTHER K Cup pods not included...

Page 2: ...ther liquids 10 Never let the main cable hang loose nor remove plug with wet hands nor lay or hang on hot surfaces nor let it come into contact with oil 11 Never operate damaged appliances 12 Do not p...

Page 3: ...disconnect turn any control to Off by pressing it again then remove plug from wall outlet 40 The appliance is not designed for commercial or industrial use it is for household use only 41 This applia...

Page 4: ...TS KEURIG MILK FROTHER Features 5 Quick Tips 8 1 Let s take the milky way 6 Setup 7 Serving suggestion Cappuccino style beverage 9 2 Maintenance 10 Caring for your milk frother 10 3 Troubleshooting 11...

Page 5: ...teel housing F Silicone sleeve G Frothing heating button H Frothing button I Power base with cord J Whisk support K Whisk for frothing milk L Whisk for heating milk L J A B C D E F G H I K MAX MAX MIN...

Page 6: ...t coffee granules chocolate powder or other similar flavouring into the frother Clean immediately and thoroughly after each use The milk frother is designed to heat and froth milk For best results use...

Page 7: ...7 LET S TAKE THE MILKY WAY...

Page 8: ...he buttons to start the machine Frothing Heating Heating Push the upper button The indicator light will turn on Once the cycle is complete between 65 130 sec the indicator light will keep flashing for...

Page 9: ...y froth Your choice of sweetener white or brown sugar honey maple syrup etc optional The perfect combination of creamy froth and rich intense coffee easily prepared in less than 2 minutes Makes one se...

Page 10: ...a non abrasive cloth If the frother will no longer be used for the rest of the day clean the gap under the shaft sleeve of the motor using warm soapy water and a soft brush Rinse and wipe dry with a s...

Page 11: ...on persists contact Customer Service at 1 800 361 5628 MOTOR DOES NOT WORK Jug might not have been cleaned right after use and milk might be locking the mechanism Ensure you clean and move the whisk s...

Page 12: ...lk will work in the Keurig milk frother Any damage to or malfunction of your milk frother resulting from the use of another milk type may not be covered by this warranty or may result in a service fee...

Page 13: ...ing on the province of purchase HOW DO YOU OBTAIN WARRANTY SERVICE Keurig milk frothers are high quality appliances and with proper care are intended to provide years of satisfying performance However...

Page 14: ...indicated by the symbol dustbin with cross on the product in the instruction manual or on the packaging Ask your local waste facilities about disposal The materials are reusable according to their la...

Page 15: ...1 GUIDE D UTILISATION ET D ENTRETIEN MOUSSEUR LAIT Capsules K Cup non comprises...

Page 16: ...pour viter tout risque de court circuit ne jamais plonger dans l eau ou dans tout autre liquide 10 Ne jamais laisser le cordon d alimentation pendre librement le retirer de la prise avec les mains mo...

Page 17: ...le placer dans un four chaud 39 Toujours brancher le cordon d alimentation dans l appareil en premier avant de le raccorder dans la prise murale Pour le d brancher teindre l appareil en appuyant de n...

Page 18: ...T KEURIG Caract ristiques 5 Conseils rapides 8 1 Commen ons mousser 6 Installation 7 Conseil de d gustation Boisson de style cappuccino 9 2 Entretien 10 Entretien de votre mousseur lait 10 3 D pannage...

Page 19: ...tier en inox F Manchon de silicone G Bouton mousser et chauffer H Bouton mousser I Base avec cordon d alimentation J Support fouet K Fouet pour mousser le lait L Fouet pour chauffer le lait L J A B C...

Page 20: ...as utiliser de caf soluble de poudre de chocolat ni d autres produits aromatisants Bien nettoyer le pot apr s chaque utilisation Le mousseur est con u uniquement pour chauffer et mousser du lait Pour...

Page 21: ...7 COMMEN ONS MOUSSER...

Page 22: ...pour d marrer l appareil Mousser et chauffer Chauffer Le voyant s allume sur pression du bouton sup rieur Une fois le lait chauff et mouss soit apr s 65 130 sec le voyant clignote pendant 30 sec Mouss...

Page 23: ...dons ce type de lait Sucre de votre choix blanc cassonade miel sirop d rable etc optionnel Une combinaison parfaite de mousse onctueuse et de caf riche et intense facilement pr par en moins de 2 minut...

Page 24: ...nge non abrasif et de l eau ti de savonneuse Si le mousseur lait ne sera plus utilis pour le reste de la journ e nettoyer sous le manchon de la tige du moteur l aide d une petite brosse douce et de l...

Page 25: ...avec le Service la client le au 1 800 361 5628 LE MOTEUR NE FONCTIONNE PAS Il est possible que le pot n ait pas t nettoy imm diatement apr s l utilisation et que des r sidus de lait bloquent le m cani...

Page 26: ...nnement de votre mousseur lait r sultant de l utilisation d un autre type de lait pourrait ne pas tre couvert par la pr sente garantie et entra ner des frais de service si le dommage ou la d fectuosit...

Page 27: ...reil COMMENT FAIRE HONORER LA GARANTIE Les mousseurs lait Keurig sont des appareils de qualit qui lorsqu ils sont utilis s et entretenus ad quatement sont con us pour durer plusieurs ann es Si toutefo...

Page 28: ...rqu e d une croix sur l appareil dans le guide d utilisation ou sur l emballage Communiquer avec le centre local de collecte des d chets pour en savoir plus Les mat riaux sont r utilisables selon les...

Reviews: