11 |
P a g e
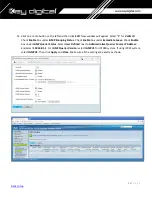
Snooping Status
and
Enable
for
Fast Leave
. Under
Querier Settings
/
VLAN ID 1
select
Enable
for
Querier
State,
V3
for
Querier Version
and make sure all other setting are exactly as shown below. Click
Apply
.
12.
IMPORTANT
:
At this point all the displays should be displaying stable running video from the selected
sources. If you do not have them displaying properly, than network switch is configured incorrectly.
13.
Navigate to
Maintenance
->
Restart Device
and click Restart Switch. After the reboot is complete, check all
settings again.
14.
IMPORTANT
:
Now you can connect back you DHCP equipment (routers, servers and so on).
15.
Power down Araknis network switch and power it up back again. Wait for the whole system to start and
until you can see video on your displays.
16.
Log in to your Araknis network switch again and make sure that IGMP settings are intact.
17.
Rescan your components with Key Digital Management Software and make sure HDMI video switch is
functional.
18.
At this point your Araknis network switch is set and ready to use
19.
Connect your encoders, decoders, allow approx 3 mins for bootup, and perform a network scan using KD
Management Software.
Summary of Contents for Enterprise AV KD-IP822DEC
Page 19: ...19 P a g e Back to top ...
Page 77: ...77 P a g e Back to top ...
Page 109: ...109 P a g e Back to top ...


