8163A/B, 8164A/B, 8166A/B User’s Guide
329
Installation and Maintenance
11
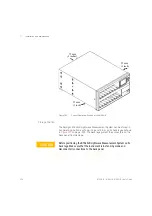
Figure 204
How to Insert a Front-Loadable Module
1 Position the module at an unoccupied slot, with the catch at the
bottom front of the module.
2 Insert the module into the slot and onto the tracks. If the module does
not slide in freely, check that you have correctly positioned and
correctly oriented it and that there is no obstruction to its movement.
3 Apply pressure to the front panel, and push the module as far as it
goes. You hear a small click when the module reaches its installed
position. This is the catch making contact.
How to Remove a Back-Loadable Module
CAUTION
Disconnect all electrical and optical connectors before you remove this
module from the instrument, as this can cause damage to the
connectors.
Make sure that the instrument is in stand-by mode, see page 55, before
you remove a module.
Summary of Contents for 8163A
Page 17: ......
Page 86: ...8163A B 8164A B 8166A B User s Guide 85 Additional Information 2 Figure 47 MAC Address...
Page 99: ......
Page 133: ......
Page 213: ......
Page 298: ...8163A B 8164A B 8166A B User s Guide 297 Applications 10 Figure 183 Low Dynamic Range...
Page 310: ...8163A B 8164A B 8166A B User s Guide 309 Applications 10 Figure 190 Printed Results...
Page 313: ......
Page 345: ......
Page 453: ......

