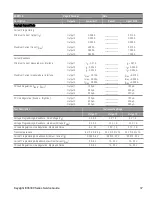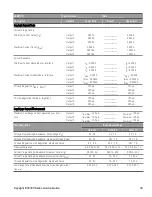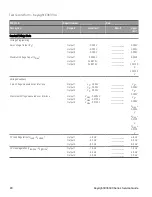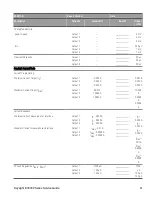
Constant Current (CC) verification
Current programming and readback accuracy
These tests verify that the current programming and the LAN, GPIB or USB readback measurement functions are
within specifications. Note that the readback values over the remote interface should be identical to those displayed
on the front panel, but with maximum resolution.
1.
Turn off the power supply using the AC line switch.
2.
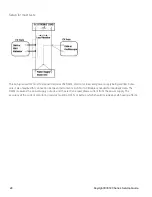
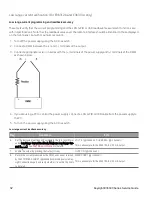
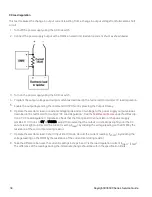
Connect the current shunt directly across the output terminals. Connect the DMM directly across the current
shunt.
3.
If you are using a PC to control the power supply, connect a LAN, GPIB or USB cable from the power supply to
the PC.
4.
Turn on the power supply using the AC line switch.
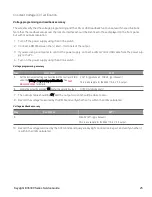
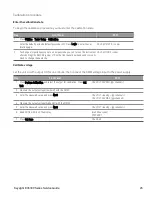
Current programming accuracy
Step
Front Panel
SCPI
5.
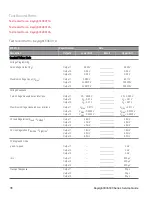
Set the instrument settings as described in the test record form
under Current Programming and Readback. See
for details.
VOLT 6, (@<channel>; CURR 5, (@<channel>)
This is an example for the E36311A, 6 V, 5 A output.
6.
Enable the output by pressing the Output ON key
OUTP ON, (@<channel>)
7.
The output status should be
CC
and the output voltage should be close to zero.
8.
Divide the voltage drop (DMM reading) across the current shunt by the shunt resistance to convert to amps.
9.
Record the current measured by the DMM and verify whether it is within the limits calculated.
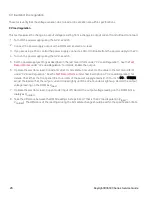
Current readback accuracy
Step
Front Panel
SCPI
10.
MEAS:CURR?, (@<channel>)
This is an example for the E36311A, 6 V, 5 A output.
11.
Record the current returned by the SCPI command query via Keysight Connection Expert, and verify whether it
is within the limits calculated.
Keysight E36300 Series Service Guide
33

