background image

9

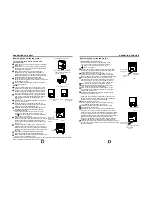
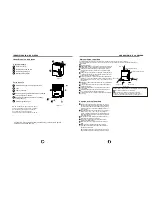
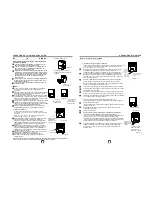
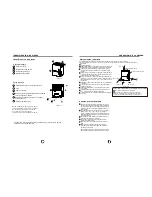
Removing the collected water

1. Pull out the bucket  a little.

2. Hold both sides of the bucket

    with even strength, and pull it 

    out from the unit.

3. Pour the water out.

There are three ways to remove collected water.

1. Use the bucket


When the unit is off,if the bucket is full, the Full indicator

     light will light.

     When the unit is on,if the bucket is full, the compressor

     and the fan turn off, and the Full indicator light will light, 

     the digital display shows P2.

     Slowly pull out the bucket. Grip the left and right 

     handles securely, and carefully pull out straight so 

     water does not spill. Do not put the bucket on the floor 

     because the bottom of the bucket is uneven. Otherwise 

     the bucket will fall and cause the water to spill.

     Throw away the water and replace the bucket. The 

     bucket must  be in right place and securely seated  for the 

     dehumidifier to operate.

     The machine will re-start when the bucket is restored

     in its correct position.

NOTES:

    When you remove the bucket, do not touch any parts 

     inside of the unit. Doing so may damage the product.

     Be sure to push the bucket gently all the way into the 

     unit. Banging the bucket against anything or failing to 

     push it in securely may cause the unit not to operate.

     If the pump hose drops when you remove the bucket 

     (see Fig.7),you must reinstall the pump hose properly 

     to the unit before replace the bucket into the unit 

     (see Fig.8).     

     When you remove the bucket,if there is some water in

     the unit you must dry it.

     When the unit is on, if the bucket is removed, the 

     compressor and the fan turn off, then the unit will beep

     8 times and the digital display shows Eb. 

     When the unit is off, if the bucket is removed, the unit 

     will beep 8 times and the digital display shows Eb.

Fig.5

Fig.6

OPERATING  THE  UNIT

8

Fig.9

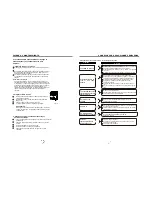
Removing the collected water

3. Pump draining(on some models)

Water can be automatically emptied into a floor 

drain or a suitable drainage facility by attaching 

the pump drain out with a pump drain hose 

(   od=1/4  , supplied).

    Remove the continuous drain hose from the unit and install 

    the plastic cover to the continuous drain hose outlet of the 

    unit by clockwise rotation.(See Fig.11)  

    Resert the pump drain hose into the pump drain hose

    outlet for depth of 15mm at least (See Fig.11), then lead 

    the water hose to the floor drain or a suitable drainage facility.    

    Press the pump pad of the unit to activated the pump

    operation. When the bucket is full the pump starts to work.

    NOTE: The pump may cause big noise when it starts to 

                work for 3~5 minutes. It is a normal phenomenon.

    Make sure the hose is secure so there are no leaks.

    Direct the hose toward the drain,making sure that there 

    are no kinks that will stop the warter flowing.

    Place the end of the hose into the drain and make sure

    the end of the hose is level or down to let the water flow

    smoothly.Do never let it up.

    Select the desired humidity setting and fan speed on the 

    unit for pump draining to start. 

Pump drain

hose

Pump drain

hose outlet

NOTE: The pump operation on light blinks at 1Hz when the 

pump is operational failure. Please turn off the unit and plug 

the power cord out. Check the following things:

    Cleaning the filter of the pump.

    -Remove the bucket from the unit, take down the pump 

     and clean the filter of the pump (See Fig.12). 


Fig.7

Fig.8

Pump hose

drops

Reinstall pump 

hose properly

Fig.10

Filter of the pump

    Check that the pump drain hose does not link or block.  


Fig.12

    Empty the water of the bucket.

    Reinstall the pump hose if it drops and reinstall the bucket 

    properly. Turn on the unit. If the error repeats, call for service. 


OPERATING  THE  UNIT

NOTE: Do not use this operation when the outdoor temperature

O

O

is equal to or less than 0 C (32 F), otherwise water is become

ice that will cause the water hose blocked up and the unit failure. 

Make sure to empty the bucket once a week when using

the pump draining feature. When the pump draining feature is 

not being used, remove the pump drain hose from the outlet.

2,Take the pump 

drain hose out

1,Press the pump drain

hose outlet in

   Press the pump drain hose outlet in and take the pump drain hose 

   out from it (See Fig.13). Make sure do not let the water in the pump 

   hose drip to the floor.   


Remove the

plastic cover

by couter-clockwise

rotation.

Drain hose

Fig.11

Reinstall the

plastic cover

Fig.13

2. Continuous draining

Water can be automatically emptied into a floor 

drain by attaching the unit with a water hose

(Id    5/16 , not included) with a female threaded

end (ID:M=1  , not included)


    Remove the plastic cover from the back drain outlet of 

    the unit and set aside, then insert the drain hose through 

    the drain outlet of the unit and lead the drain hose to

    the floor drain or a suitable drainage facility. (See.Fig.9

    and Fig.10)

    When you remove the plastic cover, if there is some 

    water in the back drain outlet of the unit you must dry it.

    Make sure the hose is secure so there are no leaks and

    the end of the hose is level or down to let the water flow

    smoothly.

    Direct the hose toward the drain,making sure that

    there are no kinks that will stop the warter flowing.


NOTE: When the continuous draining feature is not being used,remove the drain hose from the outlet,

and dry the water in the continuous drain hose outlet.


    Select the desired humidity setting and fan speed on the 

    unit for continuous draining to start.

Summary of Contents for KSTAD957PA

Page 1: ...ency or manufacturer for details CD034IU DL 16120100000055 The design and specifications are subject to change without prior notice for product improvement Consult with the sales agency or manufacture...

Page 2: ...Producto 1 866 646 4332 1 866 646 4332 MIDEA AMERICA CORPORATION PRODUCT REGISTRATION CENTER 11800 NW 100 ROAD STE 4 MEDLEY FL 33178 1037...

Page 3: ...roperly Just a little preventive care on your part can save you a great deal of time and money over the life of your air conditioner You ll find many answers to common problems in the chart of trouble...

Page 4: ...NS Do not cover the intake or exhaust openings with cloths or towels A lack of air flow can lead to overheating and fire Never insert your finger or other foreign objects into grills or openings Take...

Page 5: ...rom 35 to 85 or auto start stop time 0 24 while setting then shows the actual 5 accuracy room humidity level in a range of 30 RH Relative Humidity to 90 RH Relative Humidity Error Codes and Protection...

Page 6: ...ttom of unit Casters can move freely Do not force casters to move over carpet nor move the unit with water in the bucket The unit may tip over and spill water Adehumidifier operating in a basement wil...

Page 7: ...secure so there are no leaks Direct the hose toward the drain making sure that there are no kinks that will stop the warter flowing Place the end of the hose into the drain and make sure the end of th...

Page 8: ...pump Check the pump hose does not link or block Empty the water of the bucket 3 Clean the air filter Remove the filter every two weeks based on normal operating conditions To remove the filter pull fi...

Page 9: ......

Page 10: ...Modelo KSTAD957PA DESHUMEDECEDOR MANUAL DE INSTRUCCI N Para un funcionamiento eficaz por favor lea las instrucciones cuidadosamente y gu rdelas en un lugar seguro para referencia futura...

Page 11: ...mantener su aire acondicionado en buenas condiciones Un poco de cuidado de su parte puede ahorrarle mucho tiempo y dinero sobre la vida til de su aire acondicionado Encontrar muchas respuestas a prob...

Page 12: ...EGURIDAD No cubra las aperturas de entrada o salida con trapos o toallas Una falta de flujo de aire puede causar recalentamiento e incendio Nunca coloque su dedo o cualquier otro objeto extra o en las...

Page 13: ...uncionamiento se restablecer luego de los 3 minutos Caracter stica para verificar el filtro El sistema comienza a contar el tiempo una vez que el motor del ventilador comienza a funcionar La caracter...

Page 14: ...alpicar agua Un deshumificador que funciona en un s tano no tendr efecto o ser peque o en secar un rea de almacenamientoadyacente continua tal como un armario a menos que exista una circulaci n de air...

Page 15: ...ncionamiento de la bomba Cuando el recipiente se llena la bomba comienza a funcionar NOTA La bomba puede realizar mucho ruido cuando comienza a funcionar durante 3 a 5 minutos Es un fen meno normal As...

Page 16: ...robar que la manguera de la bomba no se encuentre entrelazada o bloqueada Vac e el agua del recipiente 3 Limpiar el filtro de aire Retire el filtro de aire cada dos semanas si funciona en condiciones...

Page 17: ......

Page 18: ...Modelo KSTAD957PA DESHUMEDECEDOR MANUAL DE INSTRUCCI N Para un funcionamiento eficaz por favor lea las instrucciones cuidadosamente y gu rdelas en un lugar seguro para referencia futura...

Page 19: ...mantener su aire acondicionado en buenas condiciones Un poco de cuidado de su parte puede ahorrarle mucho tiempo y dinero sobre la vida til de su aire acondicionado Encontrar muchas respuestas a prob...

Page 20: ...EGURIDAD No cubra las aperturas de entrada o salida con trapos o toallas Una falta de flujo de aire puede causar recalentamiento e incendio Nunca coloque su dedo o cualquier otro objeto extra o en las...

Page 21: ...uncionamiento se restablecer luego de los 3 minutos Caracter stica para verificar el filtro El sistema comienza a contar el tiempo una vez que el motor del ventilador comienza a funcionar La caracter...

Page 22: ...alpicar agua Un deshumificador que funciona en un s tano no tendr efecto o ser peque o en secar un rea de almacenamientoadyacente continua tal como un armario a menos que exista una circulaci n de air...

Page 23: ...ncionamiento de la bomba Cuando el recipiente se llena la bomba comienza a funcionar NOTA La bomba puede realizar mucho ruido cuando comienza a funcionar durante 3 a 5 minutos Es un fen meno normal As...

Page 24: ...robar que la manguera de la bomba no se encuentre entrelazada o bloqueada Vac e el agua del recipiente 3 Limpiar el filtro de aire Retire el filtro de aire cada dos semanas si funciona en condiciones...

Page 25: ......

Reviews: