1
Schritt 1
step 1
étape 1
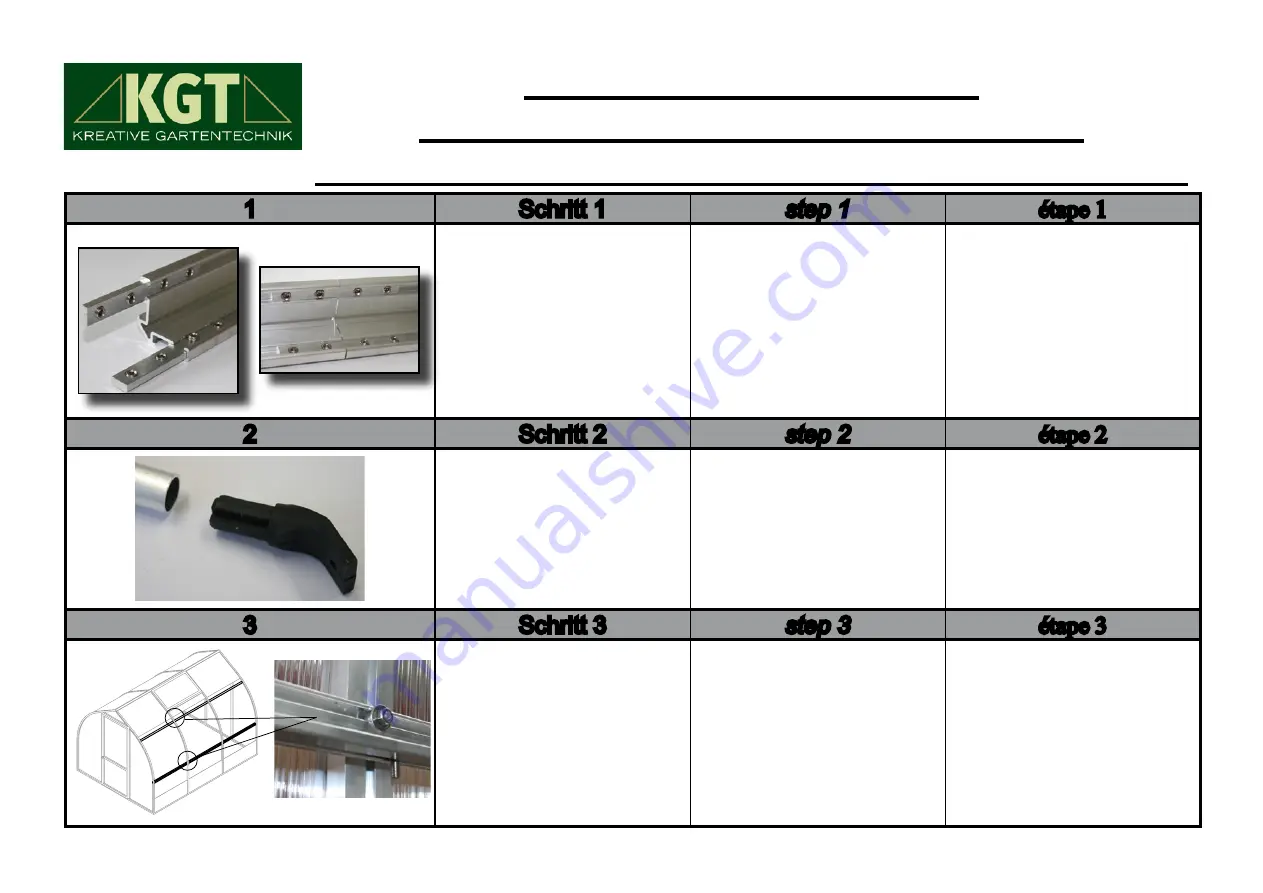
Die Profile (Pos. 1 bzw.
Pos. 1.1) sind, wie dar-
gestellt, so zu verbinden,
dass folgende Profillängen
entstehen:
Rhodo III: 2209 mm
Rhodo IV: 2946 mm
To connect the profiles
(pos. 1 and pos.1.1), as
shown, so that the follow-
ing profile lengths arise:
Rhodo III: 2209 mm
Rhodo IV: 2946 mm
Pour connecter les
profils (po. 1 et po. 1.1),
comme illustré, de sorte que
les longueurs de profil
suivantes se posent:
Rhodo III: 2209 mm
Rhodo IV: 2946 mm
2
Schritt 2
step 2
étape 2
Die Winkelendstücke
(V36) jeweils am Ende
der Streben (Pos. 3)
aufstecken.
The angle-end tail (V36)
attach each end of the
struts (pos. 3).
Les embouts d'angles (V36)
à la fin des entretoises
(po. 3) attachez.
3
Schritt 3
step 3
étape 3
In den unteren Kanal, auf
der Außenseite des Bor-
ten-/Stabilisierungswin-
kels (Pos. 3.4), ziehen Sie
jeweils eine Schraube
M6 x 12 (S12) pro
Gewächshaussprosse ein.
In the lower channel on
the outside of the
stabilization angle
(pos. 3.4) tighten one
screw at a M6 x 12 (S12)
per greenhouse rung.
Dans le canal inférieur à
l'extérieur de l'angle de
stabilisation (po. 3.4) serrer
une vis M6 x 12 (S12) par
l'échelon.
Montageablauf - Borte/Tisch -
assembly procedure - pot shelf/table shelf -
Procedure d'installation d'étagère de pot/d'étagère de table


