background image

67

Settings

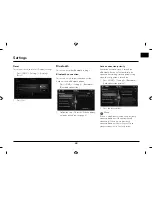
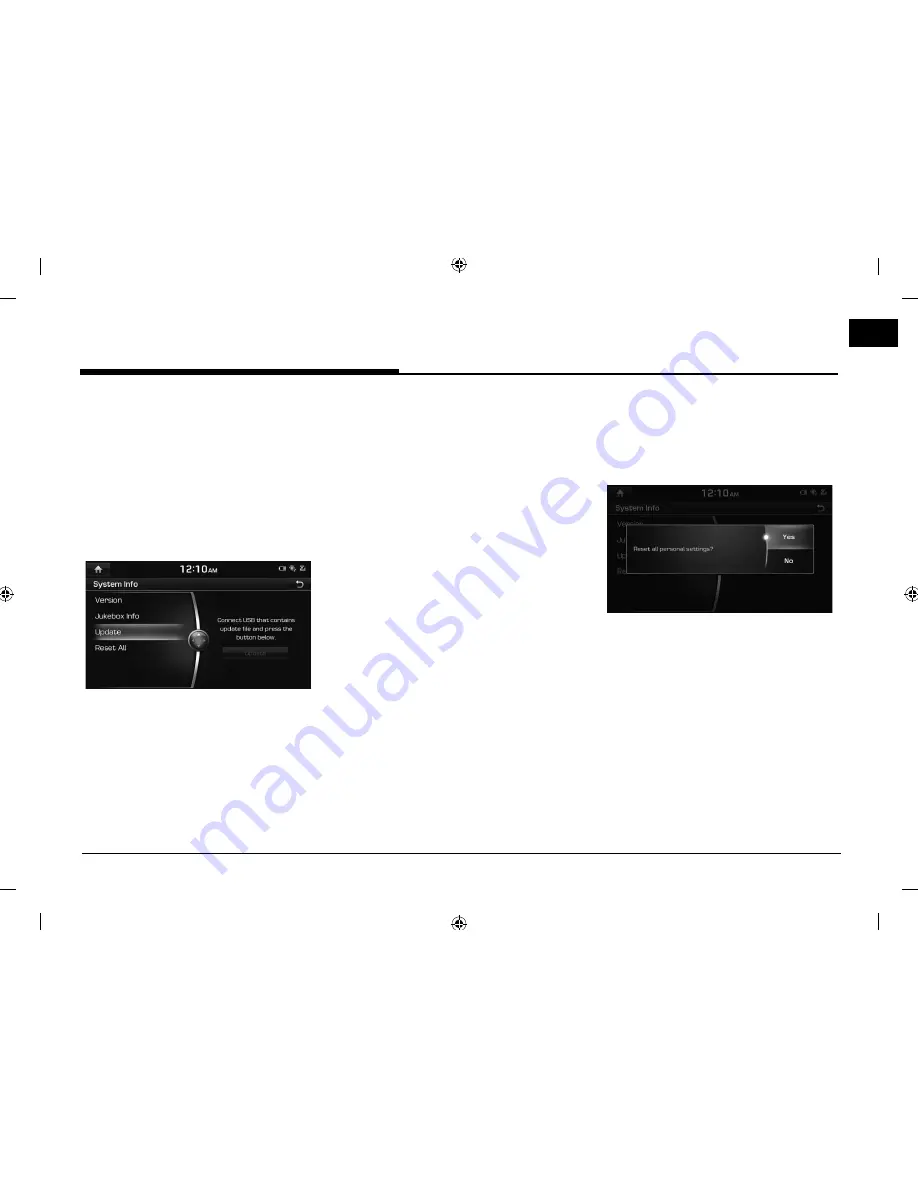
Update

For system’s software security, new function 
addition, and map update, you need an 
update. The latest map and software fi le can 
be downloaded from the web site http://www.
hyundai-mnsoft.com, and you can update 
through USB or SD card. For details about update, 
check out the web site before proceeding.

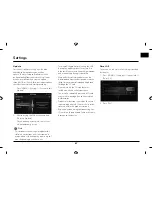
1.  Press [HOME] > [Settings] > [System Info] > 

[Update].

2.  After inserting the USB with the update 

file, press [Update].


Once updating is complete, the system 
will automatically restart.


,

Note

•  This product requires regular updates for 

software corrections, new functions and 
map updates. Updating may require up to 1 
hour depending on the data size.

• Turning 

off  the power or ejecting the USB 

during the update process may result in 
data loss. Make sure to keep the ignition on 
and wait until updating is complete.

•  Map and Navi software updates can be 

downloaded from the designated website 
(http://www.mapnsoft.com) and updated 
through the SD card.

•  Please use only the SD card that was 

included with the vehicle purchase.

•  The use of a separately purchased SD card 

may result in damage due to heat related 
deformation.

•  Product malfunctions caused by the use of 

separately purchased SD cards shall not be 
covered within the product warranty.

•  Repeatedly connecting/disconnecting the 

SD card in a short period of time may cause 
damage to the device.

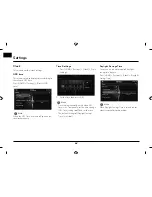
Reset All

This menu is used to reset all settings specifi ed 
by the user.

1.  Press [HOME] > [Settings] > [System Info] > 

[Reset All].

2. Press 

[Yes].

Summary of Contents for LNN2010EWUM

Page 1: ...manual carefully before operating your set and retain it for future reference Designs and specifications are subject to change without prior notice ENGLISH DEUTSCH FRAN AIS ESPA OL ITALIANO NEDERLAND...

Page 2: ...f this user s manual carefully and use this product safely The screens shown in this manual may differ with the actual screens of the product The design and specification of this product may change wi...

Page 3: ...tracted by the vehicle while driving and always be fully aware of all driving conditions Do not change settings or any functions Pull over in a safe and legal manner before attempting such operations...

Page 4: ...es not take the relative safety of the suggested routes into consideration Road blocks building sites height or weight restrictions traffic or weather conditions or other influences which affect the r...

Page 5: ...n facilities appoint ed by the government or the local authorities 3 The correct disposal of your old appli ance will help prevent potential nega tive consequences for the environment and human health...

Page 6: ...17 Autostore AM only 17 Presetting FM AM 18 Saving FM AM preset 18 Deleting FM AM preset 18 Setting the FM AM option 18 Scan 18 TA 19 Region FM only 19 Sound settings 19 Radio operation DAB 20 Listeni...

Page 7: ...tion 35 Address Search 35 Last destinations 36 POI 36 Searching for POI by category 36 Searching for POI by name 36 Searching for POI by phone number 37 Address book 37 Deleting Address book 37 Editin...

Page 8: ...Sound 56 Volume control 56 Fader Balance 56 Treble Middle Bass 56 Surround effect 57 Speed Dependent Vol 57 Touch Tone 57 Reset 57 Display 57 Set Video image 57 Set LCD Brightness 58 Illumination Set...

Page 9: ...Warning display 71 Driver s door open indicator 71 Front passenger s door open indicator 71 Trunk open indicator 71 Side mirror folding indicator 71 Climate Mode 72 Operating Climate Mode 72 Before th...

Page 10: ...e car is started while USB device is inserted it may damage USB device The amount of time required to recognize the external USB device may differ depending on the type size or file formats stored on...

Page 11: ...communication protocols may not properly operate with the system If the iPod malfunctions due to an iPod device defect reset the iPod and try again To learn more refer to your iPod manual During ACC O...

Page 12: ...t the SD card first turn off the system and the vehicle ignition Eject insert SD cards only to update the map with a new version When an SD Card with the new version is inserted then the system will r...

Page 13: ...Hands Free function 4 S W button When it is pressed shortly less than 0 8 sec FM AM DAB mode plays previous next station MEDIA mode plays previous next file When it is pressed and held 0 8 sec or lon...

Page 14: ...Software version Bluetooth version Navigation version Map database version and Firmware version 9 button Press to check the destination route traffic information and satellite status Destination shows...

Page 15: ...Volume VOL VOL button Increases or decreases the volume level 4 Seek up down W S button When it is pressed shortly less than 0 8 sec FM AM DAB mode plays previous next station MEDIA mode plays previo...

Page 16: ...Note Pay attention to the volume setting when turning the system on A sudden output of extreme volume upon turning the system on could lead to hearing impairment Adjust the volume to a suitable level...

Page 17: ...station until the button is released Manual tuning Turn on the head unit in clockwise or counter clockwise direction The stations move up and down step by step Preset tuning Press Preset Press the pr...

Page 18: ...d press and hold the station saved on the preset number Note Press W S to scroll up or down one page Press to move to the previous screen Deleting FM AM preset 1 Select FM or AM 2 Press Preset 3 Press...

Page 19: ...nts cannot be received Region FM only When the receiving signals from the current station become weak the station switches to another station 1 Select the FM band 2 Press Option 3 Press Auto or Off Au...

Page 20: ...e preset numbers of the desired station Viewing station list You can see station list with superior reception 1 Select the DAB band 2 Press List 3 Press Ensemble Station or PTY to display the Ensemble...

Page 21: ...eceiver to retune to a different station that provides the same station when the first signal becomes too weak e g when moving out of range 1 Select the DAB band 2 Press Option 3 Press On or Off L Ban...

Page 22: ...seconds of playback time plays the current file from the beginning Search You can search for the file currently playing quickly Position Description Screen Press and hold C V and then release at the...

Page 23: ...desired item All Plays repeatedly all files Folder Plays repeatedly all files within the current folder Track Plays repeatedly the current file Note You can set or cancel the Repeat function by pressi...

Page 24: ...when your vehicle is parked Switching to menu screen or full screen Press the screen repeatedly Note If there is no operation for 5 seconds in menu screen it switches to full screen Skip You can view...

Page 25: ...ion File Info This menu shows the folder name file name resolution file type and date of the current image 1 Press Option File Info 2 Press to move to the previous screen Display Settings 1 Press Opti...

Page 26: ...desired file For details refer to the Seek on the page 23 List You can play the desired file by searching for file list included in iPod 1 Press List 2 Press the desired file after searching for Play...

Page 27: ...he Repeat function by pressing on the playing screen All Track Shuffle All files are played randomly 1 Press Option Shuffle 2 Press the desired item All Plays randomly all files Off Cancels the shuffl...

Page 28: ...le driving Based on the traffic regulation Aux Video is only available whenever vehicle is in stop condition with parking gear Switching to menu screen or full screen Press the screen repeatedly durin...

Page 29: ...me between the Bluetooth handsfree or Bluetooth audio function For example if you convert to the Bluetooth handsfree while playing Bluetooth audio the music is discontinued Playing music from the car...

Page 30: ...ding the satellite transmission state vehicle state driving location and conditions etc Additionally the car position mark may differ from the actual position if the map data is different from the act...

Page 31: ...tion that the vehicle is moving 4 button Adjusts the navigation volume For details refer to the Navigation volume on the page 62 5 Route guidance display Displays the route guidance to the destinaton...

Page 32: ...rns compass screen on off when the route is deactivated C Manoeuvre Displays distance and direction information for the upcoming intersection when the route is activated Turns compass screen on off wh...

Page 33: ...he screen and the scroll mark will be displayed Information about the marked point and straight line distance from the current position will be displayed at the centre of the screen 2 Press MENU 3 Fol...

Page 34: ...ck menu Route Changes the route conditions by using the Route menu when the route is activated Page 71 POI Finds a destination by searching for POI Page 59 Traffic Shows the traffic information list P...

Page 35: ...the Multiple routes follow steps 4 5 Otherwise drive in accordance with the screen and voice information 4 Press the desired route Fast Calculates the route based on the fastest arrival time Short Cal...

Page 36: ...ways to set the destination through POI search by category by name by phone number Searching for POI by category 1 Press NAV Destination POI POI category If you want to search for the POI category by...

Page 37: ...re effectively destinations that you often travel to should be saved in advance First of all store in the Address book menu through destination search function 1 Press MENU or NAV Destination Address...

Page 38: ...tion by Service name by Service phone number Near current position 1 Press NAV Destination Hyundai service Near current position Press MENU Distance Name or Category to arrange the list in distance na...

Page 39: ...on saved in the Load tour menu To utilize this function more effectively destinations that you often travel to should be saved in advance First of all store in the Load tour menu through route search...

Page 40: ...the route to your home location office location and Favourite locations First of all store in the Favourite menu through destination search function Registering Home Office or Favourite 1 6 1 Press NA...

Page 41: ...ute condition according to your purpose 1 Press NAV or MENU Route Route option 2 Set the desired options Route Fast Calculates the route based on the fastest arrival time Short Calculates the route ba...

Page 42: ...he desired item from the list 3 Move the selected item up and down Or Drag it to the desired position 4 Press OK Start guidance Deleting plan tour 1 Press NAV Route Plan tour 2 Press MENU Delete 3 Sel...

Page 43: ...ss New Start guidance Route overview You can check the entire route between your current location and your destination 1 Press NAV Route Route overview 2 Press the desired item Start guidance Starts t...

Page 44: ...he detailed turn by turn list 1 Press NAV Route Route scan 2 Press the desired item Move to the departure location Move to the previous maneuver Move to the next maneuver Move to the destination locat...

Page 45: ...ly make calls receive calls and manage the phone book Before using Bluetooth Wireless Technology carefully read the contents of this user s manual Excessive use or operations while driving may lead to...

Page 46: ...h device The default passkey is 0000 2 If the SSP Simple Secure Pairing is supported press Yes on the pop up screen of the your Bluetooth device The pop up screen may differ from the actual informatio...

Page 47: ...switch is in ON position When you approve in the mobile phone the mobile phone contacts and the latest call list are downloaded 6 When your phone is successfully connected the Bluetooth settings scre...

Page 48: ...on the Bluetooth settings screen 3 Select the phone you want to delete and press Delete Delete all Deletes all the items Unmark all Unmarks all the items Cancel Cancels the delete function 4 Press Yes...

Page 49: ...eject Note If the Call ID service is available the caller s phone number is displayed If caller s phone number is saved in the phone book the caller s name is displayed on the unit Upon receiving a ca...

Page 50: ...ceived call Dialled call or Missed call Received call Displays the incoming call history list Dialled call Displays the outgoing call history list Missed call Displays the missed call history list 3 P...

Page 51: ...to delete all the call history Contacts 1 Press on the phone screen The contacts is displayed on the screen Contacts screen 2 Select the contact you want to call from the list of contacts 3 Press the...

Page 52: ...creen 2 Select the contact from the list of contacts 3 Press MENU Add to Favourites on the phone screen Note Added favourites can be viewed by pressing in the phone screen Favourites Calling Favourite...

Page 53: ...favourites 1 Press on the phone screen 2 Press MENU Delete on the favourites screen 3 Select the item you want to delete and press Delete Delete all Deletes all the items Unmark all Unmarks all the it...

Page 54: ...y in the case of fuel shortage Satellite status Displays the GPS satellites information Reset navigation settings Resets the navigation settings Display This menu is used to change the display environ...

Page 55: ...es the driving simulation Move to the previous position Move to the next position Pauses or plays the driving simulation Quick move to the specific position Ends the driving simulation Traffic This me...

Page 56: ...identical volume Fader Balance This menu allows you to set the sound position For example you can set the sound close to the driver seat so that the volume is relatively lower in the passenger or rear...

Page 57: ...to play a beep sound whenever you operate the touch screen Press HOME Settings Sound Touch Tone Reset This menu is used to reset all Sound settings 1 Press HOME Settings Sound Reset 2 Press Yes Displ...

Page 58: ...ct the desired options Auto illumination Adjusts the brightness automatically according to surrounding brightness Daylight Always keeps the brightness on high regardless of surrounding brightness Nigh...

Page 59: ...2 6 of the When a phone is already paired on the page 87 Auto connection priority If auto connection priority is turned on a Bluetooth device will automatically be connected according to the option s...

Page 60: ...ing When audio streaming is set you can play the music stored on a mobile device When this setting is off Audio Streaming is not available Some mobile phones may not support this function Press HOME S...

Page 61: ...en the mobile phone and car system The default passkey is set to 0000 Reset 1 Press HOME Settings Bluetooth Device Information Reset 2 Press the desired items Delete all paired devices Deletes all pai...

Page 62: ...Settings Clock Time Settings 2 Set the time then press OK Note Time settings cannot be used when GPS time is set To manually set the time change GPS Time setting to off and set the time The default s...

Page 63: ...ect Digital or Analogue Time Format This function is used to convert the digital clock display between 12 hour 24 hour systems 1 Press HOME Settings Clock Time Format 2 Select 12 Hr or 24 Hr General L...

Page 64: ...ranged in alphabetical order European keyboard Keyboard similar to the one used in Europe Korean keyboard Keyboard similar to the one used in Korea Frame This menu is used to select the screen display...

Page 65: ...anual 1 Press HOME Settings E Manual 2 Press the desired item E Manual screen Skip You can see the previous or next page Push the controller to the left or right Zoom In Out In the electronic manual s...

Page 66: ...ystem Info Version This menu option allows you to view the system information Press HOME Settings System Info Version Note The software information may differ from the actual information of the vehicl...

Page 67: ...data size Turning off the power or ejecting the USB during the update process may result in data loss Make sure to keep the ignition on and wait until updating is complete Map and Navi software updat...

Page 68: ...ut to R the rear camera power is automatically turned on and the rear camera starts operation If you change the transmission lever location from R to another position rear camera stops Turning on the...

Page 69: ...f f a Red line 0 5m from vehicle s rear bumper b Yellow line 1 1 0m from vehicle s rear bumper c Yellow line 2 3 0m from vehicle s rear bumper d Yellow line 3 vehicle path of the left side wheel in th...

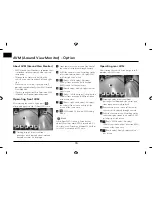
Page 70: ...l direction AVM screens at the same time e Front display It only displays vehicle s front screen f Front left side display It displays the vehicle s front screen and left front screen at the same time...

Page 71: ...unction Front view mode It sets the front camera s initial screen as initial view Around view front view driver seat side front and front passenger seat side front Rear view mode It sets the rear came...

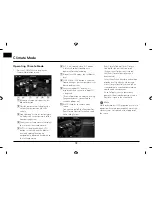
Page 72: ...passenger seat temperature is set based on driver seat I Excessive indoor CO2 display It is displayed when excessive indoor CO2 is detected If this information is displayed driving fatigue may occur s...

Page 73: ...r size When the tire pressure for the 4 tires are different When the replacement tire is worn or used Especially studless tires having passed a second season When driving near high rise buildings When...

Page 74: ...eriod of time Route guidance signaling for a u turn may occur in some No u turn intersections Route guidance signaling entrance into No entry zone may occur No entry zone road under construction etc G...

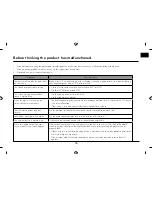
Page 75: ...e screen are dark The display appearing somewhat dark after prolonged periods of use is normal with LCD panels It is not a malfunction If the screen is very dark contact your nearest dealer for assist...

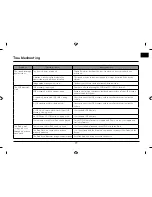
Page 76: ...hicle battery is low Charge the battery if the problem persists contact your point of purchase or service center A disc not supported by the device has been inserted Insert a disc which is supported b...

Page 77: ...y purchased USB HUB is being used Directly connect the USB memory with the multimedia terminal on the vehicle A USB extension cable is being used Directly connect the USB memory with the multimedia te...

Page 78: ...To obtain your registration code locate the DivX VOD section in your device setup menu Go to vod divx com for more information on how to complete your registration DivX Certified to play DivX video in...

Page 79: ...dBm Number of Channels 79 Radio AM Tuning range 522 kHz 1620 kHz Sensitivity 35 dBuV Frequency response 30 Hz 10000 Hz Signal to noise ratio Minimum 45 dB FM Tuning range 87 50 MHz 108 00 MHz Sensitiv...

Page 80: ...P N MFL67720954...
Reviews: