background image

7

Before Using the Machine

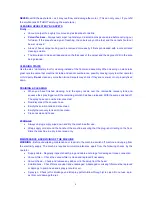
Make sure both tanks are clean and free from debris / hair etc.

Connect  the  vacuum  hose  and  the  solution  hose  to  the  carpet

cleaning wand or the upholstery tool.

Connect  the  flexible  vacuum  hose  onto  the  vacuum  hose  inlet  and

the high pressure spray hose onto the solution outlet.

Fill  the  clean  water  tank  with the low-foaming Kiam detergent  and

warm water up to 50 C. (NOT BOILING WATER - as boiling water will

damage the internal pipework.)Take care to use correct dilution rate

for the detergent. Never over fill.

Fill the anti-foam tank with an appropriate defoamer solution.

IMPORTANT – If using foaming carpet cleaning chemical, or if foam

develops  due  to  residues  in  the  carpet,  ensure  that  an  appropriate

de-foamer is used in the anti-foam tank.

Incorrect  chemicals  could  cause  damage  to  the  carpets  being

cleaned or cause the machine to malfunction..

Operating Controls

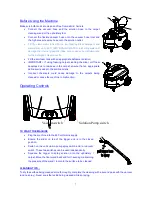
TO START THE MACHINE

Plug the machine into the 240 volt mains supply.

Ensure  the  slider  on  top  of  the  trigger  unit  is  in  the  closed

position.

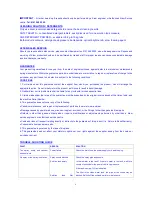
Switch on the unit solution pump spray switch and / or vacuum

switch. These two switches can be used independently.

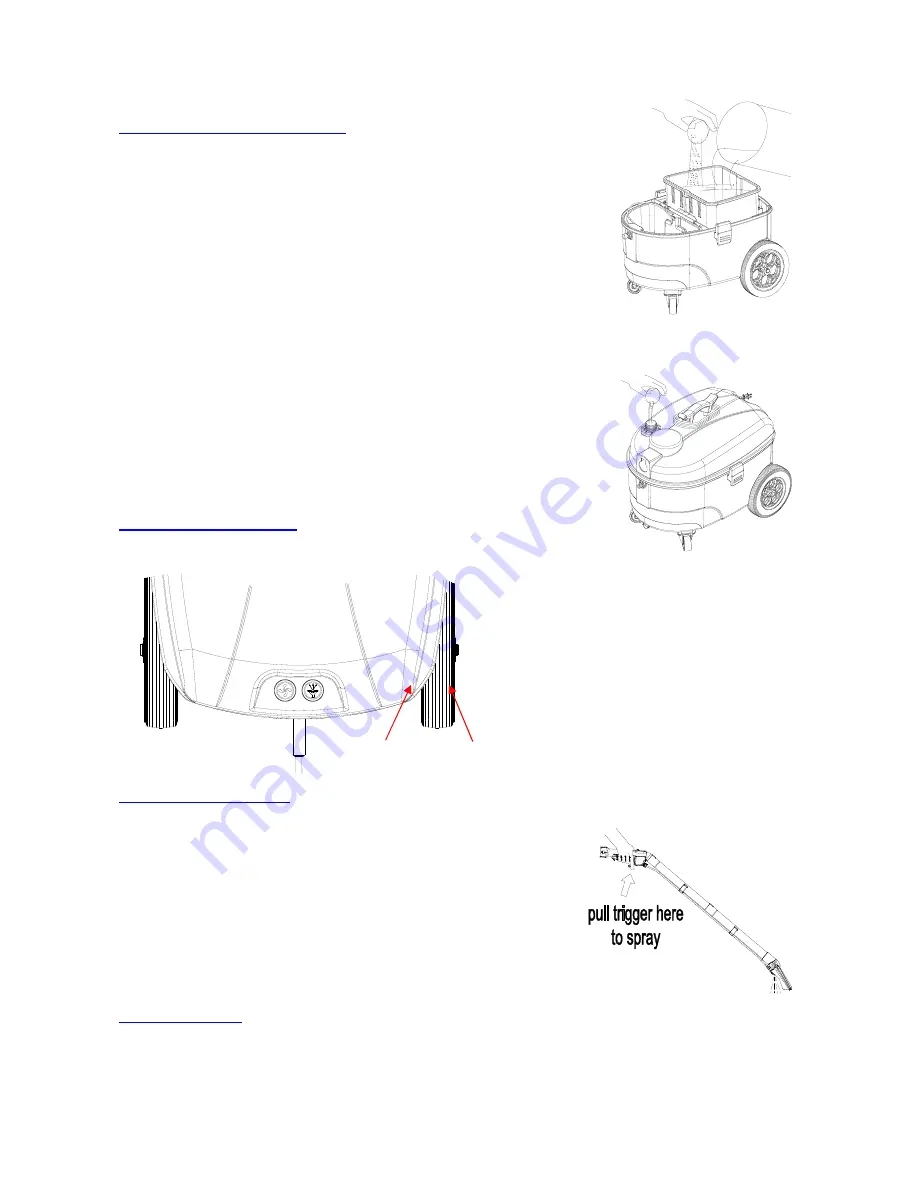
Squeeze  the  trigger  to  spray  solution  onto  the upholstery /

carpet. Move the floor wand back and forth evening maintaining

the pressure of the wand / tool onto the surface to be cleaned.

CLEANING TIPS…

To dry the surface being cleaned more thoroughly, complete the cleaning with a second pass with the vacuum

(and no spray). Never soak the textile being cleaned while spraying.

Vacuum switch

Solution Pump switch

Summary of Contents for aquarius Pro Valet

Page 1: ...1 INSTRUCTION MANUAL Please read the operation instructions and precautions in this Manual before using the Cleaner...

Page 2: ...ions carefully before use Do not use where hazardous dust is present Do not use in an explosive atmosphere Keep children and unauthorised persons away from the machine when in use Be careful when usin...

Page 3: ...he specification label to ensure that your supply voltage is correct for this particular model The supply cable is fitted with a non rewireable plug containing a 13 amp fuse Should the fuse require re...

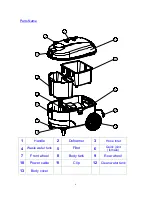
Page 4: ...me 13 11 10 7 3 5 6 8 9 12 4 2 1 1 Handle 2 Defoamer 3 Hose inlet 4 Waste water tank 5 Filter 6 Quick joint female 7 Front wheel 8 Body tank 9 Rear wheel 10 Power cable 11 Clip 12 Clean water tank 13...

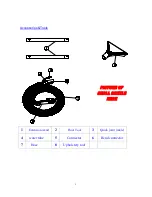
Page 5: ...5 Accessories Tools 1 Extension wand 2 Floor Tool 3 Quick joint male 4 water tube 5 Connector 6 Bend connector 7 Hose 8 Upholstery tool...

Page 6: ...6 Assembly Suction force adjustment valve Hose release catch Insert the vacuum hose solution tube...

Page 7: ...to residues in the carpet ensure that an appropriate de foamer is used in the anti foam tank Incorrect chemicals could cause damage to the carpets being cleaned or cause the machine to malfunction Op...

Page 8: ...the spray nozzle over the removable recovery tank and squeeze the spray trigger until the remaining solution has been released With the pump switched off The spray hose can now be disconnected Now di...

Page 9: ...distributors shall be liable for any incidental or consequential loss 3 Claims made under the terms of the guarantee must be supported by the original invoice issued at the time of sale and the machi...

Page 10: ...rent 5 5A Motor power 1100W Airflow 46 1 l sec Pump power 50W Pump pressure 4 bar 58 psi Flow rate 2 l min Vac Hose length 3 metres Noise level 78 dB A Maximum air flow 1 8m3 min Maximum water lift 20...

Reviews: