

7
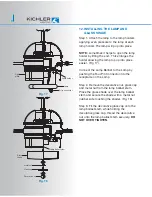
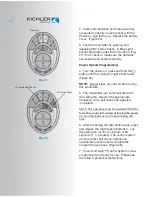
Step 1.
Tuck all the connections neatly into
the ceiling outlet box.
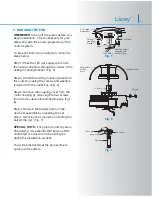
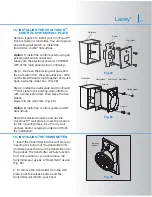
Step 2.
Slide the canopy up to the mounting
bracket and place one of the key hole slots
over the mounting screw on the mounting
bracket. Rotate the canopy until the screw
head locks in place at the narrow section of
the key hole. See figure 13.
Step 3.
Align the remaining circular hole on
the canopy with the remaining hole on the
Ceiling Mounting Bracket. Insert and tighten
the mounting screw you removed earlier and
the mounting screw from Step 2 above. Now,
attach the canopy cover to the mounting
screw heads by inserting the screw heads into
the bottom side of the canopy cover and
rotating the cover clockwise.
NOTE:
Adjust the canopy screws as
necessary until the canopy and canopy cover
are snug. (Fig. 13)
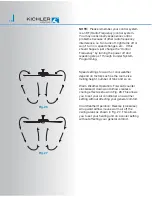
Warning:
Make sure the "Check Tab" at the
bottom of the hanger bracket is properly
seated in the "Registration Slot" on the side of
the hanger ball before attaching the canopy to
the bracket. Failure to properly seat the
"Check Tab" could damage the electrical
wires when to ceiling fan blade direction is
changed while the fan is running.
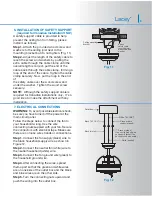
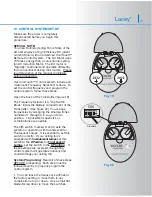
8. FINISHING THE INSTALLATION
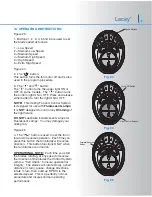
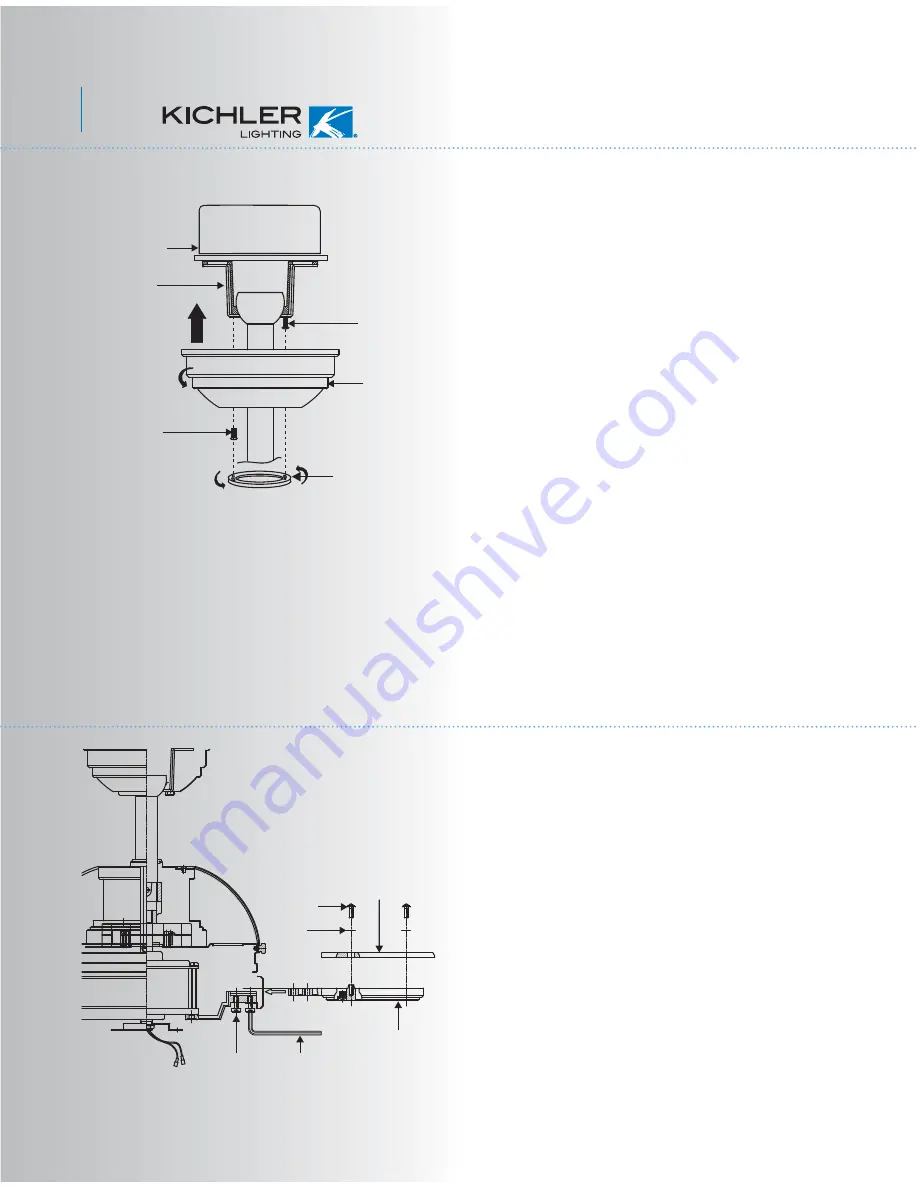
9. ATTACHING THE FAN BLADES
Step 1. Attach a blade to a blade bracket
using the screws and fiber washers provided.
(Fig.14)
Make sure the blade is straight when set on
the blade bracket. Tighten each mounting
screw and then repeat this procedure for each
blade.
Step 2. Using the Allen Wrench provided and
two mounting screws, attach each blade
assembly to the motor. (Fig. 14)
NOTE:
Make sure these mounting screws are
securely tightened.
Fig. 13
Fig. 14
Outlet box
Ceiling
mounting
bracket
Canopy
Canopy cover
Screws
Screws
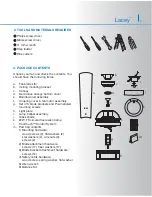
Blades
Blade brackets
Screws
Allen wrench
Screws
Fiber
washers


