


5
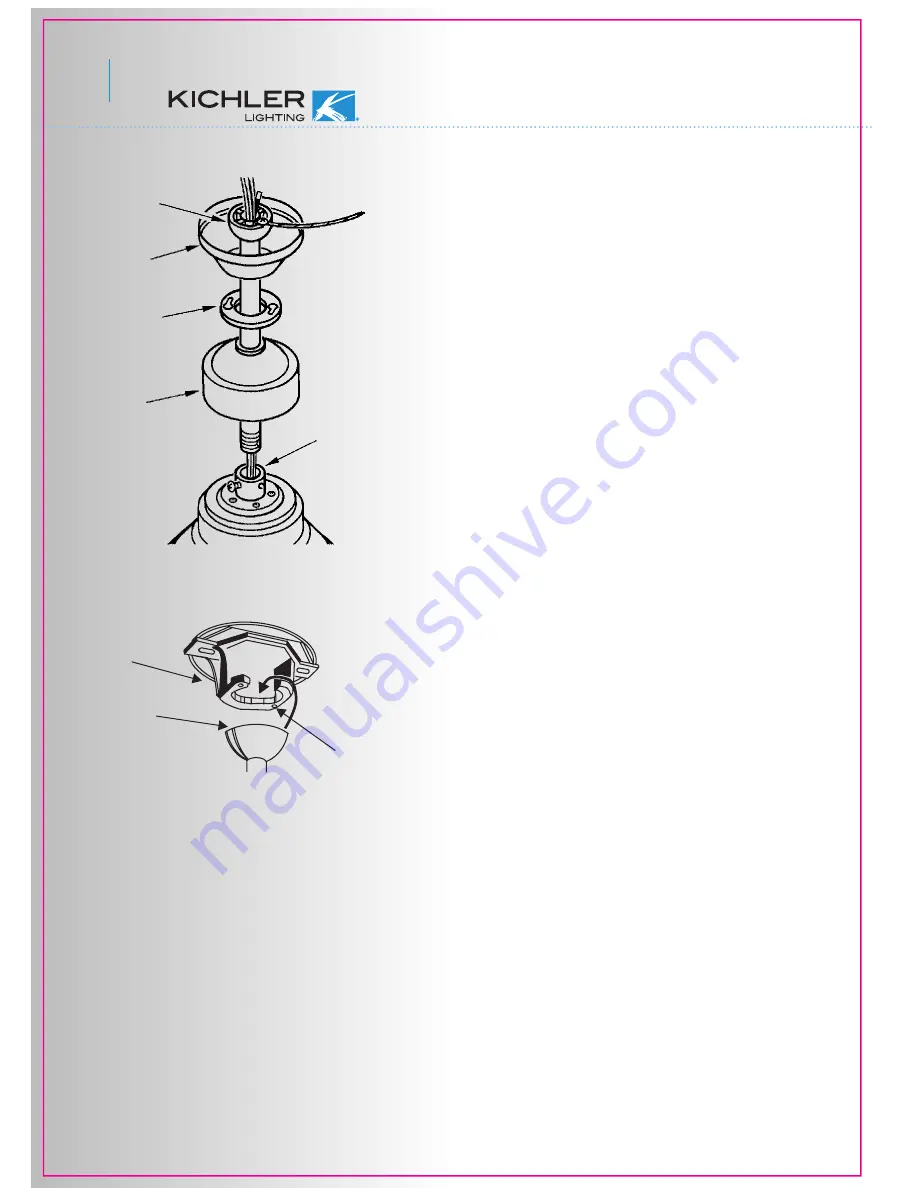
Fig. 9
Registration slot
Check Tab
Ceiling Mounting
Bracket
Step 7. Now lift the motor assembly into
position and place the hanger ball into the
hanger bracket. Rotate motor assembly until
the “Check Tab” has dropped into the “Regis-
tration Slot” and seats firmly. (Fig. 9)
NOTE:
The entire motor assembly should
not rotate if this is done correctly.
NOTE:
Please make sure all set screws are
in place and tight before installation the
following steps.
Step 6. Slip the coupling cover, canopy décor
and canopy onto the downrod. Reinstall the
hanger ball onto the downrod and make sure
the cross pin is in place and the set screw on
hanger ball is tight. (Fig. 8)
Fig. 8
Canopy Decor
Canopy
Coupling
Coupling cover
Hanger ball


