7
39. Make a small incision in the rubber grommet and pass the
power wires into the cabin.
40. Remove the driver’s side threshold panel along the bottom of
the front door opening.
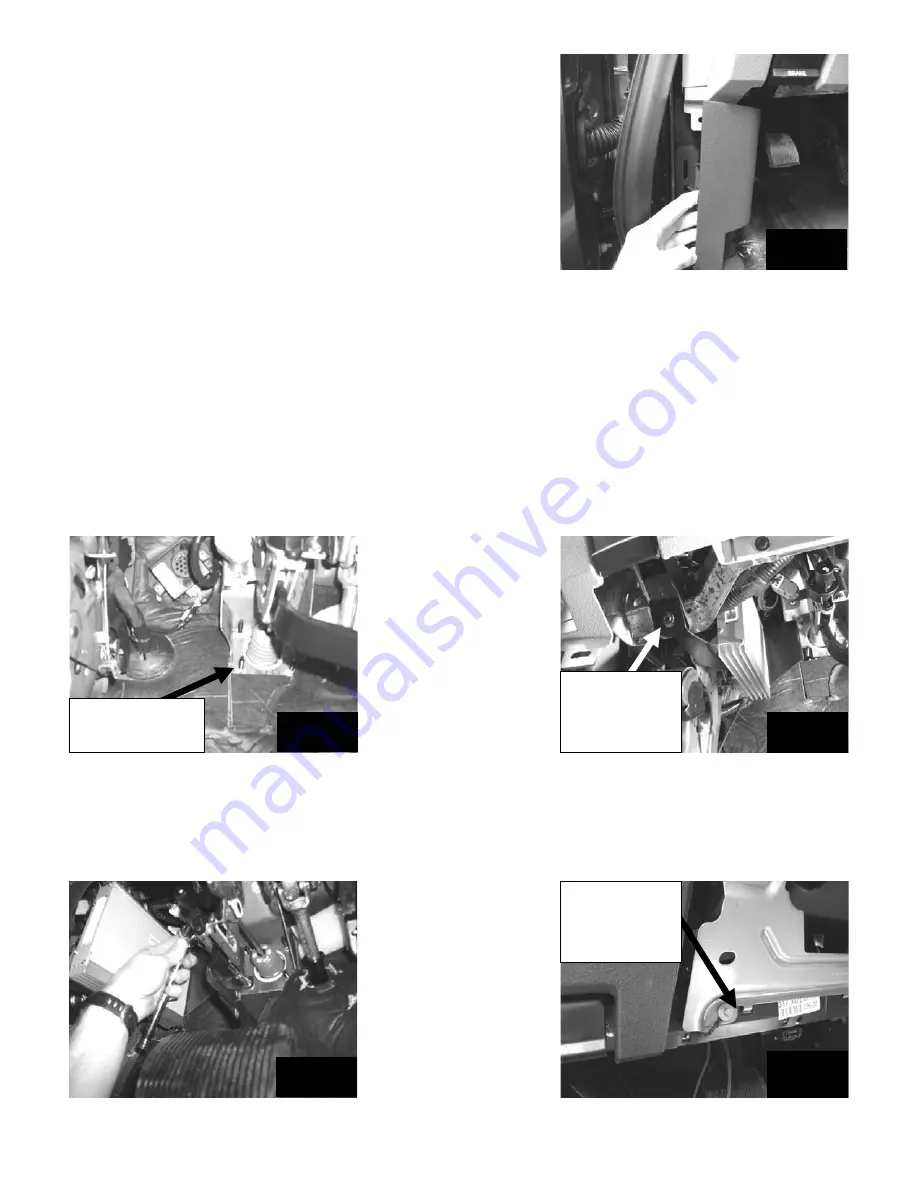
41. Pull back the rubber door molding and then pull back on the
kick panel to remove it. Fig. 24
Amplifi er Harness Routing
42. Route the amplifi er body harness from the radio opening down to the area in front of the brake pedal.
The white connectors connect to the amplifi er.
43. Connect the radio speaker/power connecter to the amplifi er harness.
44. Connect the other end of the amplifi er body harness to the back of the radio, reconnect the other radio
connections, then reinstall radio.
45. Connect amplifi er body harness to the amplifi er.
46. Remove the lower left nut securing the brake booster to the fi re wall. Fig. 25
47. Remove the screw securing the parking brake release handle.
48. Slide the amplifi er bracket over the brake booster stud and then line up the hole in the front of the brack-
et with the hole in the parking brake release then reinstall the parking brake release screw. Fig. 26
49. Reinstall the brake booster nut and tighten. Torque to 25Nm. Fig. 27
50. Remove the three screws securing the plastic panel below the steering column and then snap loose.
51.
IMPORTANT:
Ground the black ground wire of the amplifi er harness to the lower left bolt securing the
metal knee bolster. Torque to 15Nm. Fig. 28
Fig. 24
Fig. 25
Remove nut
from this stud.
Fig. 26
Amplifier
mounted over
parking brake
l
l
Fig. 27
Connect black
ground wire of
the amplifier
h
h
Fig. 28


