background image

2. Assembly instructions 

Tools required: Allen wrench (provided),  Flat head screw driver. 

WARNING.   Keep young children away from the area you are using to assemble or 

dismantle the Bedside Crib.  Some of the parts are heavy and could fall on 
the child.  Some of the fixings are a choking hazard to young children.  

WARNING 

Incorrect assembly or failure to follow these instructions could result in 
serious injury or death. 


Glue 2 dowels (D)  into the two inside holes on the lower rail of the crib end, repeat for the other crib 
end.  Allow the glue to dry. 

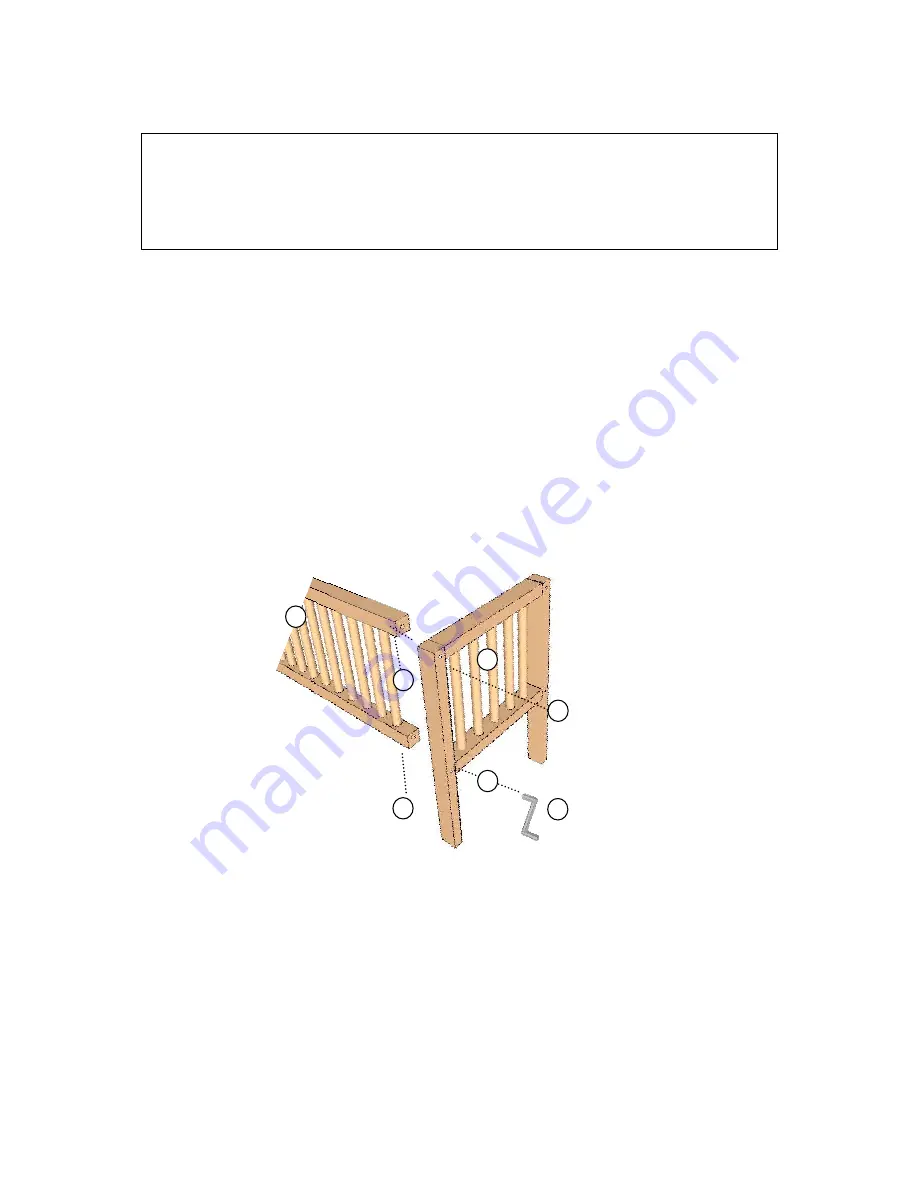
Attach the Crib side (2); to the inside face of the Crib end (1) using the Fixing bolts (C) and the Barrel 
nuts (B).  The crib side should be positioned so that the slot cut into the side rail is on the bottom and 
facing the inside of the crib.   

Using a screwdriver align the threaded hole of the barrel nut in the corner of the crib side and insert the 
fixing bolt, through one of the side support holes in the crib end and into the drilled holes in the ends of 
the crib side using the Allen wrench (A) to screw the fixing bolts into the barrel nuts. 

Slide the mattress base in to the slot on the crib side so that the base is resting on the 4 dowels in the 
crib ends.  Attach the second crib end in the crib side making sure that the base locates into the slot of 
the crib side . TIGHTEN ALL FIXINGS using the Allen wrench. 


DISASSEMBLING THE CRIB 

Using the Allan wrench (A) loosen all the Fixing bolts (C).  Start by removing the top fixing and work 
down.  Store all parts not required safely, out of reach of children. 

Attaching the crib sides 

Summary of Contents for Bedside Crib

Page 1: ...URE REFERENCE You will need these instructions after you have assembled the Bedside Crib Contents 1 Parts List 2 2 Assembly instructions 3 3 Choosing the mattress 4 4 Guide for safe use 4 5 Cleaning instructions 4 6 Maintenance 5 Kiddicare com Club Way Hampton park Hampton Peterborough Cambridgeshire PE7 8JA ...

Page 2: ... Crib check that you have all the parts listed below If any parts are missing please contact your retailer or phone 01952 461148 A B C D E Part Qty Part Qty A Allen wrench 1 D Dowel 4 B Barrel nut 8 E Wood glue 1 C Fixing bolt 8 Part Name Qty Part No 1 Crib Ends 2 2 Crib Sides 2 3 Mattress Base 1 3 2 2 1 3 2 1 ...

Page 3: ... that the slot cut into the side rail is on the bottom and facing the inside of the crib Using a screwdriver align the threaded hole of the barrel nut in the corner of the crib side and insert the fixing bolt through one of the side support holes in the crib end and into the drilled holes in the ends of the crib side using the Allen wrench A to screw the fixing bolts into the barrel nuts Slide the...

Page 4: ... pull itself up the crib cradle shall not be used anymore for this child Babies can suffocate on soft bedding Never use a pillow comforter or padding in the crib To reduce the risk of SIDS paediatricians recommend healthy babies be placed on their backs to sleep unless otherwise advised by your doctor The crib should be placed on a horizontal floor WARNING Do not place the Bedside Crib near heat s...

Page 5: ...ose a risk of strangulation or trap or pinch fingers or flesh Spare or replacement parts can be obtained from Llttle Acorns by phoning 01952 461148 It is recommended that any additional parts are obtained from the manufacturer or distributor WARNING Do not use the Bedside Crib if any part is broken torn or missing Use only spare or replacement parts approved by the manufacturer ...

Reviews: