52
1 x
Back Ground 15.9 x 114.3 x 596.9mm
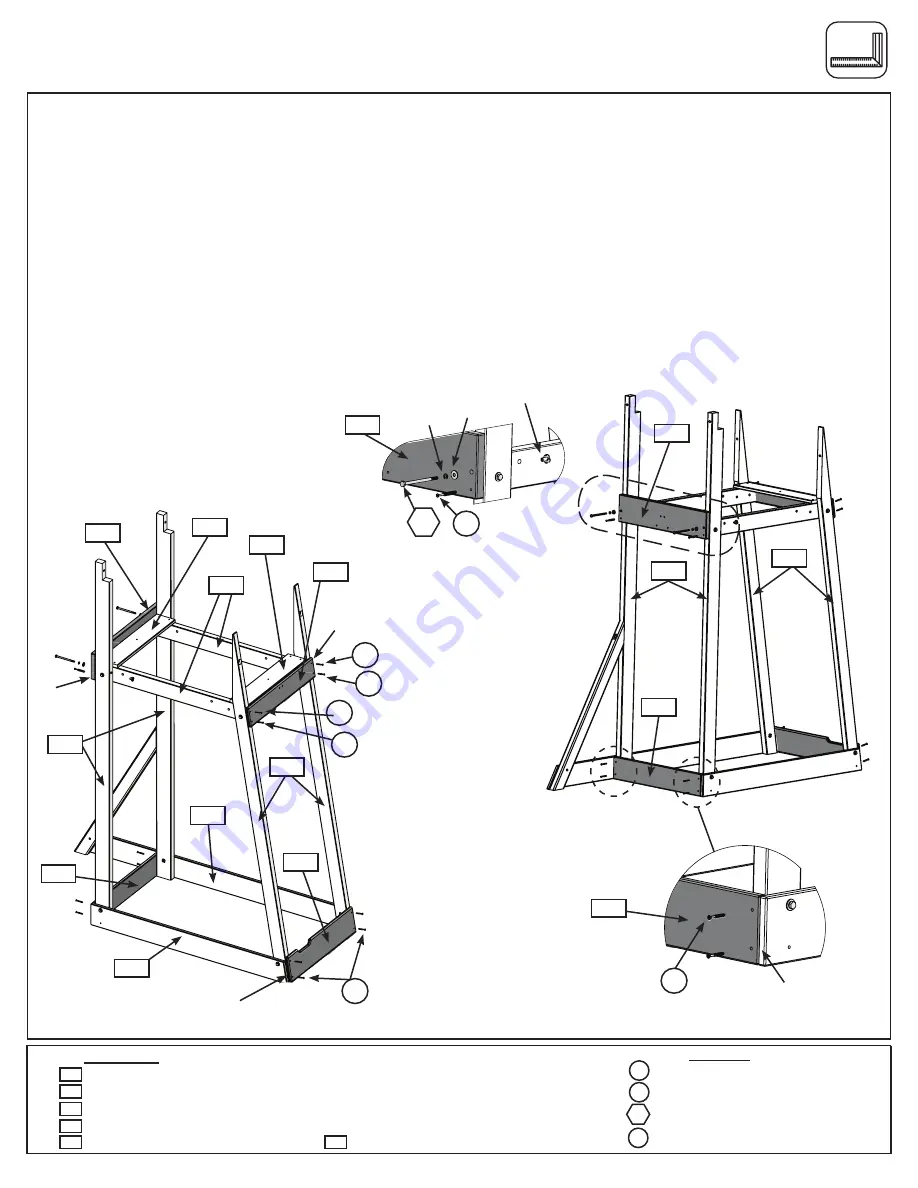
Step 26: Frame Assembly
Wood Parts
Hardware
6021
6019
6013
0600
6034
6042
A:
Make sure that lower frame assemblies are square then attach 1 (6021) Back Ground to the outside of the (6002) Long Posts
using 4 (S11) #8 x 2” Screws (with 3/16” flat washer) making sure that it is flush to the bottom. (Fig. 26.3 & 26.4 )
B
: Making sure that it’s flush to the bottom of the (6020) Short Ground and (6018) Long Ground, attach 1 (6019) Rock Bottom to
the Rock Rails using 4 (S20) #8 x 1-3/8” Wood Screws. Make sure that the notch is at the top, left hand side.(Fig. 26.1 )
C
: Place 1 (6042) Narrow Floor Board on the front end of the (6017) Floor Supports and 1 (6013) Floor Board on far end other as shown
in (fig. 26.1) making sure they are flush with the (6002) Long Posts and (6026) Rock Rails.
Do not attach these boards until Step 27.
D
: Using the (6042) Narrow Floor Board as a guide, place (0600) Bottom trim flush to the top of the front (6042) Narrow Floor
Board and attach to the Rock Rails using 2 (S7) #12 x 2” Pan Screws (with 3/16 flat washer) and 2 (S20) #8 x 1-3/8” Wood
Screws
.
(Fig. 26.1 )
E
: On the back side attach 1 (6034) Floor Back to the (6002) Long Posts using 1 (S7) #12 x 2’ Pan Screw and 1 (H8) ¼ x 4-1/4”
Hex Bolt (with lock washer, flat washer and t-nut) per side. (Fig. 26.2 & 26.3)
4 x
#8 x 2” Screws
S11
S20
S7
H8
6 x
#8 x 1-3/8” Wood Screws
4 x
#12 x 2’ Pan Screw
2 x
¼ x 4-1/4” Hex Bolt
(with lock washer, flat washer and t-nut)
1 x
Rock Bottom 15.9 x 133.4 x 596.9mm
1 x
Floor Board 15.9 x 108 x 533.4mm
1 x
Bottom Trim 15.9 X 101.6 X 596.9mm
1 x
Floor Back 23.8 x 139.7 x 596.9mm 1 x
Narrow Floor Back 15.9 x 98 x 533.4mm
A
B
flush to
bottom
6018
6020
6019
Fig. 26.1
flush
flush
6013
6042
0600
6017
6002
6026
S7
S7
S20
S20
x 4
S20
A
B
x 4
flush to bottom
S11
Fig. 26.4
A
B
Fig. 26.3
6021
6026
6002
6034
A
B
S7
lock
washer
flat
washer
H8
Fig. 26.2
1/4” t-nut
6034
6034
6021
6021
Summary of Contents for F24866
Page 94: ...94 NOTES...


