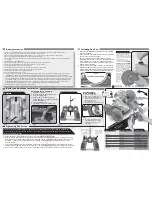
Fig. 1
Fig. 2
Fig. 3
Fig. 4
For Vehicle (Fig. 1 and Fig. 2)
1. Switch OFF the power.
2. Unscrew the screw on the battery cover.
3. Open the battery cover.
4. Install a new 11.1V battery pack with
correct polarities (+/-) as shown inside the
battery compartment.
5. Close the battery cover.
6. Tighten the screw on the battery cover.
For Transmitter
(Fig. 3 and Fig. 4)
1. Switch OFF the power.
2. Slide to open the battery cover.
3. Install 1 new 9V battery with correct
polarity (+/-) as shown inside the
battery compartment.
4. Close the battery cover.
5. Tighten the screw on the battery cover.
1. Attach the Tire Inflation Needle (included) to any standard
air pump (included).
2. Gently insert the Tire Inflation Needle into the Tire Inflation
Point on one of theTires (as shown).
3. Position the cardboard Tire Inflation Gauge Template
(Included with the Vortex) on the tire to ensure that the Tire
is fully inflated to the proper size. Inflate the Tire so that
the outer rim of the Tire touches the inner edge of the Tire
Inflation Gauge Template.
4. Once the Tire is fully inflated, disconnect the Tire Inflation
Needle from the Tire by pulling it out, and remove the Tire
Inflation Gauge Template. Repeat these steps on the other
3 Tires until all 4 Tires are inflated to the exact same size.
The Vortex is designed to operate
properly when the tires are fully
inflated and have the same diameter.
The Tire Inflation Gauge Template is
a handy tool to ensure that your tires
are properly inflated. For the
Squeeler to operate properly, the
Tires need to have
a maximum
diameter of 6.1" (155 MM)
.
Underinflated tires may cause the
body of the Squeeler to contact the
ground and the body may become
scratched or damaged. Overinflated
tires may cause the Squeeler to
bounce uncontrollably or
for the Tires to
physically conflict
with the body.
Inflating the
tires is fun
and easy so
inflate the
tires fully as
specified to
avoid
damage!
6. Insert the antenna into the top of
Transmitter, tighten it by rotating
clockwise (viewing from top of
Transmitter)
spinning
360
˚
spinning
360
˚
1. The 11.1V rechargeable battery pack must be charged before use by utilizing the battery charger which included.
2. Do not overcharge the battery pack. Do not charge for more than 6 hours.
3. Do not charge the battery pack if it shows leakage, corrosion, or has loose or exposed wires or other damage.
4. Do not cover the battery pack with any sort of materials while charging.
5. Do not touch the battery pack when it is hot. Wait until the battery pack cools before installing it in the Vehicle and before
recharging.
7. Do not dismantle the battery or charger, and do not cut the battery or charger cables.
8. The battery pack will be warm after charging, and hot after use in a vehicle.
9. The supply terminals are not to be short-circuited.
10. Rechargeable batteries are to be removed from the toy before being charged.
11. Rechargeable batteries are only to be charged under adult supervision.
12. Battery replacement must be only made by adults.
13. The transformer (charger) is not a toy.
14. Charge only type (1100mAh Max.) rechargeable battery packs. Other types of batteries may burst causing injury to persons
intended to be used for charging 11.1V rechargeable battery pack with capacity 1100mAH Max. It cannot be used for charging
non-rechargeable batteries. Regular examination of battery charger for any damage to their cord, plug, enclosure and other
parts, and that, in the event of such damage, it must not be used with the charger or battery pack charge until such damage
has been repaired. Note that the 9V battery is non-rechargeable and is not to be recharged. Only batteries of the same or
equivalent type as recommended are to be used. It will need replacement when transmission is poor.
15. Exhausted batteries are to be removed from the product.
Vehicle -
Battery Installation
Vehicle
Transmitter
155mm
Once the fully charged Battery Pack is inserted into the Vortex and the Controller is likewise prepared you
are ready to play with your Vortex! Operation of the Vortex is simple as described below. See what sorts of
stunts you can come up with!
1. Ensure that the On / Off Switches on the Vortex and the Controller are in the On position.
2. Move the Left and Right Sticks on the Controller and also twist the Controller to drive the Vortex. Twisting the Controller
will twist the Squeeler under certain circumstances. It is recommended to experiment with this feature and develop your
own stunts. Let the off-road stunt driving begin! The following is a table of Vortex Controller Stick inputs and their
functional results:
3. If your Vortex’s Battery Pack becomes depleted, you will need to recharge your Battery Pack as outlined in the section:
"INSTALLING BATTERIES", sub-section: "Charging the 11.1V Rechargeable Battery Pack and Installing it into the Vortex".
4. When you are finished playing with your Vortex or if the Battery Pack is depleted, turn off the Controller and the Vortex.
Left Stick
Neutral
Up
Down
Up
Down
Up
Down
Neutral
Neutral
Right Stick
Neutral
Up
Down
Down
Up
Neutral
Neutral
Up
Down
Function
Nothing
Forward
Reverse
Spin Right
Spin Left
Forward & Turn Right
Reverse & Turn Left
Forward & Turn Left
Reverse & Turn Right
Battery Precaution
Inflating The Tire
Battery and Antenna Installation
Operating The Vortex
Twist Control
Controls twisting
of Vortex
Right Stick
- Controls Forward /
Reverse speed on
right side wheels of
Vortex
Antenna
ON / OFF Switch
WARNING: DO NOT OVERINFLATE!
Left Stick
- Controls Forward /
Reverse speed on
left side wheels of
Vortex
MOTION CONTROL
TIP!
Inflating Tip


