TOS9213S/ TOS9213AS
5-19
Turning the contact check ON/OFF
When the optional high-voltage scanner TOS9221 (with the contact check function)
is connected to the tester, the continuity between the test leadwire and the DUT can
be tested using the HIGH or LOW terminal prior to application of a test voltage. To
do so, turn on the contact check function.
With the high-voltage scanner TOS9220, a check is conducted on the continuity
through to inside of the scanner only.
To turn the contact check function on/off, use the SHIFT + F5 keys.
Each time the SHIFT + F5 keys are pressed, ON and OFF alternate, regardless of
the location of the cursor. The cursor moves to CONTACT CHECK.
Using the
key, move the cursor to the right of CONTACT CHECK. Settings can
also be made using the rotary knob.
Turn the rotary knob clockwise: ON
Turn the rotary knob counterclockwise: OFF
Press the DCW key to return to the DCW1 screen, and then press the START
switch. READY will then disappear from the LCD, and a contact check will start for
each channel.
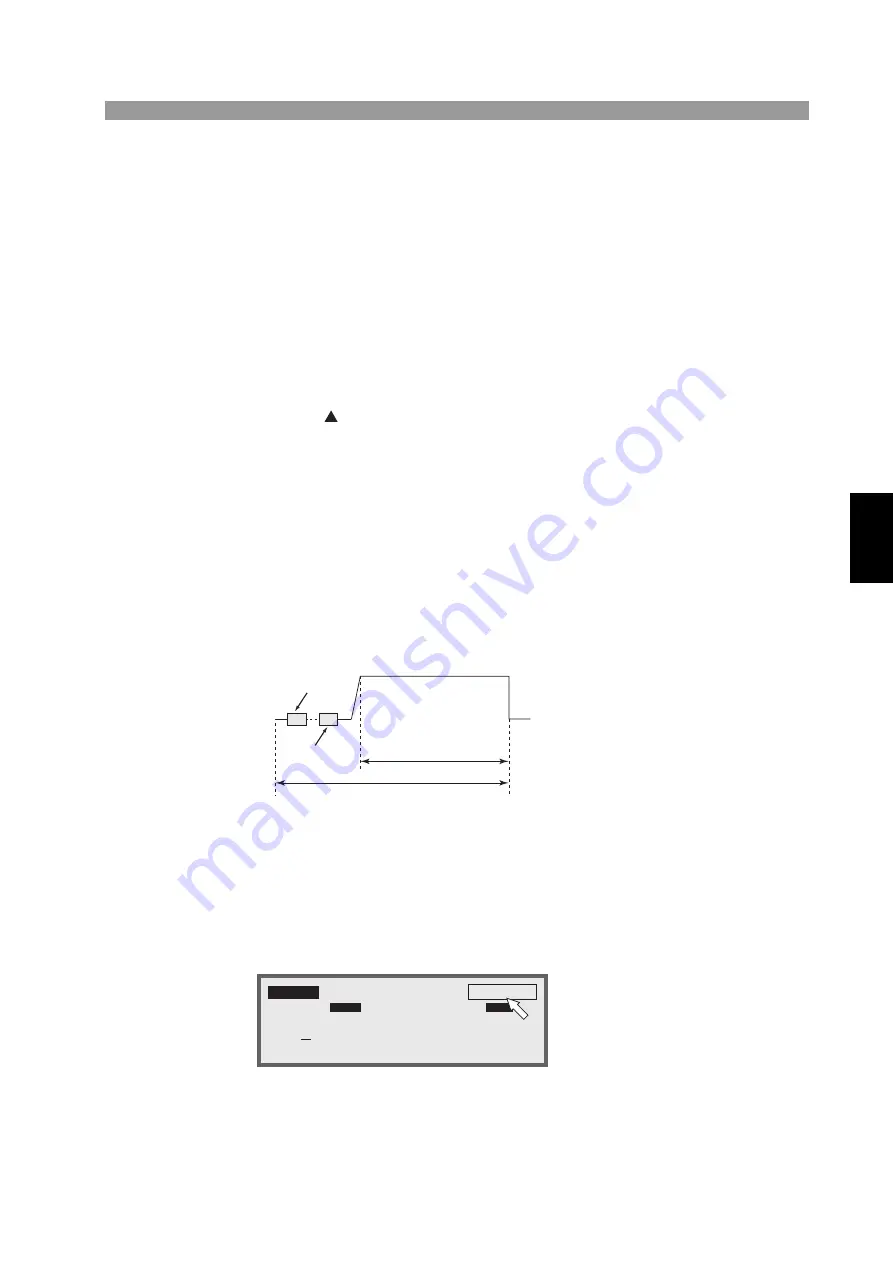
The test starts as soon as the continuity is confirmed.
The test continues until the test time preset on the timer has elapsed or the STOP
switch is pressed.
Fig.5-6
Contact check
The contact check time is calculated using the following formula:
Contact check time = 260 ms + 60 ms x (number of channels set to HIGH or LOW)
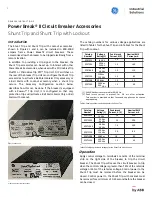
When a continuity error is detected in a contact check, “
→←
FAIL” appears at the
top right of the LCD. On the high-voltage scanner, the LED of the failed channel
lights up in orange.
(CHn)
Contact Check n
(CH1)
Contact Check 1
TEST
HV ON
VOLT LOWER UPPER
TIMER
1.00
k V
5.00
mA
3.0
s
DCW1
DCW1
LOWER
OFF
TIMER
OFF
UPPER
–
→←
FAIL


