Casegoods Assembly Instructions
President/Senator
Proper product installation, in accordance with these instructions, is the responsibility of the installing agent.
If you have any questions concerning these instructions, please call Kimball Office Customer Service.
Part No. 1741567
Revision F-09
Page 1 of 2
Bridge Unit
Tools Required
■
Level
■
Screw Gun
■
Tape Measure
■
Drill Bits
■
#2 Phillips Head Bit
Package Contents
■
4 Flat Brackets
■
44 #10 x 1" Panhead Screws
■
2 Align-n-lock Fasteners
■
4 #8 x
5
⁄
8
" Panhead Screws
■
4 Hinges
Installation
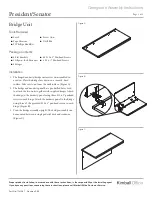
1. The hinged modesty/bridge unit arrives un-assembled in
a carton. Place the bridge face down on a smooth, hard
surface. Take care to not mar the worksurface. (Figure A).
2. The bridge and modesty panel have pre-drilled holes used
to attach the two units together with supplied hinges. Attach
the hinge to the modesty panel using three #10 x 1" panhead
screws in each hinge. Attach the modesty panel to the bridge
using three of the provided #10 x 1" panhead screws in each
hinge. (Figure B).
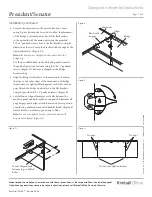
3. Turn the bridge assembly upright. The bridge assembly can
be mounted between a single pedestal desk and credenza.
(Figure C).
Figure A
Figure B
Figure C


