background image

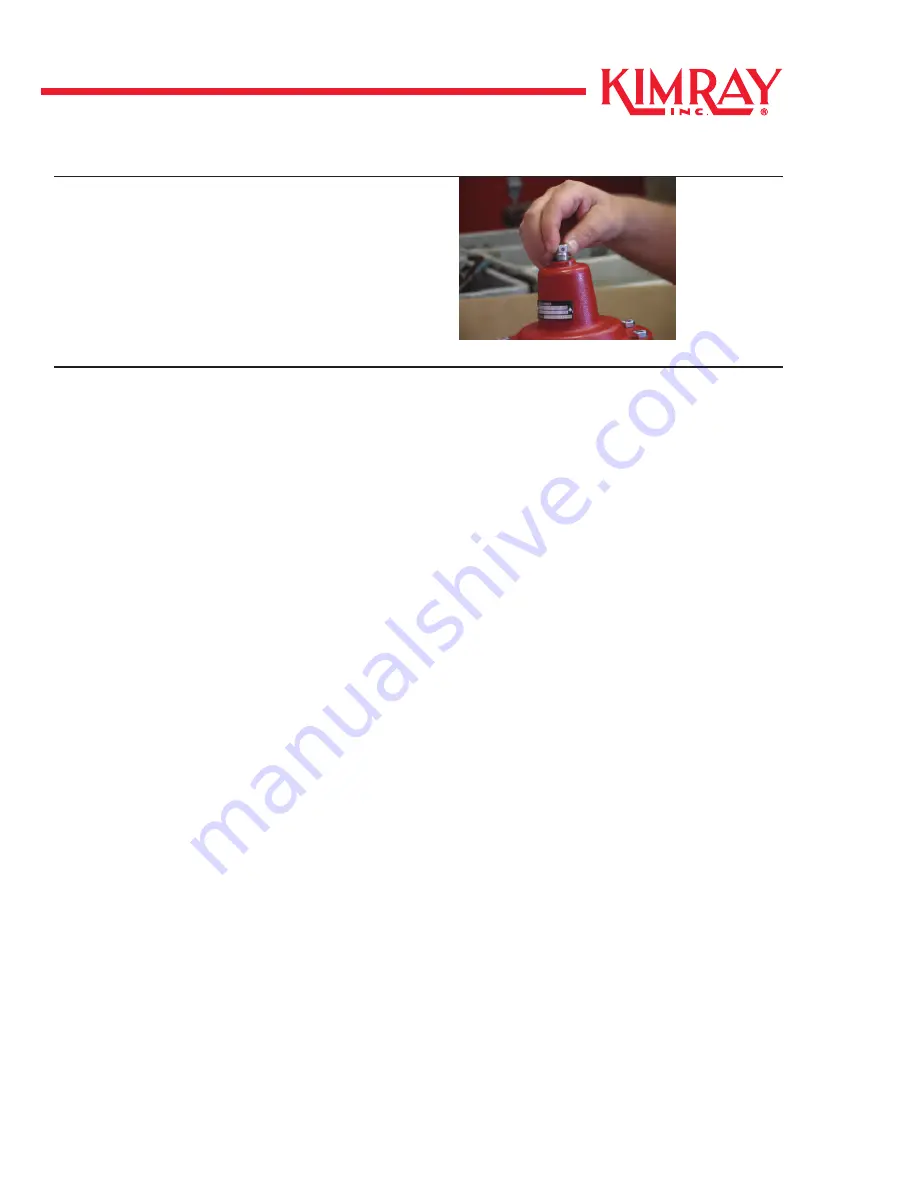
Install breather plug into bonnet and 

wrench tight (Fig. 2.4).

www.kimray.com

Page 16

PISTON BALANCED THROTTLING REPAIR MANUAL
ASSEMBLY PRESSURE OPEN

Figure 2.4

Summary of Contents for 212 SMT PBT

Page 1: ...PISTON BALANCED THROTTLING Repair Manual ...

Page 2: ... 9 Cleaning Inspection 11 Assembly Piston Body 13 Assembly Topworks Pressure Opens 15 Assembly Topworks Pressure Close 17 Testing 19 NOTE We reserve the right to modify or change without prior notice any statement or information contained herein If exact dimensions or specifications are required by the customer certified prints will be furnished for a minimum charge upon request to KIMRAY Inc Copy...

Page 3: ...should be performed on a regular basis Initial interval of 12 months is recommended The maintenance interval may increase or decrease depending on changing application environments WARNING Before performing any service to regulator verify all system pressures are bled off or pilot is properly iso lated and de pressurized GENERAL SPECIFICATIONS Working Pressures 125 300 Hydrostatic Test ANSI B16 37...

Page 4: ... 30 to 500 F 0 to 260 C APPLICATION Crude Oil Gas Production High heat Steam Flood Production Chemicals corrosion inhibitors Amine Sweetener Systems Gasoline Diesel Fuel Oil Systems FLUID GAS Crude Oil Gas Production H2S Steam Petroleum fluids Sea Water TEMPERATURE 15 to 300 F 26 to 149 C APPLICATION Crude Oil Gas Production w H2S C02 FLUID GAS Crude Oil Gas H2S C02 Sea Water TEMPERATURE Buna N 40...

Page 5: ...ve the potential to loosen in transit This is recommended to ensure your safety and proper valve function Kimray assembly torque method at right Four Bolt Four Bolt 1 1 2 2 3 3 4 4 Six Bolt Six Bolt 1 1 2 2 3 3 4 4 5 5 6 6 Eight Bolt Eight Bolt 1 1 2 2 3 3 4 4 5 5 8 8 6 6 7 7 Sixteen Bolt Sixteen Bolt 1 1 2 2 9 9 14 14 5 5 16 16 8 8 11 11 4 4 13 13 10 10 6 6 15 15 7 7 12 12 3 3 ...

Page 6: ...www kimray com Page 4 PISTON BALANCED THROTTLING REPAIR MANUAL NOTES ...

Page 7: ...the spring and set aside Fig 1 3 STEP 2 Lower Housing Wrench loose the bolts attaching the yoke to the body Fig 2 0 Remove the entire assembly from the valve body Fig 2 1 Using a back up on the ratio plug nut wrench loose the nut holding the dia phragm plate in place Fig 2 2 Remove the diaphragm plate Fig 2 3 Remove the diaphragm and discard Fig 2 4 Remove the lower diaphragm plate Fig 2 5 Figure ...

Page 8: ... PISTON BALANCED THROTTLING REPAIR MANUAL DISASSEMBLY PRESSURE OPEN Remove the lower housing from the piston assembly Fig 2 6 Remove the gasket from the bottom of the lower housing and discard Fig 2 7 Figure 2 6 Figure 2 7 ...

Page 9: ...reather plug and set aside Fig 1 4 Wrench loose the nuts and bolts attach ing the bonnet to the lower housing and remove Fig 1 5 Remove the bonnet and set aside for cleaning and inspection Fig 1 6 Remove the diaphragm Fig 1 7 Remove the diaphragm plate Fig 1 8 www kimray com Page 7 PISTON BALANCED THROTTLING REPAIR MANUAL DISASSEMBLY PRESSURE CLOSE Figure 1 0 Figure 1 1 Figure 1 2 Figure 1 3 Figur...

Page 10: ...ch the lower housing to the body Fig 2 0 Remove bolts and set aside for inspection and cleaning Fig 2 1 Remove lower housing from the body Fig 2 2 Remove housing gasket and discard Fig 2 3 Remove piston assembly from the body Fig 2 4 www kimray com Page 8 PISTON BALANCED THROTTLING REPAIR MANUAL DISASSEMBLY PRESSURE OPEN Figure 1 9 Figure 1 10 Figure 2 0 Figure 2 1 Figure 2 2 Figure 2 3 Figure 2 4...

Page 11: ...ove the seal retainer Fig 3 4 Remove the first back up and discard Fig 3 5 Remove the quad ring and discard Fig 3 6 Remove the second back up and discard Fig 3 7 Remove the stem from the cylinder Fig 3 8 Remove the o ring from the cylinder and discard Fig 3 9 www kimray com Page 9 PISTON BALANCED THROTTLING REPAIR MANUAL PISTON BODY Figure 3 0 Figure 3 1 Figure 3 2 Figure 3 3 Figure 3 4 Figure 3 5...

Page 12: ...s point Fig 4 0 4 1 See inspection and cleaning section for alternative to seat removal Remove the seat and set aside for clean ing and inspection Fig 4 2 Remove the gasket from the seat and dis card Fig 4 3 Removable Seat Tools 272SW 2 273SW 3 274SW 4 275SW 6 www kimray com Page 10 PISTON BALANCED THROTTLING REPAIR MANUAL PISTON BODY Figure 3 10 Figure 3 11 Figure 4 0 Figure 4 1 Figure 4 2 Figure...

Page 13: ...leaning tool can be made from a 3 ratio plug Fig 1 1 a 2 ratio plug Fig 1 2 and glue on sandpaper Fig 1 3 At tach the seat cleaning tool to a speed wrench make flat contact and spin the speed wrench to dress the seat inspect the seat for scratches and repeat the process as needed In the process of cleaning the valve there are a few essential areas that must be addressed 1 All thread surfaces 2 Ens...

Page 14: ...ded A Seat surface B Cylinder C Piston D Ratio Plug E Stem Emery cloth can be used to repair light scratches F Removable Seat G Housing gasket surface www kimray com Page 12 PISTON BALANCED THROTTLING REPAIR MANUAL CLEANING INSPECTION Figure A Figure B Figure C Figure D Figure E Figure F Figure G ...

Page 15: ...ig 1 4 Install the seal retainer onto the flat of the stem Fig 1 5 Install the new back up onto the piston Fig 1 6 Follow with the new o ring Fig 1 7 Install the second back up over the o ring Fig 1 8 Install the seal retainer on the stem flat Fig 1 9 www kimray com Page 13 PISTON BALANCED THROTTLING REPAIR MANUAL ASSEMBLY PISTON BODY Figure 1 0 Figure 1 1 Figure 1 2 Figure 1 3 Figure 1 4 Figure 1...

Page 16: ...1 14 STEP 2 BODY Install the new gasket onto the seat Fig 2 0 Thread the seat into the valve body and tighten using a seat wrench Fig 2 1 Install the piston assembly into the body Fig 2 2 Install new gasket onto piston assembly Fig 2 3 Note It is reccomended to apply a small amount grease to both sides of the gasket www kimray com Page 14 PISTON BALANCED THROTTLING REPAIR MANUAL ASSEMBLY PISTON BO...

Page 17: ... upper diaphragm plate onto the diaphragm Fig 1 4 Install spring onto the spring plate Fig 1 5 STEP 2 BONNET Place the bonnet onto the lower housing Fig 2 0 Install the nuts and bolts attaching the bonnet to the lower body Fig 2 1 2 2 Wrench the nuts and bolts tight Fig 2 3 www kimray com Page 15 PISTON BALANCED THROTTLING REPAIR MANUAL ASSEMBLY PRESSURE OPEN Figure 1 0 Figure 1 1 Figure 1 2 Figur...

Page 18: ...Install breather plug into bonnet and wrench tight Fig 2 4 www kimray com Page 16 PISTON BALANCED THROTTLING REPAIR MANUAL ASSEMBLY PRESSURE OPEN Figure 2 4 ...

Page 19: ... the stem Fig 2 0 Use the appropriate size spring tool to compress the spring Fig 2 1 Install the diaphragm plate and start it on the threads Fig 2 2 Apply a small amount thread lock into the plate tap Fig 2 3 Remove the spring compression tool Fig 2 4 Wrench tight the diaphragm plate Fig 2 5 www kimray com Page 17 PISTON BALANCED THROTTLING REPAIR MANUAL ASSEMBLY PRESSURE CLOSE Figure 1 0 Figure ...

Page 20: ...stall the new gasket onto the indicator housing Fig 2 10 Install the spring onto the indicator stem Fig 2 11 Install the indicator stem into the acrylic housing Fig 2 12 Install the travel indicator assembly into the bonnet Fig 2 13 www kimray com Page 18 PISTON BALANCED THROTTLING REPAIR MANUAL ASSEMBLY PRESSURE CLOSE Figure 2 6 Figure 2 7 Figure 2 8 Figure 2 9 Figure 2 10 Figure 2 11 Figure 2 12...

Page 21: ...apply upstream pressure Fig 2 and verify that no pres sure is recorded downstream Fig 3 With actuator pressure applied the valve should open and the upstream pressure should register downstream Fig 4 until actua tor pressure is removed and the valve closes www kimray com Page 19 PISTON BALANCED THROTTLING REPAIR MANUAL TESTING Figure 2 Figure 4 Figure 3 Figure 1 ...

Page 22: ...he diaphragm Fig 5 PRESSURE CLOSE With zero actuator pressure involved apply upstream pressure Fig 6 and verify that pressure is recorded downstream Fig 7 With actuator pressure applied the valve should close and the upstream pressure should cease to register downstream Fig 8 until actuator pressure is removed and the valve closes Figure 6 Figure 8 Figure 7 Figure 5 ...

Page 23: ...www kimray com PISTON BALANCED THROTTLING REPAIR MANUAL NOTES ...

Page 24: ... KimrayInc Kimray Inc 09 19 Kimray com ...

Reviews: