background image

WARRANTY INFORMATION

2-YEAR 

LIMITED WARRANTY

FOR THIS 24” DUAL ACTION HEDGE TRIMMER  

KING CANADA TOOLS

OFFERS A 2-YEAR LIMITED WARRANTY

FOR NON-COMMERCIAL USE.

PROOF OF PURCHASE

Please keep your dated proof of purchase for warranty and servicing purposes.

REPLACEMENT PARTS

Replacement parts for this product are available at our authorized King Canada service centers across Canada.

LIMITED TOOL WARRANTY

King Canada makes every effort to ensure that this product meets high quality and durability standards. King Canada warrants to the
original retail consumer a 2-year limited warranty as of the date the product was purchased at retail and that each product is free from
defects in materials. Warranty does not apply to defects due directly or indirectly to misuse, abuse, normal wear and tear, negligence
or accidents, repairs done by an unauthorized service center, alterations and lack of maintenance. King Canada shall in no event be
liable for death, injuries to persons or property or for incidental, special or consequential damages arising from the use of our products. 

To take advantage of this limited warranty, return the product at your expense together with your dated proof of purshase to an
authorized King Canada service center. Contact your retailer or visit our web site at www.kingcanada.com for an updated listing of our
authorized service centers. In cooperation with our authorized serviced center, King Canada will either repair or replace the product if
any part or parts covered under this warranty which examination proves to be defective in workmanship or material during the
warranty period.

NOTE TO USER

This instruction manual is meant to serve as a guide only. Specifications and references are subject to change without prior notice.

KING CANADA INC. DORVAL, QUÉBEC, CANADA H9P 2Y4

www.kingcanada.com

Summary of Contents for 8524TR

Page 1: ...KING CANADA 24 DUAL ACTION HEDGE TRIMMER INSTRUCTION MANUAL COPYRIGHT 2010 ALL RIGHTS RESERVED BY KING CANADA TOOLS INC MODEL 8524TR ...

Page 2: ...ccidents repairs done by an unauthorized service center alterations and lack of maintenance King Canada shall in no event be liable for death injuries to persons or property or for incidental special or consequential damages arising from the use of our products To take advantage of this limited warranty return the product at your expense together with your dated proof of purshase to an authorized ...

Page 3: ...rther use of the tool a guard or other parts that are damaged should be carefully checked to ensure that they will operate properly and perform their intended function Check for alignment of moving parts binding of moving parts breakage of parts mounting and any other conditions that may affect its operation A guard or other parts that are damaged should be properly repaired or replaced 17 NEVER L...

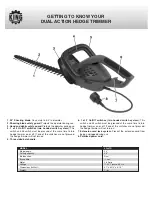
Page 4: ...tches are not pressed the hedge trimmer will not turn on 5 Three sided bale handle 6 1 of 2 On Off switches two handed switch system This switch and 4 switch must be pressed at the same time to turn hedge trimmer on or off If one of the switches are not pressed the hedge trimmer will not turn on 7 Extension cord lock system Prevent the extension cord from being unplugged during use 8 Polarized pow...

Page 5: ...e proper outlet Do not modify the tool plug or extension cord in any way USE PROPER EXTENSION CORD Make sure the extension cord is in good condition When using an extension cord be sure to use one heavy enough to carry the current your tool will draw An undersized cord will cause a drop in line voltage resulting in loss of power and overheating See Fig 2 for table showing correct size to use depen...

Page 6: ...edge being trimmed If you cut or damage the extension cord unplug it immediately from the electrical outlet before inspecting or repairing extension cord Working position Maintain proper footing and balance at all times do not overreach Always wear safety glasses and gloves when trimming Hold the tool firmly with both hands depress both triggers to turn trimmer On as shown in Fig 5 Make sure you h...

Page 7: ...n the blade There is no need to remove this nick as long as it does not interfere with the movement of the blade If it does interfere unplug unit and use a fine toothed file or sharpening stone to remove the nick Slide the file or stone down the length of each blade until you reach the pointed end Hold your fine toothed file or sharpening stone in such a way to maintain the factory ground angle on...

Reviews: