PARTS DIAGRAM & PARTS LISTS
Refer to the Parts section of the King Canada web site for the most updated parts diagram
and parts list.
CHARGING
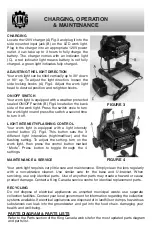
Locate the 120V charger (A) Fig.3 and plug it into the
side mounted input jack (B) on the LED work light.
Plug in the charger into an appropriate 120V power
outlet, it can take up to 3 hours to fully charge the
battery. The charger comes with an indicator light
(C), a red indicator light means battery is not fully
charged, a green light indicates fully charged.
ADJUSTING THE LIGHT DIRECTION
Your work light can be tilted vertically up to 30° down
or 90° up. To adjust the light direction, loosen the
side locking knobs (A) Fig.4. Adjust the work light
head to desired position, and retighten knobs.
ON/OFF SWITCH
Your work light is equipped with a weather protected
sealed ON/OFF switch (B) Fig.4 located on the back
side of the work light. Press the switch once to turn
the work light on and press the switch a second time
to turn it off.
LIGHT INTENSITY/FLASHING CONTROL
Your work light is equipped with a light intensity
control button (C) Fig.4. This button sets the 3
different light intensities (high/med/low) and the
flashing setting. To adjust the setting, turn on the
work light, then press the control button marked
“Mode”. Press button to toggle through the 4
settings.
MAINTENANCE & SERVICE
Your work light requires very little care and maintenance. Simply clean the lens regularly
with a non-abrasive cleaner. Use similar care for the base and U-bracket. When
servicing, use only identical parts. Use of any other parts may create a hazard or cause
product damage. Contact a King Canada service centre for identical replacement parts.
RECYCLING
Do not dispose of electrical appliances as unsorted municipal waste, use separate
collection facilities. Contact your local government for information regarding the collection
systems available. If electrical appliances are disposed of in landfills or dumps, hazardous
substances can leak into the groundwater and get into the food chain, damaging your
health and well-being.
CHARGING, OPERATION
& MAINTENANCE
FIGURE 3
FIGURE 4


