Page 23
IMPORTANT!
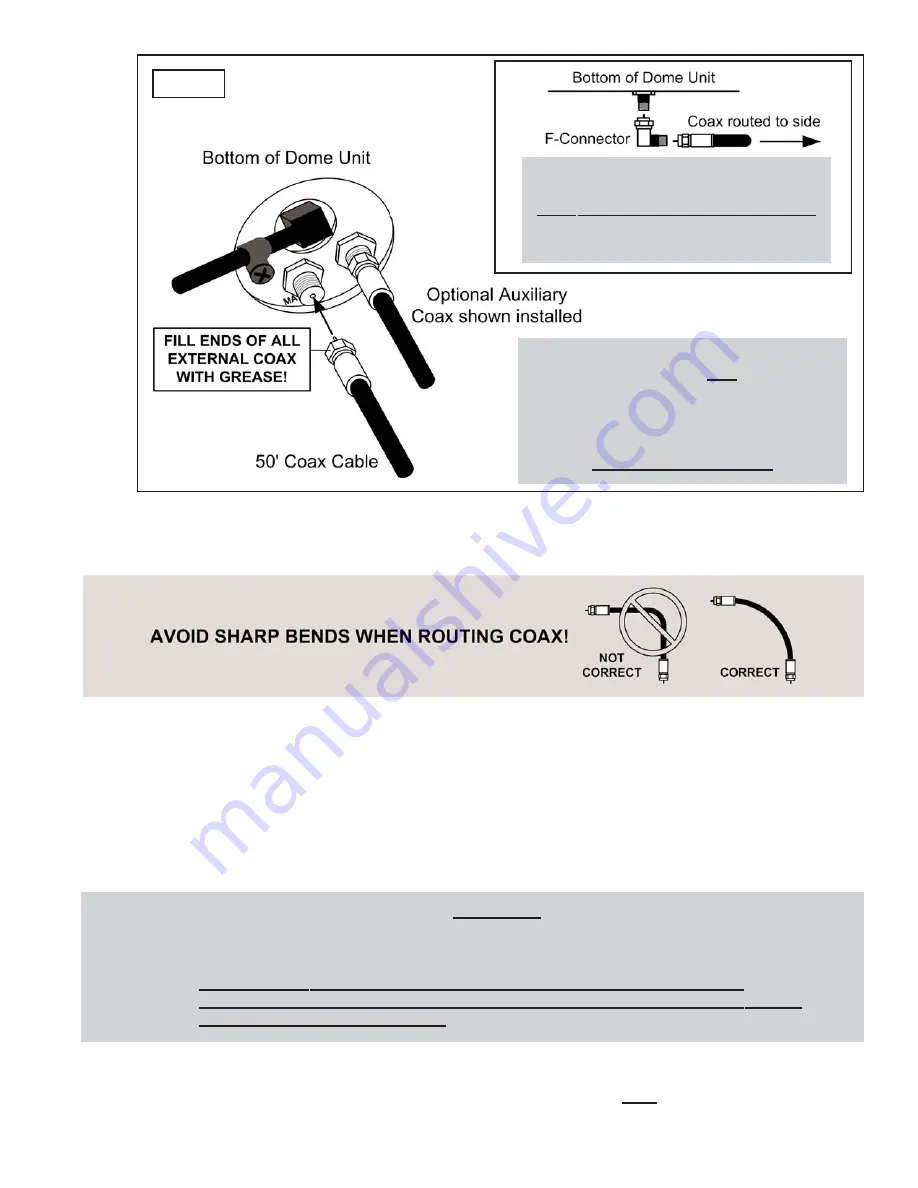
You must fill the ends of ALL external coax
with the supplied dielectric grease.
Failure to do so will void warranty.
Coax connections should be snug.
DO NOT OVER TIGHTEN!
IMPORTANT!
Use right angle F-connector
ONLY IF ROUTING COAX TO THE SIDE
with a direct to deck installation method.
Fill ends of F-connectors with grease.
Fig. 14
3. Plug external wiring harness into matching connector from dome unit. You must tighten
the connection until you feel a click.
4. Route wiring as necessary and place the dome unit in its mounting location.
5. Use the four mounting holes inside the base to install the dome unit to the mounting
pedestal or the vessel surface (fasteners go from inside of base to outside).
6. Secure wiring every 12-18 inches and seal all openings where the wiring enters the
vessel so they are entirely waterproof
(inside and outside of the holes)
.
7. Replace dome cover on base and align holes in dome cover with holes in base. Attach
dome cover with dome cover screws saved earlier. Tighten
ALL
screws securely.
IMPORTANT! When re-installing the dome cover, CAREFULLY lower it onto the base. Do not allow it to
catch on internal components or wiring.
The dome cover screws have a pre-applied locking compound on them.
DO NOT APPLY ANY ADDITIONAL LOCKING COMPOUND TO THE SCREWS.
APPLYING ADDITIONAL COMPOUND WILL VOID THE WARRANTY AND MAY CAUSE
CRACKING IN THE DOME COVER.
Summary of Contents for 1200-KU
Page 2: ......
Page 13: ...This page intentionally left blank Page 11 ...
Page 21: ...Page 19 ELEVATION ZONE MAP ...
Page 27: ...This page intentionally left blank Page 25 ...
Page 34: ...Page 32 Notes ...
Page 35: ......


