


5
EN
3.
Installation
1.1 -
Operating limits
IMPORTANT!
- When fitting accessory equipment to the boom, ob
-
serve a maximum length of 5m for OPEN 6000 and 3.5 m for OPEN
4000.
1.2 -
Changing the boom from right
to left
By right-hand boom gate we mean with the cubicle positioned on the
right looking from behind the gate. By left-hand boom gate we mean
with the cubicle positioned on the left looking from behind the gate.
The boom is supplied as a right hand unit.
If you need to change it to the left proceed as follows:
01.
Disengage the balancing spring (step 1 -
fig. 4
).
02.
Hook the balancing spring onto the bottom left (step 2
fig. 4
).
03.
Reverse the slowing down limit switch connector and that of the
motor on the control unit (see enclosed controller instructions).
04.
Tighten the bar connecting flange in the functioning position.
05.
Adjust by hand the two slowing down eccentrics (see par. 1.6).
2
1
4
1.3 -
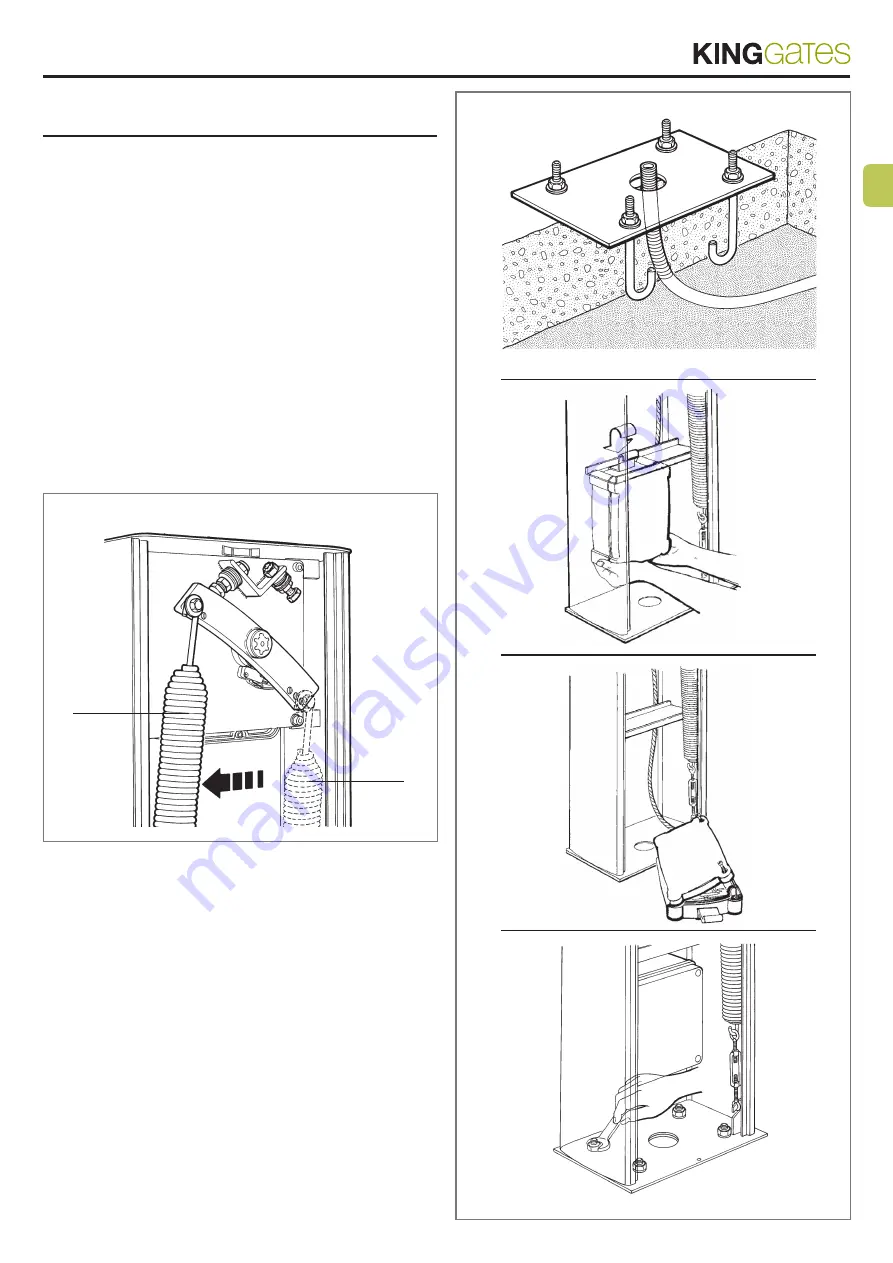
Installing the boom gate
01.
Bury the supplied base (
fig. 5
) in a concrete foundation. This
anchorage o base must be flush with the foundation and peffectly
level; also make one or more, passageways for electric cables. Then
proceed as shown in
fig. 7
and
8
.
02.
Stand the cubicle on the already installed base and anchor it with
the screws and washers provided (
fig. 8
).
03.
Mount the bar using the connection provided and lock it with the
4 screws (
fig. 9
). Cut any excess bar off.
The vertical and horizontal precision of the bar when it is open or
closed can be adjusted via the shock absorbers with stop (see par.
1.6).
Nota -
Standard bars guarantee a net opening of 4 meters and 6
metres; we recommend using a support for the bar, especially when
the distance is greater than 4 metres.
5
6
7
8
Summary of Contents for OPEN 6000
Page 2: ......


