37
EN
21
N
O
10.
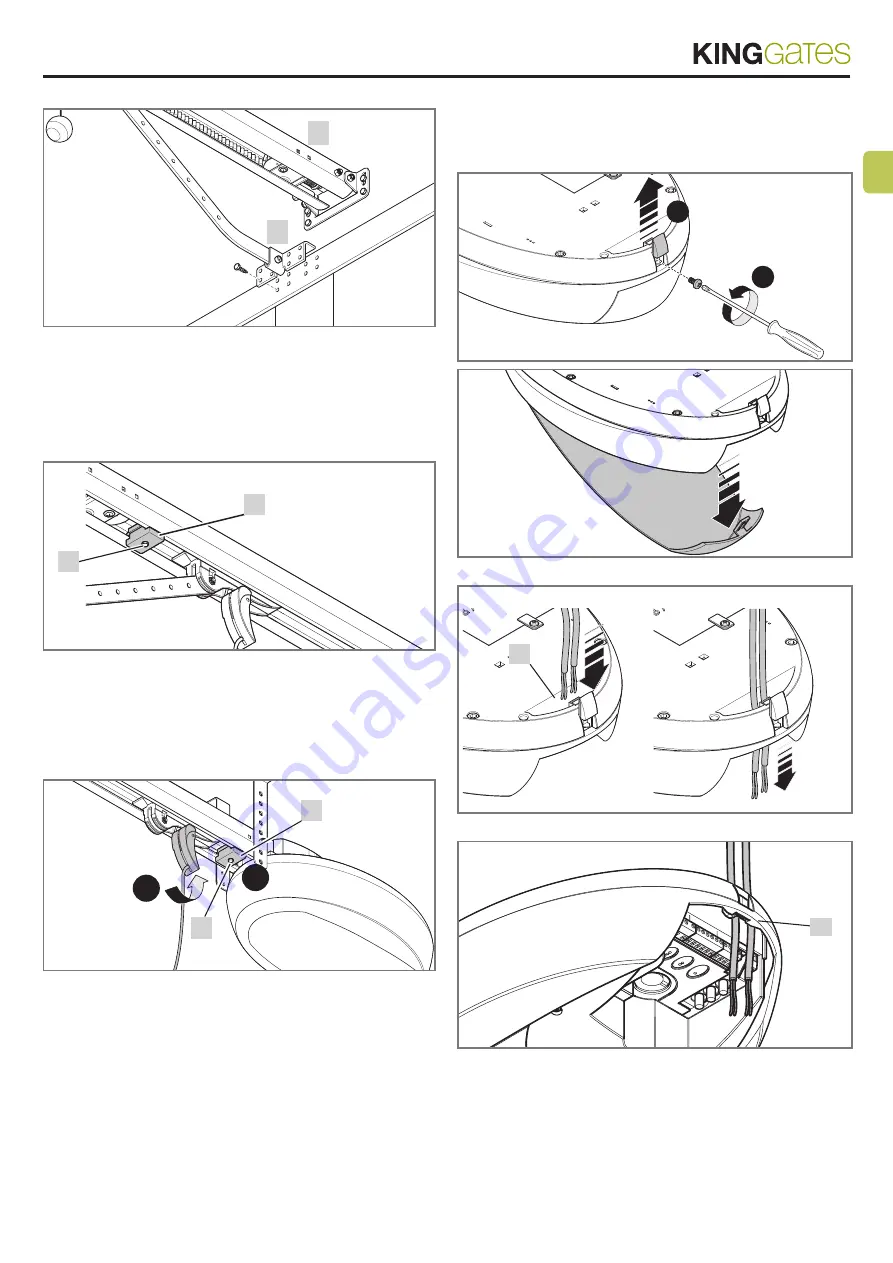
Then secure the leaf connecting bracket [N] with rivets or screws
(
fig. 21
). Use screws or rivets suited to the leaf material, and ensure
that they are able to withstand the maximum force required for leaf
opening and closing.
11.
Loosen the screws of the two mechanical stops, then move the
front mechanical stop [P] in front of the carriage (
fig. 22
).
22
Q
P
12.
Push the carriage in the closing direction and, on reaching the
position, tighten the screw [Q] fully down.
13.
Manually open the door to the required opening position, move
the rear mechanical stop [R] next to the carriage (
fig. 23
) and tighten
the screw [Q] fully down.
Important!
- Make sure the release cord
can be pulled below a height of 1.8 m. Secure the motor again.
1
2
23
Q
R
3.3 -
Installation of other devices
If other devices are needed, install them following the directions pro-
vided in the corresponding instructions. Check the devices which
can be connected to ROLLS in
fig. 1
and in section 3.5 (“Description
of electrical connections”). -
3.4 -
Electrical connections
01.
Open the cover by removing the cover plastic [1] and unscrewing
the screw [2]
(fig.24)
. Slide the cover out (
fig. 25
).
1
2
24
25
02.
Feed the cables through the hole [S] (
fig. 26
).
26
S
03.
The cables must then be connected (
fig. 27
).
27
S
04.
Refer to
fig. 28
and the connection descriptions in table 5 when
making the connections:
- if using the flashing light aerial, remove the wire clip (connected to
terminal 14 as standard) and connect the RG58 shielded cable.
05.
Once you have connected up all the cables, secure them using
cable clips.
06.
To close the cover, reinsert it in place, tighten the screw and
replace the plastic cover.


