3
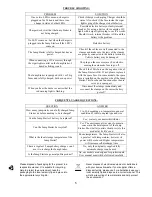
CAUTION: once the vehicle is started,
disconnect clamps IMMEDIATELY from battery, starting with the
Negative (black) clamp.
Danger of explosion if not immediately removed.
Charging times depending on model and charger:
Models with1 battery and automatic charger LESA5, 0.6A
28H maxi.
Models with1 battery and automatic charger LESA4, 1.2A
16H maxi.
Models with1 battery and automatic charger LESA6, 1.5A
12H maxi.
Models with 2 batteries and automatic charger LESA6, 1.5A
22H maxi.
Models with 2 batteries and automatic charger LESA8, 4A
18H maxi.
Models with 2 batteries and automatic charger LESA9 24V, 2A
18H maxi.
When the red light of the charger is extinguished or becomes green (LESA5, LESA4, LESA6), or when all LED’s are
flashing (LESA8 or LESA9) the battery is fully charged.
These data are non contractual and can be subjected to changes, for more information please take contact with your
retailer.
When the Jump Starter is not in use, always keep it connected to the supplied automatic charger!
6.
OPERATING INSTRUCTIONS
USED AS AN EMERGENCY JUMP STARTER:
1.
Always wear safety equipment before using this product. Safety glasses and gloves are imperative.
2.
Make sure the area is well ventilated and that the terminals clean.
3.
Read and understand the vehicle and battery manufacturer’s precautions before jump starting.
4.
If you have a 12/24V unit, make sure that the voltage selector switch is on “OFF” or that the voltage connector plug
is unplugged (depending on model). If you have a 12V or 24V unit with ON\OFF switch, make sure it is turned OFF.
5.
Connect the positive (red) clamp to the positive terminal (make sure the positive terminal is not grounded to the
chassis).
6.
Connect the negative (black) clamp to the negative terminal of the engine - to the frame of the vehicle (ground).
Make sure cables are not in the path of moving belts or fans, etc.
7.
If you have a 12/24V unit, choose the voltage with the voltage selector switch or with the voltage connector plug
12V or 24V. If you have a 12V or 24V unit with ON\OFF switch, turn it ON. Stay clear of battery and Jump Starter
while jump-starting and make sure that it cannot fall in the engine of the vehicle.
8.
Once started,
first
disconnect the black (negative) clamp,
than put the voltage selector switch on OFF or unplug the
voltage connecter plug from the (12/24V unit). Or turn the switch on the OFF position.
9.
Then disconnect the red (positive) clamp.
10.Store immediately both clamps in their respective placing.
11.Put the Jump Starter in charge with the supplied automatic charger.
IMPORTANT: Should the vehicle refuse to start within 5 seconds, have the Jump Starter cool down for at least 5
minutes before attempting to start the vehicle again. Otherwise severe damages to the unit or to yourself may
occur. (Start attempts always need to be very short).
NOTE: A defective battery may refuse to accept the current from the Jump Starter. This may be the reason why the
vehicle refuses to start. In this case please consult a professional technician and do not attempt to jump start your car
again.
Summary of Contents for Mighty Seven FA-1214
Page 7: ...6 Notes ...


