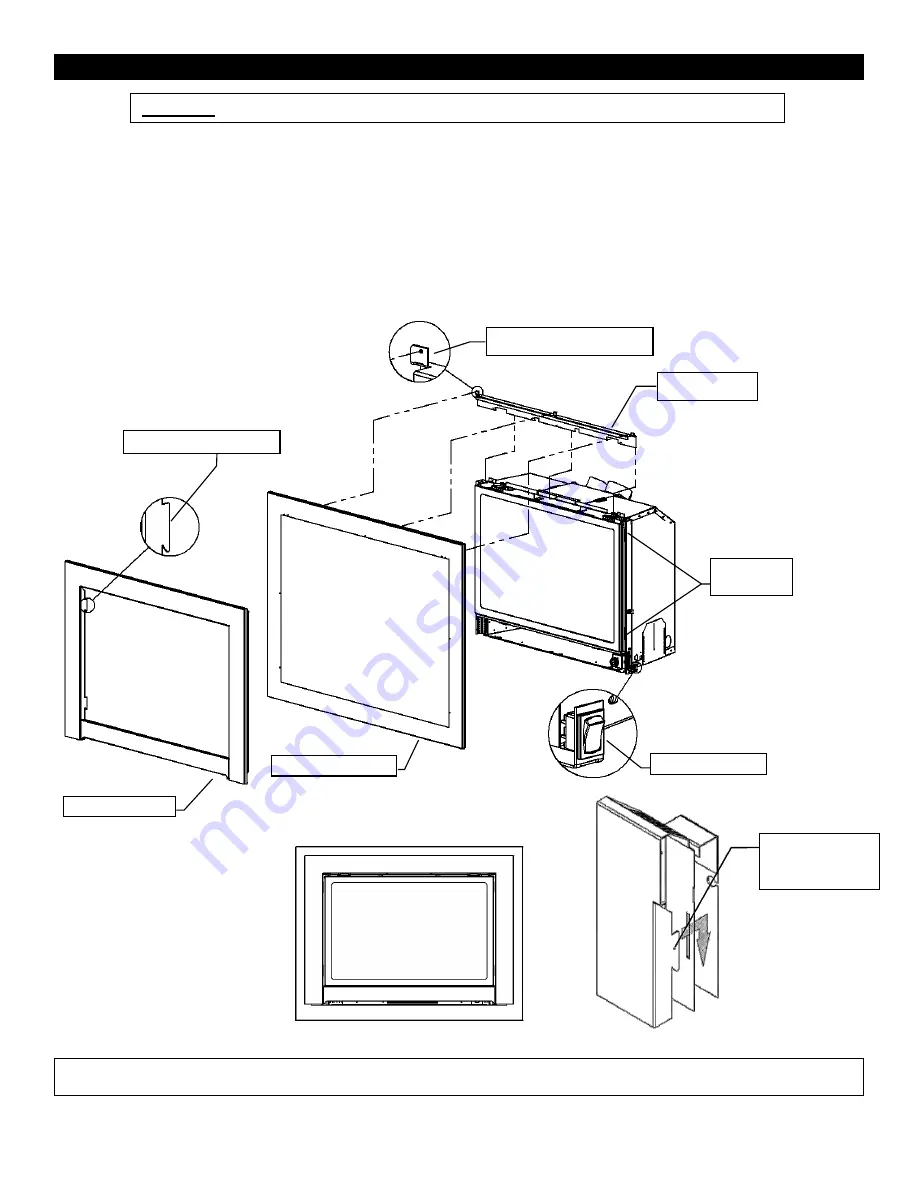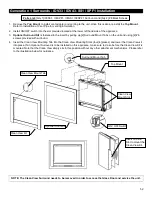
Generation 1 Surrounds - IDV33 / IDV43 -SS1 / SPF1 Installation
1. Remove the
Top Mount
to install vent adapter and venting to the unit. Once this is done, reinstall the
Top Mount
.
Refer to Installation of Vent Pipe for venting information.
2. Install ON/OFF switch into the slot provided located at the lower left hand side of the appliance.
3.
Optional Surround Kit
is fastened to the insert by pulling up [2] Surround Mount Tabs on the unit and using [2] #6
screws provided with surround.
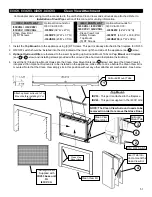
4. Insert the Clean View Mounting Tab into the Clean View Mounting Slots (four [4] places) and lower the Clean View kit
into place. If an Optional Surround is to be installed on this appliance, make sure to do so before the Clean View Kit is
mounted. Note that the Clean View simply sits in this position without any other attachment mechanisms. Please refer
to the illustration below for guidance.
NOTE: The Clean View Surround needs to be removed in order to access the Glass Door and service the unit.
Parts List:
[Qty 1] I33SS1, I33SPF1, I36SS1, I36SPF1 Surround, and [Qty 2] #6 Black Screws
Top Mount
Surround Mount Tab
Clean View Mount Tab
Clean View Kit
Optional Surround
Insert Tab into
Slot to mount the
Clean View Kit.
Clean View
Mount Slot
ON / OFF Switch
52
Summary of Contents for Marquis IDV26
Page 15: ...I26SU UNIVERSAL SURROUND I26CVPF1 or I26CVPF3 I26CVPF2 or I26CVPF4 BOTTOM OF UNIT 15 ...
Page 45: ...I43CV I43CV3 I43US4736 Flat Custom Surround TO BE CUSTOM CUT AND BENT I43CV I43CV3 7 1 4 45 ...
Page 89: ...Gas Conversion for Modulator PART C 89 ...
Page 100: ...Proflame 2 Remote Control 100 ...
Page 102: ...102 ...


