


Leveling Instructions
When installing insert it may be necessary to support back of unit.
IDV26:
There are two leveling legs at the back of the appliance. Remove screws and set to proper height. Replace screws.
IDV33 and IDV43:
There are two leveling legs at the front (for Flush Look installations) and two leveling plates at the
back sides of the appliance. Remove screws and set to proper height. Replace screws.
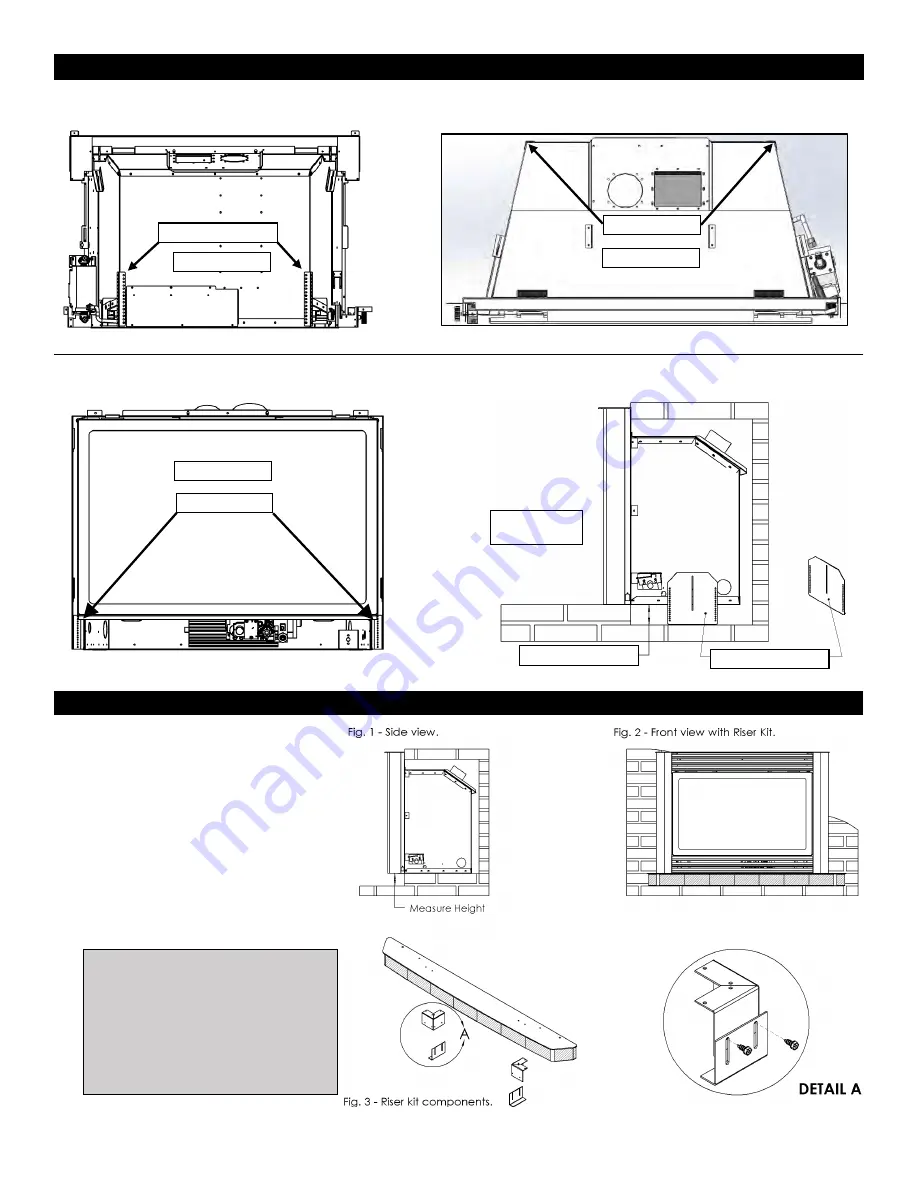
Riser Kit Installation Instructions – Model No.: I33R40 / I33R44
1. Measure height required to make
flush with base of unit (Fig. 1). If
measurement is equal to the height
of riser kit (2.5”), skip to Step 3. No
adjustment will be required.
2. Adjust leveling legs to required
height. See Fig. 3 (Detail A).
3. Locate mounting holes punched
into base right and left of unit. Place
riser assembly under front of insert
and fasten to base with supplied
screws, Fig. 2.
⚠
WARNING: Failure to
position the parts in accordance
with these diagrams or failure to
use only parts specifically
approved with this appliance
may result in property damage
or personal injury.
Front View
Back View
Top View
Right Side
View
Measure Height
Leveling Plate
Leveling Legs
Leveling Legs
Leveling Legs
70
Summary of Contents for Marquis IDV26
Page 15: ...I26SU UNIVERSAL SURROUND I26CVPF1 or I26CVPF3 I26CVPF2 or I26CVPF4 BOTTOM OF UNIT 15 ...
Page 45: ...I43CV I43CV3 I43US4736 Flat Custom Surround TO BE CUSTOM CUT AND BENT I43CV I43CV3 7 1 4 45 ...
Page 89: ...Gas Conversion for Modulator PART C 89 ...
Page 100: ...Proflame 2 Remote Control 100 ...
Page 102: ...102 ...


