background image

4

-

22

rx6030 / rx7030 / rx8030

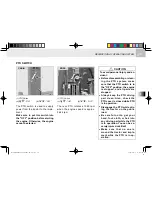
ENGINE COOlANT TEMPERATuRE GAuGE

Tf1O409A

(1) coolant temperature gauge

(2) normal temperature range

"c" : cold 

   "h" : hot

this  gauge  indicates  the  coolant 

temperature  after  the  key  switch  is 

turned to the "on" position.  

: coolant is cold.

h

 : coolant is hot.

The range marked in "2" in the figure 

indicates the normal engine tempera-

ture (normal driving range).

CAuTION

Make sure to control the work 

load so that the needle is not 

in the red zone.
IF ThE NEEDlE STAYS IN ThE 

RED  zONE,  DO  NOT  STOP 

ThE ENGINE IMMEDIATElY. 

I N S T E A D ,  R E D u C E  T h E 

wORK lOAD TO COOl DOwN 

ThE ENGINE bEFORE STOP-

PING ThE ENGINE.
Make sure to keep the front 

grill clean so that air is sucked 

through if freely for fast cooling.

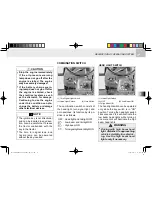
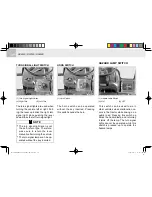
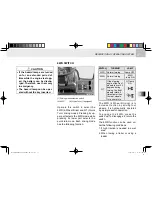
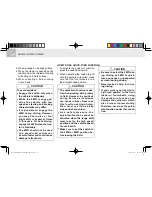
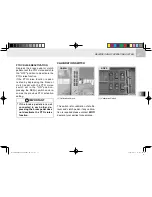
TuRN SIGNAl lAMP

operating the turn signal lamp switch 

up  and  down  turns  on  the  corre-

sponding lamp in green. 

Tf1O410A

TF120(RX6030,7030,8030)-AU-04.in22   22

2016-06-17   오후 1:54:14

Summary of Contents for RX6030

Page 1: ... RX7030 RX8030 has been designed with the finest materials under rigid quality control standards set forth by the KIOTI Engineering Department Knowledge of tractor operation is essential for many years of dependable service and reliability To help new owners familiarize themselves with the KIOTI RX6030 RX7030 RX8030 it is the policy of KIOTI tractor to provide an owners manual which includes helpf...

Page 2: ...TF120 RX6030 7030 8030 AU 00 in2 2 2016 06 17 오전 11 49 41 ...

Page 3: ...S DESCRIPTION OF OPERATING SYSTEM OPERATION 3 POINT HITCH MAINTENANCE STORAGE AND DISPOSAL TROUBLESHOOTING INDEX SECTION 1 2 3 4 5 6 7 8 9 10 TABLE OF CONTENTS 3 POINT HITCH IMPLEMENT AND LOADER OPERATION TF120 RX6030 7030 8030 AU 00 in3 3 2016 06 17 오전 11 49 41 ...

Page 4: ...on cabin 1 20 Decal mounting location ROPS 1 22 DeCALs 1 24 Cautions for decal maintenance 1 27 Precautions before operation 2 1 Vehicle identification number 2 2 TRACTOR SERIAL NUMBER 2 2 Engine SERIAL number 2 2 Transmission SERIAL number 2 2 Essential replacement parts 2 4 Oils and fluids 2 4 Filters 2 4 Belts and rubber parts 2 5 Other components 2 5 SPECIFICATIONS 3 1 General specifications 3...

Page 5: ...PTO Indicator 4 27 Parking brake warning lamp 4 27 Low fuel level warning indicator 4 28 Coolant Temperature Warning Lamp 4 28 Water In Fuel Warning Lamp 4 28 TRAVELING SPEED 3 12 IMPLEMENT LIMITATIONS 3 14 Standard size by implement 3 14 DESCRIPTION OF OPERATING SYSTEM 4 1 Exterior view cabin 4 4 Exterior view rops 4 5 switch Mounting location 4 6 Key switch 4 8 Combination switch 4 9 Hazard lamp...

Page 6: ...ment 4 41 Parking Brake Lever 4 42 FOOT THROTTLE 4 43 Hand THROTTLE Lever 4 43 Differential Lock Pedal 4 44 Seat adjustment 4 44 position control lever 4 47 Draft Control Lever 4 48 joystick lever 4 48 Lifting Arm Lower Link Speed Control KNOB 4 49 Double Acting Lever 4 49 Cabin System 4 51 Interior devices 4 51 Exterior devices 4 52 Entrance 4 52 Unlocking the door 4 53 Rear window 4 53 side wind...

Page 7: ...STARTING 5 9 OPERATING THE TRACTOR 5 10 How to drive 5 10 Parking 5 14 Turning 5 15 Driving on slopes 5 16 precautions when coming in and out of WORK FIELD 5 16 precautions while driving on the road 5 17 LOADING AND UNLOADING 5 18 Precautions when using power steering 5 18 3 point hitch control SYSTEM 5 20 REMOTE hydraulicS 5 24 Connecting and disconnecting implement 5 26 3 POINT HITCH IMPLEMENT A...

Page 8: ...mission Fluid Level c 7 10 Checking engine oil level d 7 11 Checking Coolant Level e 7 12 Cleaning Grill Radiator SCREEN f 7 13 CHECKING BRAKE AND CLUTCH PEDALS g 7 13 Checking Gauges Meter and Easy Checker h 7 14 Checking Head Light Hazard Light etc i 7 14 Checking Seat Belt and CABIN j 7 14 Changing engine oiland replacing filter k 7 14 Replacing transmission fluid and filter l 7 16 INSPECTION f...

Page 9: ... Ag 7 33 Replacing air filter Ah 7 33 Flush cooling system and changing coolant Ai 7 33 Anti freeze 7 35 Draining water from clutch housing Aj 7 35 Checking and replacing wiper Ak 7 36 Replacing cabin fuse Al 7 38 Main fuse Am 7 40 Replacing bulb An 7 41 Checking refrigerant Ao 7 46 Air conditioner maintenance Ap 7 46 TURBOCHARGER Aq 7 47 STORAGE AND DISPOSAL 8 1 Tractor storage 8 2 Daily storage ...

Page 10: ...erious injury or death to you or other persons if the warning is not heeded Follow the advice provided with the warning This indicates that a condition may result in damage to your vehicle or its equipment if the caution is not heeded Follow the advice provided with the caution This mark indicates emphasis on notable characteristics of working procedures and information about technology for easier...

Page 11: ...ng brake Headlight high beam Auto switch Battery charging condition Four wheel drive on H H High speed travel light Engine oil pressure Fast M M Middle speed travel light Power take off clutch control off position Slow L L Low speed travel light Power take off clutch control on position Differential lock Single brake light Turn signal Hazard warning lights TF120 RX6030 7030 8030 AU 00 in11 11 2016...

Page 12: ...TF120 RX6030 7030 8030 AU 00 in12 12 2016 06 17 오전 11 49 44 ...

Page 13: ... 11 When operating the PTO 1 11 When using the 3 point hitch 1 12 Safety precautions during servicing 1 12 Safety precautions when using the loader 1 17 Safety decal maintenance 1 20 Decal mounting location cabin 1 20 Decal mounting location ROPS 1 22 DeCALs 1 24 Cautions for decal maintenance 1 27 SAFETY PRECAUTIONS 1 TF120 RX6030 7030 8030 AU 01 in1 1 2015 10 29 오후 6 37 48 ...

Page 14: ...tarting the tractor make sure your path is clear of people to avoid accidents caused by sudden movements 8 Before operating in reverse move ments with your tractor you should always check to see that the path is clear 1 It is recommended that you read and understand this entire manual before operation of your new trac tor Failure to do so could result in accidents injury or death 2 Only persons wh...

Page 15: ...he tractor while in operation 14 When getting on or off the trac tor make sure to hold the hand rail and set your feet on the step firmly to ensure your safety This will help to prevent accidental slips trips and falls 15 Be sure to scrape off mud or soil from your shoes before mounting the tractor T66O104a 16 All persons using the tractor should have knowledge of its proper operation and should r...

Page 16: ...tors with narrow tread widths For added stability you should adjust your rear wheel tread width see page 4 63 4 65 19 Before starting your tractor you should depress the clutch and make sure that all shift levers are in the neutral position and park ing brake is applied 20 For your safety a ROPS with a seat belt is recommended for all applications 1 Tread T66O106a T66O107a Always use seat belt whe...

Page 17: ...chemsvit eyeprotection gloves etc 1 Avoid accidental contact with gear shift levers while the engine is run ning Unexpected tractor move ments can result in bodily injury or death 2 Do not park your tractor on a steep incline and remember to shut off the engine and PTO before dis mounting the tractor Precautions during operation When starting the engine T66O109a T66O108a T55O116a TF120 RX6030 7030...

Page 18: ...aw bar and front hitch receiver NEVER HITCH ANYTHING TO THE AXLE HOUS ING OR ANY OTHER POINT EXCEPT INDICATED POINTS Pulling from any other location only increases the risk of serious personal injury or death 1 Drawbar 2 Front Hitch Receiver M55O120A 6 Improper use of the draw bar even if correctly positioned can cause a rear overturn 7 Do not overload an attachment or towed equipment Use proper c...

Page 19: ...1O682A ing the proper adaptor parts attach the chain to the tractor draw bar support or other speci fied anchor locations Provide only enough slack in the chain to permit turning See your Dealer for a chain with a strength rat ing equal to or greater than the gross weight of the towed equip ment 11 If the front of the tractor tends to rise up when heavy implements are attached to the three point h...

Page 20: ...ractor can become dangerous to you and bystanders Overload ing your tractor or using unsafe equipment can also be danger ous and should be avoided Refer to the Specifications of Implement Limitation which out lines the maximum load for safe tractor operation 18 Driving forward out of a ditch or up steep inclines can cause the tractor to tip over backwards To avoid this you should back out of these...

Page 21: ...the tractor s weight The risk of tractor upset is even higher when the ground is loose or wet T66O115a 2 Always slow the tractor before turning Turning at high speed may tip the tractor over or cause a loss of control 1 Lock the brake pedals together when traveling at road speeds Brake both wheels together when making an emergency stop Un even braking at road speeds could cause the tractor to tip ...

Page 22: ...ay run out of control 8 Avoid sudden movements of the steering wheel as this can cause a loss of control of the tractor This risk is especially great when traveling at road speeds 9 Do not operate an implement while the tractor is on the road Lock the three point hitch in the raised position 10 When towing other equipment use a safety chain and place an SMV emblem on it as well 11 When driving the...

Page 23: ...stalling or using PTO driven equipment read the man M55O109A ufacturer s manual and review the safety labels attached to the equip ment WARNING Before driving an implement with the PTO always make sure that all bystanders are well away from the tractor When using the PTO drive with a stationary tractor always make sure that the gears are in neutral and that the parking brake is applied Before star...

Page 24: ...e chocks behind and in front of the rear wheels Stay clear of all rotat ing parts 5 Do not attach a PTO driven imple ment if the implements safety shields are damaged or not in place Rotating shafts are an en tanglement hazard M55O111A In order to service your tractor you must park it on a flat level surface set the parking brake place the gear shift lever in neutral and stop the engine 1 Do not s...

Page 25: ... first aid kit and fire extinguisher handy at all times 6 Do not remove the radiator cap while the coolant is hot When cool slowly rotate the cap to the first stop and allow sufficient time for excess pressure to escape After all the pressure is released remove the cap completely If your tractor is equipped with a coolant recovery tank add coolant there rather than to the radiator T66O125a T66O126...

Page 26: ...itably equipped workshop 8 Carry out the following operations before any operation of the tractor Engage the four wheel drive the first gear and the parking brake and put chocks to the wheels touching the ground 9 Before lifting the tractor prevent it from swinging by means of wooden wedges applied to the front axle This engine is coated with an ti corrosive to prevent prema ture corrosion This co...

Page 27: ...ofessionals with the proper equipment 15 Maintaining correct tire pres sure is important for the life of your tires Do not inflate the tires above the recommended pres sure specified in the owner s manual See page 4 62 16 Securely support the tractor when changing wheels or the wheel tread width T66O128a Apply the jack lift to the lifting points according to the type of operation and follow the sa...

Page 28: ...mmended If injured by leaking fluid see a medical doctor at once This fluid can produce gangrene and or severe allergic reaction T66O130a 1 Cardboard 2 Hydraulic Line 3 Magnifying Glass 17 Make sure that wheel bolts have been tightened to the specified torque 18 Leaking hydraulic fluid under pressure has sufficient force to penetrate skin causing serious personal injury Be sure to release all resi...

Page 29: ...or get close to it Also lower the loader arm onto the ground before leaving the tractor Otherwise it may lead to a fatal injury or even death Use the safety bar to prop up the loader H11O103a 3 The loader can be turned over if a draw bar is improperly loaded Make sure to use a draw bar prop er for the 3 point hitch lower link Otherwise it may lead to an injury or even death H11O104a TF120 RX6030 7...

Page 30: ...er fit all parts which are con nected to the bucket and boom The bucket or boom can be acci dentally dropped down leading to an injury or even death H11O106a 4 Never carry a big object with the loader unless the correct imple ment is attached Keep a carried object low during driving Other wise it may lead to an injury or even death H11O105a TF120 RX6030 7030 8030 AU 01 in18 18 2015 10 29 오후 6 37 5...

Page 31: ...1 19 SAFETY PRECAUTIONS 1 7 Keep bystanders away No riders Otherwise it may lead to a fatal injury or even death H11O108a TF120 RX6030 7030 8030 AU 01 in19 19 2015 10 29 오후 6 37 56 ...

Page 32: ...1 20 RX6030 RX7030 RX8030 T11O105C Safety decal maintenance Decal mounting location cabin TF120 RX6030 7030 8030 AU 01 in20 20 2015 10 29 오후 6 37 57 ...

Page 33: ...1 21 SAFETY PRECAUTIONS 1 T11O106B TF120 RX6030 7030 8030 AU 01 in21 21 2015 10 29 오후 6 37 59 ...

Page 34: ...1 22 RX6030 RX7030 RX8030 T11O107D Decal mounting location ROPS TF120 RX6030 7030 8030 AU 01 in22 22 2015 10 29 오후 6 37 59 ...

Page 35: ...1 23 SAFETY PRECAUTIONS 1 T11O108D TF120 RX6030 7030 8030 AU 01 in23 23 2015 10 29 오후 6 38 00 ...

Page 36: ...ecure a safe distance before working on a field Lifting Lowering Precautions during rocker switch operation 5 Part No T4930 52371 WARNING Do not remove the radiator cap when the engine is running or while the engine is hot If the radiator cap is removed hot vapor or liquid may be violently released causing burns WARNING T4182 53191 TO AVOID POSSIBLE INJURY DEATH OR LOSS OF PROPERTY FROM A MACHINE R...

Page 37: ... use the 3 point hitch should only use the 3 point hitch To prevent severe and deadly injuries during P T O operation 1 All protective components should be in place 2 Do not let your hands feet and clothes come near the implement 3 When disengaging an implement from the P T O stop the engine in advance When repairing or servicing the tractor or its part depress the brake pedal to set the parking b...

Page 38: ...and safety decals 3 Never modify the machine without approval 4 Never use an implement with the capacity other than the specified The owner has the sole responsibility for any problem occurred by not following the above instruction 1 When the vehicle is equipped with the ROPS always fasten your seat belt When no ROPS is installed never wear the seat belt 2 When driving the tractor equipped with th...

Page 39: ...vent such a thinner or acetone since it can ruin the decals Do not spray high pressure water directly onto the decal The decal may fall off the trac tor CAUTION If a decal is damaged or lost contact your local KIOTI deal er immediately to install a new decal Make sure to attach the decal in the correct position cleanly without bubbles after cleaning its mounting surface If a decal is attached to a...

Page 40: ...MEMO MEMO TF120 RX6030 7030 8030 AU 01 in28 28 2015 10 29 오후 6 38 00 ...

Page 41: ... 2 2 TRACTOR SERIAL NUMBER 2 2 Engine SERIAL number 2 2 Transmission SERIAL number 2 2 Essential replacement parts 2 4 Oils and fluids 2 4 Filters 2 4 Belts and rubber parts 2 5 Other components 2 5 2 2 TF120 RX6030 7030 8030 AU 02 in1 1 2016 06 17 오후 1 53 14 ...

Page 42: ...entify the vehicle and its plate is attached on the front right side of the front axle frame T11O206A 1 Engine Serial Number T11O204A It is stamped on the range shift lever case on the left side of the tractor The engine number is stamped on the cylinder block surface which is rear side of the alternator on the left side of the engine T11O205A TF120 RX6030 7030 8030 AU 02 in2 2 2016 06 17 오후 1 53 ...

Page 43: ...o see your KIOTI dealer For service contact the KIOTI dealership from which you purchased your tractor or your local authorized KIOTI dealer When in need of parts be prepared to give your dealer both the tractor and engine serial numbers Before using non KIOTI approved implements contact your nearest dealer regarding safety application of the implement Tractor Model Name To be filled in by purchas...

Page 44: ...eized parts on the tractor leading to malfunctions Regularly add or change the fluid specified on the right to keep the tractor in perfect condition Essential replacement parts Oils and fluids No ITEM SPECIFICATION CAPA Remark L U S gal 1 Engine oil with filter Tier2 or 3 without DPF API CH grade above Tier4 with DPF API CJ grade above SAE10W30 SAE10W40 SAE15W40 7 7 2 03 9 0 2 38 2 Transmission fl...

Page 45: ...g to a serious problem on the tractor Therefore regularly check or replace those items to pre vent the failure The battery condition is very impor tant for engine start performance es pecially in winter Therefore make sure to check its condition daily e s Y NO PART NO DESCRIPTION QTY 1 E6305 72533 Fan Belt 2 2 E7220 72611 A C Belt 1 NO PART NO DESCRIPTION QTY 1 C7910 42204 Battery 1 TF120 RX6030 7...

Page 46: ...MEMO MEMO TF120 RX6030 7030 8030 AU 02 in6 6 2016 06 17 오후 1 53 15 ...

Page 47: ...ons 3 4 noise levels as perceived by the operator 3 10 VIBRATION LEVELS OF THE TRACTOR EXPOSITION TO VIBRATIONS 3 11 TRAVELING SPEED 3 12 IMPLEMENT LIMITATIONS 3 14 Standard size by implement 3 14 SPECIFICATIONS 3 3 TF120 RX6030 7030 8030 AU 03 in1 1 2016 06 17 오후 1 53 47 ...

Page 48: ...s are measured with standard tires AG installed on the CABIN model tractor A1 A2 A3 D D47O301a General specifications External dimensions E 2 B 1 E D A3 C A2 F A1 t11O301a ROPS CABIN TF120 RX6030 7030 8030 AU 03 in2 2 2016 06 17 오후 1 53 47 ...

Page 49: ...0P 1 Overall length A1 4 020 158 2 4 050 159 4 2 Overall length A2 3 685 145 0 3 715 146 2 3 Overall length A3 3 780 148 8 3 810 150 4 Overall width B 1 800 70 8 1 960 77 2 5 Overall height C 2 630 103 5 2 700 106 2 2 655 104 5 2 730 107 5 6 Wheel base D 2 100 82 7 2 130 83 9 7 Tread E1 1 465 57 6 1 475 58 1 8 Tread E2 1 415 55 7 1 515 59 6 9 Ground clearance F 420 16 5 440 17 3 TF120 RX6030 7030 ...

Page 50: ...TO Power kw HP 39 52 3 43 57 6 49 65 5 Rated revolution rpm 2 600 Capacities Fuel tank L U S gal 95 25 1 85 22 5 95 25 1 85 22 5 Engine Oil with Filter L U S gal 7 7 2 03 9 0 2 38 Transmission oil L U S gal 60 15 9 Front axle oil L U S gal 8 5 2 2 Drive train Clutch Dry Single Plate Hydro Multi Wet Disc Dry Single Plate Transmission Shuttle Synchro Shuttle Main Synchro mesh 4 stages Range Constant...

Page 51: ... 0 11 23 13 4 wheel drive Hydro Multi Wet Disc Quick Turn QT NA Brake Wet Multi Disc Differential lock Rear Standard Tires Agricultural Front 11 2 20 11 2 24 Rear 14 9 30 16 9 30 Hydraulic system Pump capacity Total hydraulic flow lpm cc rev 67 6 26 72 8 28 Implement lpm cc rev 41 6 16 Power steering lpm cc rev 26 10 31 2 12 Steering Hydrostatic Power Steering TF120 RX6030 7030 8030 AU 03 in5 5 20...

Page 52: ...nk end kg f lbs 2 075 4 575 2 256 4 974 PTO Rear Type Independent P T O shaft SAE 1 3 8 6 Spline Speed PTO rpm 540 540E Min turning radius with one rear wheel braked Agricultural mm in 3 110 122 4 3 370 132 7 Weight Incluiding cabin excluding front weight kg f lbs 2 630 5 798 2 360 5 203 2 795 6 162 2 535 5 589 Max Drawbar vertical load kg f lbs 750 1 655 900 1 984 Automation system Auto P T O Std...

Page 53: ... 49 65 5 Rated revolution rpm 2 600 Capacities Fuel tank L U S gal 95 25 1 85 22 5 Engine Oil with Filter L U S gal 9 0 2 38 Transmission oil L U S gal 60 15 9 Front axle oil L U S gal 8 5 2 2 Drive train Clutch Hydro Multi Wet Disc Clutch Transmission Shuttle Power Shuttle Main Synchro mesh 4 stages Range Constant mesh 6 stages Speeds 24 X 24 Power shuttle TF120 RX6030 7030 8030 AU 03 in7 7 2016 ...

Page 54: ...Differential lock Rear Standard Tires Agricultural Front 280 85R24 Radial tire Rear 420 85R30 Radial tire Hydraulic system Pump capacity Total hydraulic flow lpm cc rev 72 8 28 Implement lpm cc rev 41 6 16 Power steering lpm cc rev 31 2 12 Steering Hydrostatic Power Steering 3 Point Lift Control Type Position Draft Mixed Control Standard remote valve quantity Rear remote hydraulic valve 2 Port 4 T...

Page 55: ...er link end kg f lbs 2 256 4 974 PTO Rear Type Independent P T O shaft SAE 1 3 8 6 Spline Speed PTO rpm 540 540E Min turning radius with one rear wheel braked Agricultural mm in 3 370 132 6 Weight Incluiding cabin excluding front weight kg f lbs 2 795 6 162 2 540 5 600 Max Drawbar vertical load kg f lbs 900 1 985 Automation system Auto P T O Std TF120 RX6030 7030 8030 AU 03 in9 9 2016 06 17 오후 1 5...

Page 56: ...ut load and when driving by in compliance with standard EEC 74 151 dBA Note Data supplied by the manufacturer approval values pending Tractors with Cabin Model Directive of The European Parliament and of the Council Noise level at the operator s ear according to 2009 76 EC Noise level in motion according to 2009 63 EC RX6030 C RX7030 RX8030 C P PC 2003 37 EC 87 dB A 81 dB A TF120 RX6030 7030 8030 ...

Page 57: ...ument is required such a three axis accelerometer applied to the seat IMPORTANT The vibration level transmitted to the body as a whole depend on different parameters some of them relating to the machine others to the terrain and many specific for the operator The prevailing parameters are the type of terrain or work surface and the ground speed Vibrations cause discomfort for the operator and in s...

Page 58: ... 37 0 23 0 39 0 24 0 37 0 23 0 38 0 24 Middle 1 0 49 0 30 0 51 0 32 0 48 0 30 0 50 0 31 2 0 65 0 40 0 67 0 42 0 64 0 40 0 66 0 41 3 0 82 0 51 0 85 0 53 0 80 0 50 0 84 0 52 4 1 13 0 70 1 18 0 73 1 12 0 70 1 16 0 72 High 1 1 51 0 94 1 57 0 98 1 48 0 92 1 54 0 96 2 1 99 1 24 2 07 1 29 1 95 1 21 2 03 1 26 3 2 51 1 56 2 61 1 62 2 47 1 53 2 57 1 60 4 3 49 2 17 3 63 2 26 3 43 2 13 3 57 2 22 TRAVELING SPE...

Page 59: ... 78 2 35 3 57 2 22 3 72 2 31 Middle 1 4 75 2 95 4 95 3 08 4 67 2 90 4 87 3 03 2 6 26 3 89 6 52 4 05 6 16 3 83 6 41 3 98 3 7 90 4 91 8 23 5 11 7 77 4 83 8 09 5 03 4 10 99 6 83 11 44 7 11 10 80 6 71 11 25 6 99 High 1 14 60 9 07 15 21 9 45 14 36 8 92 14 95 9 29 2 19 25 11 96 20 05 12 46 18 93 11 76 19 71 12 25 3 24 29 15 09 25 30 15 72 23 88 14 84 24 87 15 45 4 33 76 20 98 35 16 21 85 33 20 20 63 34 ...

Page 60: ...depth Not use Do not use 3 point hitch backhoe 3 Mid Mower Max width Not use 4 Tiller Max width Not use 5 Box Blade Max width Below 2 134 84 0 6 Rear Blade Max width Below 2 134 84 0 Use it only to lowest top link hole 7 Rotary Cutter Max width Below 2 134 84 0 8 Aerator Max width Below 2 134 84 0 9 Landscape Rakes Max width Below 2 134 84 0 mm in TF120 RX6030 7030 8030 AU 03 in14 14 2016 06 17 오후...

Page 61: ...harging lamp 4 23 Head light high beam lamp 4 23 Glow Plug Indicator 4 24 Engine oil pressure warning lamp 4 24 Differential Lock Warning Lamp 4 25 Air Filter Warning Lamp 4 25 Quick Turn Warning Lamp if equipped 4 25 4WD indicator 4 26 H Indicator 4 26 m indicator 4 26 L indicator 4 27 PTO Indicator 4 27 Parking brake warning lamp 4 27 Low fuel level warning indicator 4 28 Coolant Temperature War...

Page 62: ...osition control lever 4 47 Draft Control Lever 4 48 joystick lever 4 48 Lifting Arm Lower Link Speed Control KNOB 4 49 Double Acting Lever 4 49 Cabin System 4 51 Interior devices 4 51 Exterior devices 4 52 Entrance 4 52 Unlocking the door 4 53 Rear window 4 53 side window 4 54 Working Light 4 54 Wiper 4 55 MODE SELECTION SWITCH 4 56 RADIO CASSETTE CD PLAYER if EQUIPPED 4 57 BLUETOOTH PLAYER RADIO ...

Page 63: ...r Conditioner 4 62 7 pin power output socket 4 65 tires Wheels and ballast 4 66 Inflation Pressure 4 67 TREAD 4 68 WHEEL TORQUE AND DIRECTION 4 72 Additional weight 4 73 Mass es and tire s 4 75 TF120 RX6030 7030 8030 AU 04 in3 3 2016 06 17 오후 1 54 05 ...

Page 64: ... T11O443B 1 Working Lamp 2 Wiper 3 Rear View Mirror 4 Turn Signal Lamp 5 Step 6 Bonnet 7 Head Lamp 8 Top Link 9 Lift Rod 10 Lower Link 11 Draw Bar 12 Backup Lamp 13 License Plate Bracket TF120 RX6030 7030 8030 AU 04 in4 4 2016 06 17 오후 1 54 05 ...

Page 65: ...Steering Wheel 2 Rear View Mirror 3 Bonnet 4 Head Lamp 5 Step 6 Seat 7 Joy stick Lever 8 Combination Lamp 9 ROPS 10 Top Link 11 License Plate 12 Rear Lamp 13 Lift Rod 14 Draw Bar 15 Lower Link T11O443B TF120 RX6030 7030 8030 AU 04 in5 5 2016 06 17 오후 1 54 06 ...

Page 66: ...030 RX8030 switch Mounting location 1 Key Switch 2 Combination Switch 3 Hazard Lamp Switch 4 Driving Mode Selection Switch 5 Instrument Panel MANUAL M55O4K5A TF120 RX6030 7030 8030 AU 04 in6 6 2016 06 17 오후 1 54 07 ...

Page 67: ...ION OF OPERATING SYSTEM 4 1 Key Switch 2 Combination Switch 3 Hazard Lamp Switch 4 Driving Mode Selection Switch 5 Instrument Panel POWER SHUTTLE t11O4A56 TF120 RX6030 7030 8030 AU 04 in7 7 2016 06 17 오후 1 54 07 ...

Page 68: ...ch is in position B the engine and all electrical de vices in the vehicle are turned off However flasher lights and turn signal lights can be operated along with their indication lamps on the dash board ACC C When the key switch is turned to the position C brake lights flasher lights and turn signal lights can be operated D The position D indicates the ON position As soon as the key switch is turn...

Page 69: ...careful not to leave the tractor unattended with the key in the tractor The horn turn signal lamp and hazard lamp can be operated without the key inserted NOTE The head light switch can be operated only while the key switch is in ON position Turning the head light switch clockwise one click will illuminate the low beam head lights while turning it one more click will illuminate the high beam head ...

Page 70: ...switch 1 Hazard Lamp Switch A ON B OFF The turn signal light lever is not the self return type Therefore make sure to return the lever manually after turning the vehicle The turn signal lamps can be op erated without the key inserted NOTE This switch can be used to warn other vehicles when malfunction oc curs in the tractor while driving on a public road Pressing this switch up blinks the hazard l...

Page 71: ...ing is to increase traction by driving four wheels It is hydraulically operated by a simple switch operation T11O464A Operate this switch to select the 4WD 4 Wheel Drive and QT Quick Turn driving modes Pressing its up per part selects the 4WD mode while pressing its lower part selects the quick turn mode Each driving mode has the following function SWITCH TURNING LAMP 2WD Normal turning lamp oFF 4...

Page 72: ...ke sure that the front wheels are in the straight ahead position hOw TO uSE QuICK TuRN FuNCTION Be sure to select the 2WD dur ing driving as 4WD or quick turn can cause an unexpected accident during driving Never make a sharp turn dur ing driving If your work requires mid to high load applied to the front loader or four wheels using the quick turn function can damage the quick turn clutch disc or ...

Page 73: ...topped and all parts are stopped Always keep the PTO driving part clean Also check the PTO cover is closed while PTO is in operation Disengage the PTO while driv ing the tractor on the public road Be careful not to get your hand foot cloth or hair into any driving part while the PTO is in operation You can be se verely injured or killed Make sure that no one is around the tractor and imple ment wh...

Page 74: ...n switch TF1O402A 1 DPF Regeneration Switch A Activation B Deactivation Activation Upper Button Perform the following procedure when the regeneration warning lamp comes on 1 Park the vehicle on level ground 2 Run the engine at the idle speed 3 Depress the brake pedal and lock it in place 4 Do not depress the clutch pedal 5 Run the engine 3 to 4 minutes Then press the regeneration button over 2 sec...

Page 75: ... tion slows down the clutch engagement operation 6 The regeneration underway lamp blinks after the regeneration warning lamp goes off Wait for approx 30 to 40 minutes until the regeneration process is completed Deactivation lower button Do not press the deactivation button during the regeneration process However in an emergency press the deactivation button to stop the regeneration process T11O4A5...

Page 76: ...With the brake and clutch pedals released set the PTO cruise switch to the ON position and press the SET 1 portion of the cruise acti vation switch The cruise setting switch can be operated as follows while the PTO cruise function is activated RES Speed is increased by 50 RPM when pressing it SET Speed is decreased by 50 RPM when pressing it CABIN T11O4A54 ROPS 1 PTO Cruise 2 PTO Setting Switch TF...

Page 77: ...sition pressing the RES switch once re sumes the previous PTO activation setting If the brake pedals are not connected to each other de pressing the brake pedal does not deactivate the PTO cruise function IMPORTANT TF1O405A 1 Calibration Switch Calibration switch This switch is for calibration of shuttle lever and clutch pedal if any calibra tion is required please contact KIOTI dealer at your ear...

Page 78: ...Indicator 4 Glow Plug Indicator 5 Turn Signal Lamp 6 Tachometer 7 PTO ON Indicator 8 One Side Brake Lamp 9 Parking Brake Indicator 10 Low Fuel Level Warning Indicator 11 Forward Indicator 12 4WD Operation Indicator 13 Fuel Gauge 14 Engine Oil Pressure Warning Lamp 15 Hour Meter 16 Coolant Temperature Gauge 17 Neutral Indicator 18 Reverse Indicator 19 Coolant Temperature Warning Lamp 20 Quick Turn ...

Page 79: ...ndicator 15 Quick Turn Warning Lamp If Equipped 16 Parking Brake Warning Lamp 17 HMS Lamp 18 Low Fuel Level Warning Indicator 19 Air Filter Warning Lamp 20 ECO PTO Lamp 21 Auto Level Work Light 22 No Stall Switch 23 Cruise Indicator 24 Speed Limit Switch 25 Back Up Light 26 Auto Tilling Depth Work Light 27 Auto Draft Work Light 28 Turn Up Light 29 Calibration Lamp 30 Communication Error 31 Cruise ...

Page 80: ... Lamp 11 Communication Error 12 Speed Limit Switch 13 Water Sensor 14 Engine Check Lamp 15 Regeneration Underway Lamp 16 Regeneration Warning Lamp 17 Hour meter Error Code 18 Cruise PTO 19 Parking Brake Indicator 20 4WD Engaged Indicator 21 PTO Indicator 22 Fuel Level Warning Lamp 23 Low Speed Indicator 24 Mid Speed Indicator 25 High Speed Indicator 26 Fuel Gauge 27 QT 28 HMS 29 Automatic draft op...

Page 81: ...main ing fuel level after the key switch is turned to the ON position F Fuel is fully filled E Replenish the fuel tank If driving is continued with the needle below the position E air may enter the fuel supply system In this case bleed the system For detailed in structions refer to Bleeding fuel sys tem in the chapter Maintenance Make sure to use only correct fuel as the engine can be dam aged if ...

Page 82: ...Normal driving range CAUTION Make sure to control the work load so that the needle is not in the red zone IF THE NEEDLE STAYS IN THE RED ZONE DO NOT STOP THE ENGINE IMMEDIATELY I N S T E A D R E D U C E T H E WORK LOAD TO COOL DOWN THE ENGINE BEFORE STOP PING THE ENGINE Make sure to keep the front grill clean so that air is sucked through if freely for fast cooling Turn Signal Lamp Operating the t...

Page 83: ... sary TF1O412A TF1O411A Battery charging lamp This lamp is turned On when the starting switch is turned On before starting the engine but turned Off af ter starting the engine CAUTION If this warning lamp comes on while driving the charging system such as the alternator is malfunctioning Therefore turn off all electrical devices and have the tractor checked by your local KIOTI Dealer or workshop a...

Page 84: ...e severely damaged if driving or operat ing the tractor with the engine oil warning lamp ON CAUTION TF1O414A This lamp comes on when the en gine oil pressure or oil level is low This lamp is turned On when the starting switch is turned On before starting the engine but turned Off after starting the engine If this lamp comes on while driving stop the engine immediately and check the engine oil leve...

Page 85: ...uick turn mode Quick Turn Warning Lamp if equipped TF1O417A Air Filter Warning Lamp This lamp illuminates when the air filter is clogged by dust etc TF1O416A This comes on when the differential lock is engaged Differential Lock Warning Lamp TF1O415A TF120 RX6030 7030 8030 AU 04 in25 25 2016 06 17 오후 1 54 17 ...

Page 86: ...eration TF1O418A The durability of the axle can be deteriorated if only one brake pedal is depressed while the 4WD is activated CAUTION If the range shift is at middle speed this lamp turned in green m indicator TF1O420A If the range shift is at high speed this lamp turned in green H Indicator TF1O419A TF120 RX6030 7030 8030 AU 04 in26 26 2016 06 17 오후 1 54 18 ...

Page 87: ...a warning lamp will turn on and off on the buzzer For the tractor with power shuttle CAUTION TF1O422A PTO Indicator This indicator shows the PTO en gagement condition When the PTO is engaged this indicator comes on When the PTO clutch is disengaged this indicator goes off set the PTO switch to the OFF position in order to start the engine CAUTION If the range shift is at low speed this lamp turned...

Page 88: ...he panel After 30 seconds just the in dicator will stay on until filling with fuel CAUTION If the coolant temperature is 239 or above 239 115 for more than 5 seconds buzzer is heard and lamp is turned on Stop the engine contact a KIOTI dealer immediately Coolant Temperature Warning Lamp TF1O425A The warning buzzer sounds when Approx 45 cc of water is accumu lated in the fuel filter In this case st...

Page 89: ...ing Engine check warning lamp TF1O429A U WARNING When on regeneration Don t touch the part of DPF because it is very hot around DPF WARNING If carbon is accumulated in the ex haust catalytic filter the warning lamp comes on or blinks If this lamp comes up push down the Regeneration button Refer to the page 4 14 TF1O427A Regeneration Warning Lamp TF120 RX6030 7030 8030 AU 04 in29 29 2016 06 17 오후 1...

Page 90: ...perating status of the brake One side This comes on when the brake lock for two brake pedals is unlocked When driving on a public road or at a high speed never use only one brake pedal The tractor can roll over While the brake One side lamp is illuminated the brake pedals are not interlocked and only one brake pedal can be depressed accidentally Make sure to set the pedal lock to the Lock position...

Page 91: ...ot accelerate the vehicle but still maintains the speed con stant in the ON position TE3O436A cruise control SWITCH To activate the cruise control function set the desired speed and press the switch to the ON position In this case the speed limit lamp in the cluster meter Depress the HST pedal to increase the driving speed in order to accelerate at a constant speed To deactivate the cruise functio...

Page 92: ...tary engine overload In this case the speed limit lamp in the cluster meter When engine overload occurs with the NO STALL switch in the ON position engine load de creases to protect the engine NOTE Only for loader work Never use for Trailer work IMPORTANT TF120 RX6030 7030 8030 AU 04 in32 32 2016 06 17 오후 1 54 22 ...

Page 93: ... LCD please contact with KIOTI dealer NO DISPLAY DESCRIPTION 1 ERR 001 No Signal at TACHO Input 2 ERR 002 No Signal at Water Temp 3 ERR 006 No Signal at GLOW LAMP Input 4 ERR 007 No Signal at PTO CRUISE LAMP 5 ERR 008 No Signal at Water IN FUEL Input 6 ERR 009 No Signal at HOUR Input Some error codes may not be displayed depending on the model NOTE TF120 RX6030 7030 8030 AU 04 in33 33 2016 06 17 오...

Page 94: ...er 2 Shuttle Shift Lever 3 Clutch Pedal 4 Steering Column Tilt 5 Brake Pedal L 6 Brake Pedal R 7 Main Shift Lever 8 Range Shift Lever 9 Joy stick Lever 10 Double Acting Lever 11 PTO Change Lever MANUAL T11O448A TF120 RX6030 7030 8030 AU 04 in34 34 2016 06 17 오후 1 54 24 ...

Page 95: ... 3 Clutch Pedal 4 Steering Column Tilt 5 Brake Pedal L 6 Brake Pedal R 7 Main Shift Lever 8 Range Shift Lever 9 Joy stick Lever 10 Double Acting Lever 11 PTO Change Lever 12 Position Draft Control Lever POWER SHUTTLE TF1O432A TF120 RX6030 7030 8030 AU 04 in35 35 2016 06 17 오후 1 54 26 ...

Page 96: ... Clutch Pedal 4 Steering Column Tilt 5 Brake Pedal L 6 Brake Pedal R 7 Main Shift Lever 8 Range Shift Lever 9 Joy stick Lever 10 Double Acting Lever 11 Position Draft Control Lever 12 Parking Brake Lock Lever 13 PTO Change Lever TF120 RX6030 7030 8030 AU 04 in36 36 2016 06 17 오후 1 54 26 ...

Page 97: ...in total RANGE GEAR SHIFT LEVER TF1O434A 1 Range Gear Shift Lever 6 Speeds C Creep Speed L Low Speed N Neutral M1 Middle Speed 1 M2 Middle Speed 2 H High Speed D Drive 6 speeds can be selected by oper ating the range gear shift lever in the shaped pattern Only shift this lever after the tractor is com pletely stopped by depressing the clutch pedal If the lever does not move freely or makes abnorma...

Page 98: ...hift Lever H High Speed Travel Light M Middle Speed Travel Light L Low Speed Travel Light This lever is to select the forward and reverse driving direction Power shuttle model is an electronic hydraulic shift type which can shift without the clutch pedal depressed Manual model is a synchronized mesh type it is necessary to stop the vehicle prior to shifting during driving Put this lever into the n...

Page 99: ...PM of the PTO speed rpm Shift 1st 2nd PTO rpm 540 540E HOW TO USE THE SHUTTLE SHIFT LEVER To select the driving direction if the shuttle shift lever is pushed for ward with lifting slightly the tractor is driving forward and if the shuttle shift lever is pulled backward with lifting slightly the tractor is driving reverse At initial starting control the shuttle lever with the engine rpm decreased ...

Page 100: ...end To start off smoothly put the main and range shift levers into the proper positions and release the clutch pedal slowly It is possible to shift the shuttle shift lever without depressing the clutch pedal However the clutch pedal should be depressed in advance to cut the power before shifting the main or range shift lever into the de sired position Power shuttle only When releasing the pedal re...

Page 101: ...ing wheel with both hands depress the tilt pedal lightly and then adjust the position of the steering wheel as desired 1 Steering Wheel Tilt Pedal A Lowering B Lifting TF1O438A Do not adjust the tilt steering while driving An accident can occur unexpectedly CAUTION Brake pedal 1 Make sure to link the left and right brake pedals as shown in the figure while driving on a road The tractor can roll ov...

Page 102: ... local KIOTI dealer or workshop immediately CAUTION To stop the tractor depress the brake pedal and pull the lever up to apply the parking brake To engage the parking brake pull the lever up To release the parking brake pull up and press the thumb button Then while holding the button in lower the brake lever EU only To avoid possible injury death or loss of property from a ma chine runaway With th...

Page 103: ...tion decelerates the engine The hand throttle lever is mainly used while working in a field Do not use the hand throttle lever while driving on public highways Otherwise it can lead to an accident as it be comes hard to decelerate the tractor rapidly CAUTION FOOT THROTTLE 1 Foot Throttle A Depress TF1O439A The foot throttle is mainly used dur ing driving on a road while the hand throttle lever is ...

Page 104: ... should be engaged only while the driving clutch is engaged If the differ ential lock pedal does not move when depressing it try to de press it again after releasing it When engaging the differential lock reduce the engine speed After engaging it accelerate the tractor Make sure to set the steering wheel in the straight ahead po sition while the differential lock is in use Otherwise the differ ent...

Page 105: ... Seat Back Adjustment Lever M55O4M5A To change the seat back angle raise the lever 1 on the left of the seat Then adjust the seat back angle with the lever pulled Release the le ver after adjustment Make sure that the lever is returned and the seat is firmly fixed after adjustment Do not put a hand between the seat and the slides when ad justing the seat position You can be injured unexpectedly CA...

Page 106: ...ing the cushion adjustment lever 1 on the front of the seat to the direction makes the cushion softer while turning it to the direction makes the cushion firmer The seat belt is semi automatic self retracting type Make sure to fasten the seat belt before driving To dis engage the seat belt press its red release button T11O4A42 1 Cushion Adjustment Lever ROPS CABIN TF120 RX6030 7030 8030 AU 04 in46...

Page 107: ...mplement is raised by pulling the lever In order to limit the lowering height of implements use the lock bolt 2 to limit the operating range of the lever For detailed information refer to 3 point hitch control in Chapter 5 Make sure that the seat belt is not twisted It cannot work properly leading to a hazard ous condition The seat belt should go around your body as low as possible not your waist ...

Page 108: ...5 1 Draft Control Lever A Lifting B Lowering The draft function can be used for the plow which is installed to the lower link Lifting arm If the plow is operated with excessive draft the lifting arm is automatically raised to reduce the draft and then returned to its original This is called Draft Function The plowing depth can be controlled by the soil status by putting the draft control lever int...

Page 109: ...ition Lifting Arm Lower Link Speed Control KNOB This knob does not control the lifting speed of the lower link NOTE 1 Lowering Speed Control Knob A High Speed B Low Speed M55O560A Double Acting Lever 1 Double Acting Valve 1 Lever 1 A Port A B Port B T11O454A This lever is used to control a auxil iary hydraulic implement installed on rear CABIN T11O4A43 1 Joystick Lever ROPS TF120 RX6030 7030 8030 ...

Page 110: ...etent valve if equipp ed operating lever into the neutral position when the hydraulic implement is not in use If the detent valve is kept in the operating position for an extended period of time the relief valve is kept open and the temperature of the hy draulic fluid rises leading to damage of various hydraulic parts such as the oil seals and O rings WARNING For detailed information see Opera tio...

Page 111: ...or devices 1 Speaker 2 Air Grill 3 Air Inlet 4 Heater Air Conditioner Switch 5 Room Lamp 6 CD Player Bluetooth Player 7 air intake gill lever 8 Room Mirror If equipped 9 Sun Visor If equipped TF1O451A TF120 RX6030 7030 8030 AU 04 in51 51 2016 06 17 오후 1 54 35 ...

Page 112: ...o provide a clear and wide rear view 3 The cabin can be kept comfortable and pleasant by operating the air conditioner and heater Entrance 1 Door Lock 2 Door Handle 1 Work Lamp 2 Antenna 3 Wiper 4 Outside Rearview Mirror 5 Door Handle 6 Turn Signal Lamp 4 The cabin structure is safe as it is verified by the ROPS Roll Over Protection Structure test and FOPS Falling Object Protection Structure Howev...

Page 113: ...contact to avoid falling both hands on rails and one foot on the step or one hand on the hand rail and both feet on the steps WARNING Pull up and push the window handle gently to open the rear door To close the door pull and close the door and push down the window handle TF1O443A Rear window 1 Handle of rear window 2 Pull Unlocking the door TG1O429A 1 Door Lever Push the lever to open the door in ...

Page 114: ...ing the tractor Side win dows can be partially open to vent the cab 1 Side Window T11O466A side window Working Light 1 Working Light Switch Front The working lights are installed to the front and rear sections of the roof and their operating buttons are in stalled in the right panel in the cabin To turn on position the switch marked front to the ON position The key switch should be positioned to t...

Page 115: ...itch Rear Wiper T11O427A 1 To turn on position the switch marked wiper to the ON position 2 The washer fluid is sprayed through the nozzle of the wiper by pressing the switch again with the key switch in the ACC or ON position 1 Washer Fluid Tank M55O4N4A 3 The washer fluid tank for cleaning the windows is installed behind the license plate bracket on the rear left side outside the cabin Check the...

Page 116: ...iper blade can be damaged if operating on a window that is iced over WARNING MODE SELECTION SWITCH 1 ECO MODE selection switch A MODE button B ECO button 1 ECO MODE selection switch MODE button A Each pressing of the MODE switch changes the indication on the instrument cluster LED in the following order odometer instant fuel consumption aver age fuel consumption total fuel consumption White Fuel e...

Page 117: ...ing a CD cassette tape oper ates the CD cassette player auto matically For detailed information refer to the owner s manual for the audio system BLUETOOTH PLAYER RADIO 1 Bluetooth Player Radio 2 Power Switch TF1O452A This vehicle is equipped with a Blue tooth player which has an audio radio function and wireless LAN communi cation Using the Bluetooth function it is possible to pair and use it with...

Page 118: ...gh can affect the driver s concentration leading to pos sible safety accidents CABIN Lamp 1 Cabin Lamp If you press the lens the cabin lamp will be turned on If you press it again it will be turned off TF1O445A CAUTION The cabin lamp can be oper ated without the key inserted However turning it on for an extended period of time can discharge the battery TF120 RX6030 7030 8030 AU 04 in58 58 2016 06 ...

Page 119: ...before driving for a clear rear view TF1O446A Cigarette lighter Press and release the cigarette lighter When it is heated to the specified level it pops out automatically Then it is ready to be used It can also be used as a power source It is oper able only when the ignition switch is in the ON position 1 Cigarette Lighter TF1O447A TF120 RX6030 7030 8030 AU 04 in59 59 2016 06 17 오후 1 54 40 ...

Page 120: ...up holders and storage sections for keeping cups and manuals for convenience TF1O448A Sun Visor If equipped 1 Sun Visor Pull it down to block the sunlight from the front Keep it folded unless nec essary TF1O449A 7105 TF1O450A TF120 RX6030 7030 8030 AU 04 in60 60 2016 06 17 오후 1 54 41 ...

Page 121: ...n the air condi tioner is in operation Pushing the vent lever to A opens the vents and draws fresh air from outside Pushing the vent lever to B closes the vents to recirculate the air in the cabin M55O4N8A U WARNING This cabin is not designed for spraying chemicals and can not block polluted outside air from entering WARNING TF120 RX6030 7030 8030 AU 04 in61 61 2016 06 17 오후 1 54 41 ...

Page 122: ...ises rapidly in hot weather or on a sunny day Use the fresh air mode in normal conditions and use the air recir culation mode only if necessary Continued operation of the air recirculation mode can cause the inside to become stuffy causing headaches drowsiness or frost on the windows Do not operate the recirculation mode for an extended period of time WARNING H11O493A The fan speed for the heater ...

Page 123: ...ents in the front and 4 vents on the left and right When the dial is turned to the Defrost position air comes out from 4 vents in the front to defrost the wind shield H11O498A The desired temperature can be set by adjusting this dial Warm air flows out by turning it clockwise Red and cool air flows out by turning it coun terclockwise Blue The temperature control dial only con trols the amount of a...

Page 124: ...ong hours of driving turn off the air conditioner set the fan speed control dial to the 4th speed drive for 5 to 10 min utes and then turn on the air conditioner CAUTION Make sure you operate the air conditioner once or twice a month in winter season to prevent refrigerant leakage and facilitate the compressor lubrication for durability of the A C components CAUTION A C refrigerant amount in spect...

Page 125: ... load rapidly increases When the tractor is stationary and being used in high load work reduce the A C opera tion period as the engine may be overheated Make sure you operate the air conditioner once or twice a month in winter season to prevent refrigerant leakage and facilitate the compressor lubrication for durability of the A C components If the tractor has been parked under strong sunlight for...

Page 126: ...ssemble or assem ble the tire If it is necessary to disassemble assemble the tire let a qualified service per son perform the work WARNING When driving on a road with an implement which has ex terior lamps such as a trailer make sure to turn on those lamps by connecting them to the 7 pin socket in order to prevent an accident Make sure you check for prop er operation after connecting the 7 pin soc...

Page 127: ...ximum when using the front end loader or front suitcase weights If tires with a different size from the ones already in use are in stalled contact the KIOTI dealer for the front rear wheel speed ratio Improper front rear wheel speed ratio can result in exces sive wear of the tires NOTE T46w031a Do not weld or apply heat to the tire rim or disc The tire can explode due to the rapidly in creased pre...

Page 128: ...it the type or condition of work 1 Disc 2 Rim Bolt 3 Rim Never operate tractor with a loose rim wheel or axle Always tighten nuts or bolts to the specified torque Make sure to frequently check that all these parts are firmly tightened Make sure to perform inspec tion daily WARNING T11O429A TF120 RX6030 7030 8030 AU 04 in68 68 2016 06 17 오후 1 54 44 ...

Page 129: ... 54 1 1 666 65 6 1 554 61 1 1 424 56 1 1 467 57 8 1 551 61 1 1 501 59 1 1 571 61 9 1 609 63 3 1 679 66 1 1 443 56 8 Standard Be adjusted Front Rear Front rear tire tread RX6030 C P pc T12O461A mm in TF120 RX6030 7030 8030 AU 04 in69 69 2016 06 17 오후 1 54 44 ...

Page 130: ...55 7 1 528 60 2 1 442 56 8 1 554 61 2 1 593 62 7 1 691 66 6 1 485 58 5 1 583 62 3 1 563 61 5 1 455 57 3 Standard Be adjusted Front Rear Front rear tire tread RX7030 C P pc T12O462A mm in TF120 RX6030 7030 8030 AU 04 in70 70 2016 06 17 오후 1 54 44 ...

Page 131: ... 58 1 1 515 59 6 1 613 63 5 1 713 67 4 1 811 71 3 1 676 66 0 1 566 61 7 1 576 62 0 1 466 57 7 1 666 65 6 Standard Be adjusted Front Rear Front rear tire tread RX8030 C P pc T12O463A mm in TF120 RX6030 7030 8030 AU 04 in71 71 2016 06 17 오후 1 54 44 ...

Page 132: ... lb ft Rear 274 6 318 7 N m 28 32 5 kgf m 202 5 235 1 lb ft WHEEL TORQUE AND DIRECTION front REAR wheel installation pattern Use tires approved by KIOTI only Assemble the tire as shown in the figure Contact your local KIOTI Dealer if it is necessary to change the tire specification or installation method WARNING FRONT AND REAR wheel bolt AND NUT torque RIM bolt and nut torque Tightening torque of ...

Page 133: ... wheels remove the extra front weight Additional weight Additional front weight T11O444b If the front tires are excessively load ed and it becomes hard to steer the tractor the tires can be worn faster and the durability of the front axle can be deteriorated For agricultural tires make sure to install them with their arrow marks on their side pointing to the front driving direction The tire is cor...

Page 134: ... the required amount of weight Otherwise the life of the axle or wheel can be shortened IMPORTANT Additional weight might be needed for transporting heavy implements Reduce the speed regardless of additional weight when driv ing on a bumpy or rough road with the implement lifted The tractor can roll over CAUTION 1 H11O4E1a 1 Rear Weight Additional rear weight IF EQUIPPED The rear weight is used to...

Page 135: ...hese mass es among the axles Maximum permissible vertical load on the coupling point daN AAH ABM Front wheel Agri 11 2 20 8PR 1 120 2 100 42 750 320 70 R20 1 150 2 100 42 Agn 300 70 R20 1 215 2 100 42 Turf 31x13 5x15 8PR 1 180 2 100 42 Ind 12 5 80 18 10PR 2 135 2 100 42 Rear wheel Agri 14 9 30 8PR 1 930 2 900 58 420 70 R28 2 070 2 900 58 Agn 420 70 R30 2 120 2 900 58 Turf 44x18x20 4PR 1 550 2 900 ...

Page 136: ...MEMO MEMO TF120 RX6030 7030 8030 AU 04 in76 76 2016 06 17 오후 1 54 45 ...

Page 137: ...0 How to drive 5 10 Parking 5 14 Turning 5 15 Driving on slopes 5 16 precautions when coming in and out of WORK FIELD 5 16 precautions while driving on the road 5 17 LOADING AND UNLOADING 5 18 Precautions when using power steering 5 18 3 point hitch control SYSTEM 5 20 REMOTE hydraulicS 5 24 Connecting and disconnecting implement 5 26 5 TF120 RX6030 7030 8030 AU 05 in1 1 2015 10 29 오후 2 25 49 ...

Page 138: ...o not drive the tractor at the max imum speed on a road 4 Never apply excessive load during work 5 Idle the engine at a low speed for 2 to 3 minutes before stopping it Driving a new tractor at a high speed or under heavy load can affect its du rability Make sure to run the tractor at the proper work load and speed for the initial operation of 10 to 20 hours Initial operation Walk around inspection...

Page 139: ...the engine for over 10 seconds consecu tively to protect the start mo tor and battery from damage IMPORTANT When the parking brake is en gaged the parking brake lamp on the instrument cluster illu minates When releasing it the parking brake lamp is turned off NOTE 1 Make sure there is no obstacle around the tractor 2 Make sure the parking brake is set 1 Parking Brake Lever 2 Brake Pedals 3 Pedal I...

Page 140: ...or behind the tractor WARNING T11O452A 1 Position Control Lever 2 Lock Bolt 3 Lower Link A Lifting B Lowering T11O513A ROPS 4 Set the main range and shuttle shift levers in the neutral position 1 Forward Reverse Lever 2 Main Shift Lever 3 Range Shift Lever 4 PTO Switch A OFF B ON TF120 RX6030 7030 8030 AU 05 in4 4 2015 10 29 오후 2 25 51 ...

Page 141: ...mp and engine oil pressure 1 Key Switch A Pre heat B Stop C ACC D ON E Start M55O4K6A Operating principle of auto pre heating system The glow plug lamp comes on for 8 seconds and then goes off when the key switch is turned to the Start or Stop position The engine should be started within 5 seconds after the glow plug lamp goes off After the en gine is started post heat is per formed for 15 seconds...

Page 142: ...f any lamp remains on immediately stop the engine and determine the cause TF1O502A 1 If the oil pressure warning lamp 2 and engine check lamp 1 does not go off in 4 to 5 seconds after the engine is properly started stop the engine immediately and check the engine oil level If the engine oil level is proper contact your lo cal KIOTI Dealer 2 If the charge warning lamp 3 does not go off in 4 to 5 se...

Page 143: ...the OFF position to stop the engine 4 Remove the ignition key T85O532A Never touch the muffler or hot covers until they are cooled down after running the engine or driving the tractor WARNING Turn off all the electrical devic es and remove the ignition key before leaving the tractor Do not leave the tractor outside unattended It can be stolen as the key used for all KIOTI trac tors are the same in...

Page 144: ...order to shorten the warm ing up time 5 The engine is sufficiently warmed up when the temperature gauge on the instrument panel indicates 1 2 of the normal temperature range regardless of the warming up time 6 Do not increase the work load rap idly after starting work 7 Run the engine without load for approx 2 to 3 minutes before stop ping the engine after work This vehicle is equipped with a turb...

Page 145: ...exces sively increases fuel consump tion and affects the durability of the tractor negatively Never leave the tractor unat tended while warming up It can cause fire and an accident WARNING Be sure to apply parking brake while warming up the engine If the warm up is skipped or missed the tractor can take off abruptly to cause a fatal accident WARNING 1 Dead Battery 2 Jumper Cables 3 Jumper Cables 4...

Page 146: ...ody with the discharged battery Make sure to connect the clip to the body part without paint 6 Start the engine of the tractor with the normal battery 7 Start the engine of the tractor with the discharged battery 8 Disconnect the black cable from the negative battery terminals of both of the tractors 9 Disconnect the red cable 10 Run the engine for at least 30 minutes to charge the discharged batt...

Page 147: ...ING T11O509A 1 Steering Wheel 2 Tilt Pedal A Lifting B Lowering 3 Adjust the steering wheel accord ing to the driver s physique Do not adjust the tilt angle of steering wheel while driving You could lose control of your tractor causing an accident WARNING M55O550A 4 Make sure both brake pedals are interlocked 1 Brake Pedal LH RH 2 Pedal Interlock A Depress If depressing only one brake pedal at a h...

Page 148: ...ifting B Lowering M55O547A lever to the rear side of the tractor to lift the implement 6 Increase slowly the engine RPM from idle speed to medium speed 1 Hand Throttle Lever Slow Fast 7 Release the parking brake 1 Parking Brake Lever 2 Brake Pedals 3 Pedal Interlock A Depressing B Pressing Down M55O4M1A TF120 RX6030 7030 8030 AU 05 in12 12 2015 10 29 오후 2 25 55 ...

Page 149: ... the main shift lever M55O556A POWER SHUTTLE MANUAL TF1O503A range shift lever and shuttle lever to the position you want As this tractor is equipped with the power shuttle system for forward backward driving it is possible to shift the main shift and range shift levers without depressing the clutch pedal and then operate the shuttle shift lever 10 The tractor starts to move if you release the clu...

Page 150: ...nterlock 4 Chocks A Depressing B Pressing Down M55O562A 1 Pull the parking brake lever 1 up with the brake pedals depressed fully to engage the pedals with the latch If the braking force is insuf ficient depress the pedals more firmly 2 Before leaving the tractor after parking it make sure to stop the PTO lower the implement onto the ground and stop the engine 3 If it is necessary to leave the tra...

Page 151: ...luid friction in the transmission This symptom can occur easily when the engine rpm is high the low speed gear is selected by the range shift lever and the vis cosity of the transmission fluid is high due to low tempera ture To prevent this symptom make sure to apply the parking brake Get off the tractor after check ing that the tractor is com pletely stopped and the park ing brake is firmly appli...

Page 152: ...ifferential lock pedal is released Do not disengage the clutch or put the shift lever in the neu tral position on a steep slope Otherwise the tractor may become inoperable Before en tering a steep slope move the shift lever down to a proper gear and never try to move the shift lever on a slope A seri ous accident can occur WARNING precautions when coming in and out of WORK FIELD 1 Make sure that t...

Page 153: ...n public roads 1 Turn Signal Light precautions while driv ing on the road 1 Parking Brake Lever 2 Brake Pedals 3 Pedal Interlock 4 Chocks A Depressing B Pressing Down M55O562A When you are driving on the road observe all local traffic and safety regulations Only the operator should ride on the tractor unless a passen ger seat is installed If the tractor breaks down while driving on the road move i...

Page 154: ...e of the height of the loaded tractor to avoid hitting the roof of a tunnel or the bot tom of a bridge Make sure to follow this in struction as such accidents frequently happen WARNING M55O564A 1 Power Steering Handle 1 The power steering function is acti vated only while the engine is run ning However the steering wheel becomes slightly difficult when the engine is running at a low speed The stee...

Page 155: ...l hydraulic system means that power necessary for power steering is transferred by hydrau lic fluid only and therefore me chanical devices such as rack and pinion are not installed on the tractor Therefore the angle of the KIOTI emblem on the cen ter of the steering wheel may dif fer occasionally which is normal The load reaction type means that the reaction force or impact applied to the front ax...

Page 156: ... in a severe accident Never stop the en gine while driving Always grip the steering wheel using both hands while driv ing WARNING 3 point hitch control SYSTEM POSITION CONTROL The 3 point hitch can be controlled by the position control lever T11O452A 1 Position Control Lever 2 Lock Bolt 3 Lower Link A Lifting B Lowering 1 The position control lever is used to lift or lower the lifting arm lower li...

Page 157: ... This is called as floating 1 Lower Link M55O563A 7 The lower limit of the implement s height can be set by limiting the 1 Lowering Speed Control Knob A High Speed B Low Speed M55O560A 6 The lowering speed of the lower link is proportional to the applied weight but can be controlled by ad justing the draining passage of the hydraulic fluid See Lifting arm speed control knob on Page 4 44 T11O452A 1...

Page 158: ...trol function is used to prevent the wheels from spin ning and the engine from stopping due to excessive draft load when the tractor is used for work which requires a lot of draft such as plowing 2 The draft function is activated when the lowest or middle hole on the top link of the 3 point hitch is used The middle hole is for sensi tive draft control 3 To keep the plowing depth shallow put the dr...

Page 159: ...ill heard the hydraulic sys tem may be malfunctioning In this case let the engine idle for an 10 to 15 minutes addition ally and then try to start the engine again If the problem is still present contact your local KIOTI Dealer 7 However if the draft control lever is pushed forward to its end the low est position of the lifting arm can be lowered a little On the other hand if the lever is pulled b...

Page 160: ...e oil seals and O rings IMPORTANT For the self return type double act ing lever it returns to its original position to block the hydraulic fluid when it is pushed pulled and then released However this type of double acting valve lever should be pulled or pushed continuously for operation which is suitable for an implement with a short operat ing time such as the hydraulic cyl inder Optionally KIOT...

Page 161: ...in the figure The hydraulic pressure is properly supplied to the cylinder However when the hydrau lic pressure is released the cylinder is contracted only if there is outer force such as potential energy Single acting and double acting Cylinder 1 Single Acting Cylinder A External Load H11O585A 2 To contract the cylinder operate the lever to the opposite direc tion of the expansion Then the hydraul...

Page 162: ... release the pressure in the hydraulic line of the tractor Otherwise it is hard to connect the couplers and hydraulic fluid can be sprayed from the line and get in to your eyes while connecting them 3 Remove any foreign material around the male and female cou plers If foreign material enters the hydraulic components it can lead to malfunction of the system 4 Open the dust proof cover of the female...

Page 163: ...icult and dangerous due to the pressurized fluid in the hose 5 Remove the male coupler by push ing the female coupler boss back ward 6 Close the dust proof cover of the female coupler Wrap the male coupler of the implement with a plastic bag to prevent contamina tion Never connect or disconnect the implement hydraulic hose while the pressure in it is not released or the engine is run ning It is ha...

Page 164: ...MEMO MEMO TF120 RX6030 7030 8030 AU 05 in28 28 2015 10 29 오후 2 26 02 ...

Page 165: ... 6 5 Adjustment of Top link 6 6 Precaution for installing How to use top link holes 6 6 Adjustment of stabilizer 6 7 dismounting the implement 6 7 Draw Bar and trailer 6 7 INSTALLING PTO SHAFT 6 9 Handling loader 6 11 fixation points for front end loader 6 12 Driving on slopes 6 13 Joystick lever 6 14 Joystick valve PORT 6 17 6 TF120 RX6030 7030 8030 AU 06 in1 1 2015 10 29 오후 2 26 30 ...

Page 166: ...rs in the neu tral position stop the engine and apply the parking brake H11O562A 1 Implement Support 1 Telescopic Stabilizers Pin H11O567A 3 Remove both of the Telescopic Stabilizers fixing pins When removing installing an implement remove the check link pin to use the lower link end cassette type effectively 1 Latch 2 Lower Link End H11O564A 4 Press the latch to pull out the low er link end Casse...

Page 167: ...to its original position 1 Lower Link End H11O569A 7 Separate the top link from its bracket and turn it to adjust its length so that it becomes close to the upper bracket mounting hole of the implement Then fit it to the mounting hole insert the lock pins and secure it with the snap pin Remove the implement support as necessary 1 Top Link 3 Snap Pin 2 Lock pin H11O561A TF120 RX6030 7030 8030 AU 06...

Page 168: ...r local KIOTI Dealer for selection of the PTO shaft When selecting a PTO shaft make sure there is a minimum of 152 mm 6 inches of over lap of the PTO shaft tubes when the shaft is extended to its maximum working length between the tractor and the piece of equipment Also make sure there is 76 mm 3 inches of clearance between the shaft tube ends and the universal joints at both ends when the PTO sha...

Page 169: ...r Link R 6 Draw Bar M55O618A Operation tip for 3 point hitch elements M55O622A Adjustment of LIFT ROD 1 Lift Rod 2 Check Link 3 Pin 1 Adjust the implement height by turning the lift rod after removing the pin 2 After adjustment secure it with the pin TF120 RX6030 7030 8030 AU 06 in5 5 2015 10 29 오후 2 26 33 ...

Page 170: ... angle of the implements to the desired position by shorten ing or lengthening the top link 2 Adjusting top length varies accord ing to the type of implements used A plate describing how to at tach the implement is placed on the standard implement of our company When you are attaching an implement not requiring draft mount the top link into hole A When you are attaching an implement like plow requ...

Page 171: ...e moving the pins 3 Be sure to insert the set pins lynch pins and snap pins back to the implement securely to keep those safe 4 Stop the engine and move the re mote hydraulic control lever back and forth to relieve the hydraulic pressure in the system before dis connecting hydraulic couplers 5 Put the top link back to its hook Hold both lower links together with a rubber strap or tie down Oth erwi...

Page 172: ... Pull ing with top link ROPS and etc will cause a fatal accident Be sure to install the auxiliary safety chain when installing a trailer Improper use of the draw bar even if correctly positioned can cause a rear overturn Do not overload an attachment or towed equipment Use prop er counterweights to maintain tractor stability Hitch heavy loads to the draw bar only WARNING M55O117A TF120 RX6030 7030...

Page 173: ... groove of the PTO shaft 1 PTO Shaft H11O682A 1 1 C56O140a Make sure that the PTO safety cover is in its position before driving the PTO shaft The tractor PTO and PTO shaft should not be interfered by any surrounding parts Never go close to the rotating PTO or tractor PTO shaft A se vere accident can happen Before driving an implement through the PTO always make sure that all bystanders are well a...

Page 174: ...least 1 4 of the total length of the telescopic section of the drive shaft is en gaged WARNING M55O626A Ref to the chart below as to installing of an universal joint 1 PTO Cover A Allowable angle of universal joint 50 The type of PTO shaft Allowable angle of universal joint SAE 1 3 8 6 splines 50 degree TF120 RX6030 7030 8030 AU 06 in10 10 2015 10 29 오후 2 26 37 ...

Page 175: ...d information about instal lation and use of the front loader refer to the separate manual of the loader T11O603B Check the transmission fluid level and add fluid as neces sary after installing an attach ment or implement related to the hydraulic fluid such as a loader or backhoe and driving the tractor for a test IMPORTANT TF120 RX6030 7030 8030 AU 06 in11 11 2015 10 29 오후 2 26 39 ...

Page 176: ...at the indicated points WARNING fixation points for front end loader M55O627A Left hand side of front axle frame Left hand side of clutch housing The beneath of rear transmission Right hand side of front axle frame Right hand side of clutch housing TF120 RX6030 7030 8030 AU 06 in12 12 2015 10 29 오후 2 26 41 ...

Page 177: ...t end of the tractor uphill In other words drive forward on uphill and backward on downhill H11O554A H11O555A When unloaded bucket and rear ballast are installed H11O556A H11O557A To avoid injuries Keep the loader arm as low as possible when driving on a slope WARNING Driving on uphill Driving on downhill Driving on uphill Driving on downhill TF120 RX6030 7030 8030 AU 06 in13 13 2015 10 29 오후 2 26...

Page 178: ...ible for vehicle stability and safety while driving unless there are obstacles along the way Parking with loader installed 1 1 H11O683A FLOAT DOWN N DOWN ROLLBACK UP ROLLBACK DUMP REGEN Lock Unlock UP ROLLBACK UP DOWN DUMP DOWN 1 Joystick Lock Lever 1 Joystick Lever TF1O601A M55O625A When parking a tractor which is equipped with a loader or backhoe make sure that the bucket of loader or backhoe is...

Page 179: ...1O651A A Bucket Roll Back B Bucket Dump one position further to forward from the down position When the lever is in this position the boom moves up and down freely along the surface of the ground as the hydraulic line is opened from the valve to the boom cylinder This function is useful when removing soft objects on hard ground for example when removing snow or sand on paved road If moving the lev...

Page 180: ...e by operating the joystick lever to the rear left position 7 o clock position However these two op erations may not be performed simultaneously due to unbalanced hydraulic pressure in the hydraulic circuit 8 Up Dump The boom can be lifted and the bucket can dump at same time by operating the joystick lever to the rear right position 5 o clock posi tion However the operation time may not be shorte...

Page 181: ...round stop the en gine and move the joystick lever front and back left and right for several times to remove residual pressure in the hydraulic hose IMPORTANT WARNING Pressurized diesel fuel or hy draulic fluid may be sprayed on your skin or eyes lead ing to a severe injury or even death To for leaks use a board and wear protective gloves and goggles If your eyes come into contact with the hydraul...

Page 182: ...MEMO MEMO TF120 RX6030 7030 8030 AU 06 in18 18 2015 10 29 오후 2 26 45 ...

Page 183: ...Checking Seat Belt and CABIN j 7 14 Changing engine oil and replacing filter k 7 14 Replacing transmission fluid and filter l 7 16 INSPECTION front axle case oil m1 7 17 Changing front axle case oil m2 7 18 Adjusting Brake Pedal n 7 18 Lubricating Grease LOCATIONS o 7 20 Checking Wheel Bolt nut Torque p 7 21 Adjusting Clutch Pedal q 7 21 REPLACING Air Cleaner Primary Element r 7 22 fuel filter s 7...

Page 184: ...ecking caB cushion rubber Ag 7 33 Replacing air filter Ah 7 33 Flush cooling system and changing coolant Ai 7 33 Anti freeze 7 35 Draining water from clutch housing Aj 7 35 Checking and replacing wiper Ak 7 36 Replacing cabin fuse Al 7 38 Main fuse Am 7 40 Replacing bulb An 7 41 Checking refrigerant Ao 7 46 Air conditioner maintenance Ap 7 46 TURBOCHARGER Aq 7 47 MAINTENANCE TF120 RX6030 7030 8030...

Page 185: ...ged tires and ensure for proper sized tires and correct air pressure Parking Brake Check operation and adjust if required Clean Pedals Clean brake pedals travel control pedal clutch pedal and footrest area N General Items Check for loose or broken parts damaged operator cab instrument operation loose wheel nuts bolts oil leaks and damaged or missing signs Decals P AF AG AK PTO Inspect the splines ...

Page 186: ... filter Replace M 3 HST oil filter Replace 4 transmission fluid Change M transmission fluid level Check D 5 Front axle oil Change N Front axle oil level Check 6 Front axle pivot Adjust 7 Engine start system Check 8 Greasing Apply P 9 Wheel bolt torque Check Q 10 Battery condition Check 3 W Tier2 or 3 Without DPF Tier4 With DPF DI Direct Injection IDI In Direct Injection CRDI Common Rail Direct Inj...

Page 187: ...ace 2 12 Fuel filter element Replace S 13 Fan belt Air con belt Adjust 3 V AB 14 Clutch pedal free play Adjust O 15 Brake pedal free play Adjust R 16 Radiator hose and clamp Check G Replace 17 Radiator grill Clean Z 18 Power steering hose and oil line Check AA Replace 19 Fuel line Check U Replace 20 Intake air line Check X Replace 3 TF120 RX6030 7030 8030 AU 07 in5 5 2016 06 17 오후 1 55 34 ...

Page 188: ... AE 23 Fuel injection nozzle injection pressure Check 24 Injection pump Check 25 Cooling system Clean AJ 26 Coolant Replace AJ Coolant level Check F 27 Air con filter Replace AI 28 Fuel system Check 3 C 29 Fuse Replace 3 AN AQ AP 30 Light bulb Replace 3 AQ 31 Seat belt Check 32 Tire pressure damage Check 33 Parking brake Check 34 PTO cover Check TF120 RX6030 7030 8030 AU 07 in6 6 2016 06 17 오후 1 5...

Page 189: ...ner you are responsible for the performance of the re quired maintenance on the above instruction The components that have major impact on the tractor performance should be serviced by your local Dealer The per formance can be deteriorated leading to a serious accident Major component Components in engine transmission hydraulic system and electric system IMPORTANT NO Maintenance Interval Item Run ...

Page 190: ...h DPF API CJ grade above Oil viscosity SAE 10W30 10W40 15W40 4 Transmission oil 60 15 9 Daedong UTF 55 Shell Donax TD Exxonmobil Mobilfluid 424 Exxon Hydraul 560 BP Tractran UTH 5 Front axle oil 8 5 2 2 SAE 90 gear oil or better or same as T M oil 6 Apply grease Front axle support Brake pedal Brake lever Top link holder Control lever A little SAE Multi purpose type grease Check the oil level regul...

Page 191: ...f the tractor body Make sure to use high quality diesel fuel Fuel Tank Capacity CABIN Type 95 L 25 1 U S gal ROPS Type 85 L 22 45 U S gal 1 It is very easy to open the hood with one touch pulling knob 2 The hood stays open by itself with an air cylinder To close it just press down Never open the hood while the engine is running CAUTION T11O701A TF120 RX6030 7030 8030 AU 07 in9 9 2016 06 17 오후 1 55...

Page 192: ...uel level is low open the fuel tank filler cap and add fuel 3 After adding the fuel close the fuel tank filler cap Be careful not to let the fuel tank become empty otherwise air will enter the fuel system necessitating bleeding before next engine start Be careful not to spill during refueling If a spill occurs wipe it off at once or it may cause a fire If unit is not used for a long time make sure...

Page 193: ...k the oil level after installing hydraulic imple ment Add the fluid as needed Check the oil level with the cylinders of an implement ex tended and check again with cylinders retracted Add the oil to adjust average oil level in the range of the oil limit upper or lower IMPORTANT 1 Oil Dipstick A Oil level is acceptable within this range Checking engine oil level d 1 Check the engine oil daily 2 Par...

Page 194: ...ater only up to the middle of the range In case of leakage add anti freeze and water in the specified mixing ratio up to the middle of the range 3 The tractor is furnished in the factory with a mixture of anti freeze ethylene glycol and water in a ratio of 50 50 which is usable in any season When using oil of different make or viscosity from the previous one remove all of the old oil Never mix two...

Page 195: ...st be clean from debris to pre vent engine from overheating and to allow good air intake for the air cleaner IMPORTANT CHECKING BRAKE AND CLUTCH PEDALS g 1 The brake and clutch pedals should be inspected for free travel and smooth operation 2 You should adjust these pedals if an incorrect measurement is found See maintenance code O and R in this chapter When depressing the brake ped als separated ...

Page 196: ...he tractor on level ground and start the engine to warm it up 1 Oil Dipstick 2 Engine Oil Filler Cap A Oil level is acceptable within this range 1 Drain Plug M55O761A 2 Stop the engine apply the parking brake and place the container un der the tractor 3 Wait until the oil is cooled down 4 Take off engine oil filler cap to al low easy draining for engine oil 5 Remove the drain plugs at the bot tom ...

Page 197: ...pstick If the level is low add more oil The engine oil filter should be replaced when changing the en gine oil NOTE The engine oil is very hot while the engine is running or right after the engine is stopped Be careful not to be burned Avoid oil contact while chang ing or adding engine oil and wear eye protection to prevent eye contact Prolonged and repeated con tact with the engine oil may cause ...

Page 198: ...transmission fluid should be changed if it is contaminated or after the transmission is serviced or every 400 hours of operation When chang ing the transmission fluid make sure to change the fluid filter However re place the filter only at initial 50 hours and every 200 hours of operation afterward 1 Park the tractor on level ground and start the engine to warm it up 2 Stop the engine apply the pa...

Page 199: ...sion fluid Run the engine at medium speed for a few minutes to prevent damage to the hydraulic sys tem IMPORTANT 5 Apply a thin film of clean oil onto the O ring of a new filter 6 Tighten the filter firmly by hand 7 Run the engine for a few minutes and then shut engine off to check for leaks and fluid level Add fluid to the specified level as needed 1 Oil Filler Plug INSPECTION front axle case oil...

Page 200: ...fied level through the oil filler 5 Wait at least 15 minutes to allow the oil flow to the bevel case be fore checking the oil level 6 Add oil as necessary and tighten the oil filler plugs and oil level checking plug T11O749A Adjusting Brake Pedal n 1 Brake Pedal A Free Play M55O7B6A Adjust the brake pedal free play pe riodically Refer to the Maintenance schedule chart for checking interval The bra...

Page 201: ...esired and acceptable limit 4 Re tighten the lock nuts 5 Perform the same procedure for the left brake pedal to make both free play the same 6 Interlock the brake pedals after checking or adjusting them CAUTION Proper brake pedal free travel A 15 30 mm 0 591 1 181 in Keep the free play in the right and left brake pedals equal 1 Lock Nut 2 Turn Buckle M55O7e1A TF120 RX6030 7030 8030 AU 07 in19 19 2...

Page 202: ...OCATIONS o 1 Front axle support bracket FRT 2 Front axle case support LH 1 Front axle support bracket RR 2 Front axle case support RH 1 Brake shaft RH M55O766A M55O7B3A M55O7B4A 1 Brake shaft LH T11O738A T11O739A 1 Pitman arm support M55O7B5A 1 Hydraulic cylinder upper lower 2 Top link upper lower 3 Lift rod LH RH TF120 RX6030 7030 8030 AU 07 in20 20 2016 06 17 오후 1 55 42 ...

Page 203: ...m Front Rear Rim Bolt Nut 260 304 N m 192 224 lbf ft 26 5 31 kgf m T11O740A To avoid personal injury Never operate tractor with a loose rim wheel or axle Any time bolts and nuts are loosened retighten to speci fied torque Check all bolts and nuts fre quently and keep them tight CAUTION M55O7C9A 1 Clutch Pedal 2 Clutch Cable 3 Lock Nut A Free Play Adjusting Clutch Pedal q MANUAL 1 If the clutch doe...

Page 204: ... tighten the lock nut firmly The air cleaner will only fulfill its function if it is correctly and regularly maintained A poorly maintained air cleaner will mean loss of power excessive fuel consumption and a reduc tion in engine life Do not run the engine with fil ter element removed Be sure to refit the cap with the arrow on the rear of cover upright If the cap is im properly fitted evacuator va...

Page 205: ...der ordinary conditions or dai ly when used in dusty conditions to get rid of large particles of dust and dirt fuel filter s removing water from fuel filter T11O760A TF1O709A 1 Fuel Filter 2 Drain Plug 1 Water and dust in fuel are accumu lated in the filter Remove the plug from the bottom of the fuel filter to drain any impurities 2 Tighten the filter withe a hand Not a tool after drainage 3 Start...

Page 206: ...is air in the fuel filter turn the filter cock to the air side and turn the ignition key to turn the start motor Then the air in the filter port is discharged through the bleeding hose as shown in the figure CAUTION Do not operate the start motor for more than 5 seconds con tinuously Instead operate it for several times within 5 sec onds each time NOTE It is not necessary to bleed the system if fi...

Page 207: ...s is filtered by the fuel filter and is transferred to the fuel injection pump Maintain the proper fuel level in the fuel tank before the fuel tank be comes empty If all fuel is com pletely consumed in a Disel engine fuel should be added to the fuel tank and then the fuel system should be bled NOTE If the engine cannot be started even after bleeding the fuel sys tem contact your local Dealer 1 Adj...

Page 208: ...s should always be clean and firmly connected When installing a new or used bat tery clean its terminals 2 Check the battery and cable for damage and corrosion TF1O711A The battery gas can explode Do not expose the battery to flames or sparks It may cause a fire The battery fluid contains sul furic acid that can burn you Do not allow the battery fluid to contact your eyes skin or painted surfaces ...

Page 209: ...uld be replaced replace it with a new one with same specifi cation and capacity Charging Battery Type Volts V 100AH 12 CAUTION The charge warning lamp comes on if the charging sys tem is defective If it comes on while driving have the system checked or repaired by your local KIOTI Dealer Keep the battery fully charged If the battery fluid concentration is too low during the winter sea son the batt...

Page 210: ...lure to do so could lead to engine damage 3 Check the following section 1 air line Hose Section Inspection item Air cleaner intake manifold Loose clamp and damaged hose TF1O713A A Wheel to wheel distance at front B Wheel to wheel distance at rear Adjusting Toe in x ADJUSTING PROCEDURE T46OA36A 1 Park tractor on a flat surface 2 Turn steering wheel so front wheels are pointed straight ahead 3 Lower...

Page 211: ...st it again if necessary M55O782A Check to ensure the radiator hoses are free from damage and are tight ened properly every 200 hours or ev ery 6 months whichever comes first 1 If the hose clamps are loose or water leaks from hose tighten clamps securely 2 If the radiator hoses are swollen hardened cracked or otherwise damaged you must replace the hoses Failure to do so could lead to coolant loss ...

Page 212: ...e manual s instruction 1 Power Steering Oil Line 2 Connect 1 Check to see that all hydraulic lines and hose fittings are tight and undamaged 2 If damage is found you should re place the hoses at once Power steering line z T11O717A 1 Stop the engine and apply the parking brake 2 Unscrew the nuts B and D and press the middle of the belt with force of 10 kg f Adjust the belt ten sion to the specifica...

Page 213: ...If cooler fan is blocked by dirt clean with a soft brush or cloth using water CAUTION T11O719A Adjusting Front Axle pivot Ac 1 Adjusting Bolt 2 Lock Nut T11O741A If the front axle pivot pin adjustment is not correct front wheel vibration can occur causing vibration in the steering wheel ADJUSTING PROCEDURE Loosen the lock nut tighten the ad justing screw all the way and then loosen the screw by 1 ...

Page 214: ...ion hose and air cleaner housing for damage Replacing air cleaner filter Ae 1 Filter 2 Cap 3 Evacuator Valve T11O711A 2 Unscrew the air cleaner clip and remove the cover 3 Clean the inside of the air cleaner housing by blowing compressed air through it 4 Replace the filter and check the housing for damage 5 Install the cover and fix it with the clip Use only a genuine filter Use of a non recommend...

Page 215: ...cabin roof then separate the filter T11O742B Flush cooling system and changing coolant Ai 1 Stop the engine and let it cool 2 To drain coolant remove the drain plug from the radiator and turn the radiator cap to the 1st notch to release pressure in the radiator Then remove the cap completely 3 After all coolant is drained close the drain cock 4 Fill with clean water and anti freeze 5 Install the r...

Page 216: ...cooled down turn the cap to its first stop and then wait un til it is depressurized before removing the cap completely CAUTION IMPORTANT Do not start engine without coolant Use clean fresh water and anti freeze to fill the radiator and reservoir tank When the anti freeze is mixed with water the anti freeze mix ing ratio must be no less than 50 mixture of water and anti freeze Securely tighten radi...

Page 217: ...ll the plug Drain the water into a container and dispose of it in a proper manner for environment protection 3 Make sure to install the plug and not to damage the clutch severely 4 Make sure to drain water after working in a paddy field and wa tery field Draining water from clutch housing Aj 1 Drain Bolt T11O751A NOTE The temperatures shown on the left are industry standards that necessitate a min...

Page 218: ...he wiper arm upright Then hold the arm head and shake it left and right to remove the wiper arm from the drive spindle Disconnect the washer fluid hose and then install a new wiper arm to its position by aligning it to the proper angle T11O743B Replacement 1 Wiper Arm 2 Wiper Fixing Lever 3 Wiper Blade H11O649a 1 Set the wiper upright to replace the wiper blade 2 Hold the blade with one hand and p...

Page 219: ...he fixing lever is facing down Align the wiper arm with the fixing lever slot and lower the blade H11O652a 5 Lift the wiper blade to its end and install it so that the fixing lever is engaged with the wiper arm A clicking sound is heard CAUTION When the wiper blade is sepa rated the wiper arm should not contact the windshield or rear glass The glass can be damaged TF120 RX6030 7030 8030 AU 07 in37...

Page 220: ...sher fluid never operate the wiper In order to prevent damage of the wiper blade never use synthetic detergent thinner or solvent on the windshield A Open M55O794A M55O794A Replacing cabin fuse Al The cabin fuse panel is behind the cup holder on the left fender in the cabin 1 Fuse Box 2 Relay Box The relay and fuse designation decal is on the fuse box cover for refer ence TF1O715A TF120 RX6030 703...

Page 221: ...cort Tale Air con Beacon Head Lamp Combimeter Controller Fuel Heater PTO Start 10A 10A 10A 30A 15A 10A 10A 10A 10A 10A 15A 30A 15A 10A 15A 15A 10A 15A 10A 5A 5A T11O753B RELAY BOX TG1O769A TG1O770A 1 Normal Fuse 1 Blown Fuse 30A Customer 15A 3PIin Socket TF1O701A TF120 RX6030 7030 8030 AU 07 in39 39 2016 06 17 오후 1 55 52 ...

Page 222: ...f all the electri cal devices 2 Open the fuse box cover and check the fuse in question using fuse tongs H11O655a 3 If the fuse is blown replace it with a new fuse with the same capacity Make sure it is firmly installed 4 Install the fuse box cover Main fuse Am 1 Ignition Power Fuse 2 Preheat Power Fuse 3 Main Power Fuse 4 Charge Power Fuse TF1O716A TF1O717A TF120 RX6030 7030 8030 AU 07 in40 40 201...

Page 223: ... blow fuse can damage elec trical systems in the tractor severely Refer to the chapter Trouble shooting in this manual or contact your local KIOTI Dealer for specific information dealing with electrical prob lems IMPORTANT Head lamp 1 Handle A Pull B Open 1 Turn the key switch to the OFF position and open the hood T11O745A The main fuse is to protect electric devices and wirings If the ignition pr...

Page 224: ...sh This is because of the temperature difference be tween the inside and outside of the lamp which is normal CAUTION Work lamp FRT RR The work lamp uses a halogen bulb Do not touch the illuminating part of the halogen bulb The bulb life can be shortened by finger prints dust and moisture or the bulb even can be broken Clean it with soft cloth Be careful of the following when re placing the halogen...

Page 225: ...stall a new bulb with the same capacity 1 Work Lamp Bulb T11O755A T11O756A CABIN lamp 1 Cabin Lamp Bulb 1 Fit a flat bladed screwdriver into the edge of the cabin lamp and pry off the room lamp cover 2 Remove the cabin lamp bulb by pulling it up Install a new bulb H11O666A from the mounting hole with a cross head screwdriver to sepa rate the front glass case TF120 RX6030 7030 8030 AU 07 in43 43 20...

Page 226: ...led on the rear fender M55O7A1A 2 Unscrew the mounting bolts from the inside of the rear fender 1 Protective Cover 2 Mounting Bolt T11O746A 1 Turn Signal Lamp RR Bulb 3 Remove the bulb by turning its socket counterclockwise Install a new bulb M55O7A3A TF120 RX6030 7030 8030 AU 07 in44 44 2016 06 17 오후 1 55 55 ...

Page 227: ...pressing it down lightly to remove it Install a new bulb LICENSE PLATE LAMP M55O7A4A T11O724A Do not touch the bulb if it is still illuminated or right after it is turned off You can be burned by the hot bulb For some bulbs which require delicate handling or work pro cess contact your local KIOTI Dealer Do not touch the illuminating glass part of the halogen bulb The bulb life can be shortened by ...

Page 228: ...ard backward lever Main shift lever and PTO lever in neutral CAUTION Make sure to follow the instructions below to keep the air conditioner in the best condition 1 Operation in winter season During the winter time run the air conditioner once or twice every month to prevent refrigerant leak age and corrosion in the air con ditioner system and to facilitate oil circulation in the compressor in orde...

Page 229: ... is insufficient However charging the air conditioner with excessive refrigerant also affects its performance nega tively Therefore have the sys tem checked by a KIOTI Dealer if malfunction is found CAUTION Have the air conditioner ser viced by qualified service personnel If it is serviced by an unqualified person he she can be injured by the refriger ant under high pressure WARNING 1 Turbocharger...

Page 230: ...MEMO MEMO TF120 RX6030 7030 8030 AU 07 in48 48 2016 06 17 오후 1 55 56 ...

Page 231: ...STORAGE AND DISPOSAL 8 Tractor storage 8 2 Daily storage 8 2 Long term storage 8 2 Using tractor after storage 8 4 Usage and disposal 8 5 8 TF120 RX6030 7030 8030 AU 08 in1 1 2015 10 29 오후 3 16 07 ...

Page 232: ...y Follow the instructions below if the tractor is not to be used for a long period of time This is to operate the tractor again with minimum prepara tion after long term storage Repeat this procedure if the tractor hasn t been used for one year 5 Change the engine oil and run the engine to circulate oil throughout the engine parts for about 5 min utes 6 With all implements lowered to the ground co...

Page 233: ... direct sunlight and heat away from the tires 11 Clean the engine components as well as the tractor 12 Add grease to all the grease fit ting 13 Worn or damaged parts should be replaced 14 If a loader or implement is at tached lower it onto level ground 15 Apply grease to the exposed section of the cylinder rod 16 Flush the cooling system and drain water from it Also add an tifreeze as well as wate...

Page 234: ...he engine 9 Check if the instrument panel and all parts operate correctly while running the engine for a few minutes Using tractor after storage CAUTION To avoid injury Never clean the tractor body while the engine is running Never run the engine in an en closed area without proper venti lation system in order to prevent poisoning by exhaust gas When storing the tractor re move the key from the sw...

Page 235: ...s it may can cause excessive exhaust gas which is harmful to the envi ronment 10 Drive the tractor outside and check if it is operating properly Park the tractor outside and idle engine for at least 5 minutes Stop the engine and visually inspect the tractor Check if there is leakage 11 Start the engine release the parking brake and check the brake condition while driving for ward Adjust the brake ...

Page 236: ...MEMO MEMO TF120 RX6030 7030 8030 AU 08 in6 6 2015 10 29 오후 3 16 08 ...

Page 237: ...TROUBLESHOOTING 9 Engine Troubleshooting 9 2 Tractor Troubleshooting 9 4 9 TF120 RX6030 7030 8030 AU 09 in1 1 2015 10 29 오후 2 59 51 ...

Page 238: ...ilter and fuel injection pump to eliminate all the air in the fuel system Thick carbon deposits on orifice of injection nozzle This is caused when water or dirt is mixed in the fuel Clean the nozzle injection piece being careful not to damage the orifice Check to see if nozzle is working properly or not if not install a new nozzle Valve clearance is wrong Contact KIOTI dealer Engine oil become thi...

Page 239: ...if the check ENGINE lamp is turned on If it is contact your dealer 2 When output is insufficient Valve out of adjustment Contact KIOTI dealer Air cleaner is dirty Clean or replace the element at every 100 to 200 hours of operation Fuel injection pressure is wrong Contact KIOTI dealer Check ENGINE lamp ON Check if the check ENGINE lamp is turned on If it is contact your dealer 3 When color of exhau...

Page 240: ...e does not operate or only one brake pedal operates The brake pedal play is excessive Adjust the play The brake lining is worn or stuck Have it replaced in a workshop Brake pedal does not return properly The brake return spring is damaged Replace it Grease is insufficient on each mating surface Remove rust and apply grease 4 Steering wheel is not oper ating properly Steering wheel is heavy or vibr...

Page 241: ... the specified level There is air in the intake pipe Bleed the pipe The oil filter is clogged Replace it The hydraulic filter valve and cylinder are malfunctioning Contact KIOTI dealer 3 point hitch hops itself Each sensor malfunctioning Contact KIOTI dealer Select the highest top link hole 6 Electric system is faulty Headlamps cannot be turned on or are dim The fuse is blown Check the wiring and ...

Page 242: ...ck and clean them Work lamps do not come on The bulb is blown Replace it The ground and terminal wirings are poorly contacted Check and clean them 7 Heater air conditioner motor is faulty Fan speed is slow or no air is blown out The fan speed control switch and motor are faulty Repair or replace them The air suction filter is clogged The wiring is short circuited Check and repair it Fan speed cann...

Page 243: ...t is loose Tighten it High temperature and low pressure occur The refrigerant is insufficient See KIOTI dealer The compressor is faulty Repair or replace it Compressor clutch does not operate The wiring is faulty Check and replace it The clutch clearance is excessive Adjust it The voltage is low Replace the battery The internal part is malfunctioning Replace it Insufficient refrigerant Add refrige...

Page 244: ...MEMO MEMO TF120 RX6030 7030 8030 AU 09 in8 8 2015 10 29 오후 2 59 51 ...

Page 245: ...10 10 INDEX INDEX 10 2 TF120 RX6030 7030 8030 AU 10 in1 1 2016 05 17 오후 2 45 36 ...

Page 246: ... 31 Adjusting Toe in x 7 28 Adjustment of LIFT ROD 6 5 Adjustment of stabilizer 6 7 Adjustment of Top link 6 6 Air Conditioner BELT TENSION Aa 7 30 Air conditioner maintenance Ap 7 46 Air Conditioner Switch 4 65 Air Filter Warning Lamp 4 25 ANTENNA 4 60 Anti freeze 7 35 B Battery v 7 26 Battery charging lamp 4 23 Belts and rubber parts 2 5 Bleeding fuel system t 7 24 BLUETOOTH PLAYER RADIO 4 59 Br...

Page 247: ...ng Grill Radiator SCREEN f 7 13 Clutch Pedal 4 42 CLUTCH PEDAL ENGAGEMENT CONTROL BUTTON 4 15 Combination switch 4 9 Components for additional front weight 4 76 Connecting and disconnecting implement 5 26 Coolant Temperature Warning Lamp 4 28 cruise control SWITCH 4 31 CRUISE PTO warning lamp 4 30 Cup Holder and Storage 4 62 Cushion strength adjustment 4 48 D Daily check chart 7 3 Daily storage 8 ...

Page 248: ...rnal dimensions 3 2 F Fan Speed Control Dial 4 64 Filters 2 4 fixation points for front end loader 6 12 Flush cooling system and changing cool ant Ai 7 33 FOOT THROTTLE 4 45 FRONT AND REAR wheel bolt AND NUT torque 4 74 front REAR wheel installation pattern 4 74 Front rear tire tread RX6030 C P pc 4 71 Front rear tire tread RX7030 C P pc 4 72 Front rear tire tread RX8030 C P pc 4 73 fuel filter s ...

Page 249: ...ON front axle case oil m1 7 17 INSTALLING PTO SHAFT 6 9 Instrument panel 4 18 Interior devices 4 53 J Joystick lever 6 14 joystick lever 4 50 Joystick valve PORT 6 17 JUMP STARTING 5 9 K Key switch 4 8 L L indicator 4 27 LICENSE PLATE LAMP 7 45 Lifting Arm Lower Link Speed Control KNOB 4 51 LOADING AND UNLOADING 5 18 Long term storage 8 2 Low fuel level warning indicator 4 28 LUBRICANTS 7 8 Lubric...

Page 250: ...N CONTROL 5 20 position control lever 4 49 Power steering line z 7 30 Precaution at Overheating 7 30 Precaution for installing How to use top link holes 6 6 Precautions before operation 1 2 PRECAUTIONS BEFORE OPERATION 2 1 Precautions during operation 1 5 Precautions for handling 7 26 precautions when coming in and out of WORK FIELD 5 16 Precautions when using power steering 5 18 precautions while...

Page 251: ...n fuse Al 7 38 Replacing fuel filter 7 24 Replacing transmission fluid and filter l 7 16 RIM bolt and nut torque 4 74 Room Mirror If equipped 4 61 S Safety decal maintenance 1 20 SAFETY PRECAUTIONS 1 1 Safety precautions during servicing 1 12 Safety precautions when using the loader 1 17 Seat adjustment 4 46 SEAT BACK RECLINING 4 47 Seat belt 4 48 Seat height adjustment 4 47 Seat Sliding 4 46 Shut...

Page 252: ...5 Usage and disposal 8 5 Using tractor after storage 8 4 V Vehicle identification number 2 2 VIBRATION LEVELS OF THE TRACTOR EXPOSITION TO VIBRATIONS 3 11 visual Check itemS 5 2 W WARMING UP 5 8 Water In Fuel Warning Lamp 4 28 WHEEL INSTALLATION DIRECTION 4 75 WHEEL TORQUE AND DIRECTION 4 74 When driving the tractor 1 9 When loaded bucket and rear ballast are instalLeD 6 13 When operating the PTO ...

Reviews: