


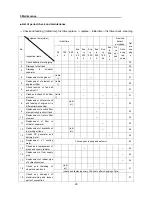

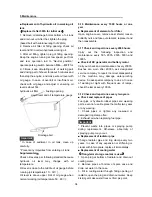
5 Maintenance
Chapter 5 Maintenance
5.1 Check
In order to use this machine safely and prevent
any troubles, please carry out frequent check and
periodic maintenance before use. The time in this
instruction book is stipulated by manufacturer.
Therefore, your maintenance shall be subject to
this time point.
▆
General instruction for maintenance and
check
1. In case of any difficulties or confusion, please
consult your local distributor or appointed
company for detailed structural functions.
2. Clean up the vehicle for check any
abnormities. Particularly those grease filling parts
and engine oil gauge to prevent any impurities
from entering. And prevent water splashing on
electrical device.
3. Select clean place to check and replace
engine oil and apply clean containers to prevent
any impurites.
4. Park the vehicle at smooth ground, check its oil
level and fill in fuel. Please use the grease with
same brand name.
5. It’s dangerous to drain oil or water or replace
filter immediately after parking; so carry out these
after complete cooling. In case of cold engine oil,
warm up it slightly and then drain it out.
6. Carry out exhaust operation after replacement
of oil or filter element.
7. For filling opening with filter screen, do not
remove the screen and fill.
8. Clean up the used lubricant after filling. Any
sands or wastes adhered on machine may
accelerate wearing.
9. When carry out engine oil and filter
replacement, check drained oil and used filter for
any metal powders and impurities.
10. Please apply incombustible cleaning agent or
light oil for cleaning of parts.
▆
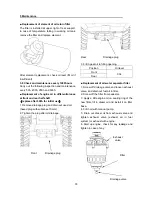
Safety precautions for maintenance
* Prevent poisoning of exhaust gas while the
motor is working indoor. Pay special attention to
ventilation measures.
* Do not carry out check or maintenance during
driving of vehicle or working of motor.
* Before check or maintenance, put front and rear
operation rod at [Neutral position] and parking
brake. Let the shovel contact with ground, and put
shovel control rod on [Neutral position] to stop
engine working. lock shovel control rod with
locking button and pull out the starting key.
* Lock connecting rod with connection device and
fix front support (front bridge) and rear support
(rear bridge).
* Install fixed cushion on wheel.
* Remove connection of battery joint while
carrying out check and maintenance of electrical
system.
* Do not use scrub tools instead of appropriate
ones.
* No smoking while check and maintenance of
fuel system of filling fuel.
* Keep cloth with grease and combustible oil at
safety place without smoke.
* Wear helmet, safety glasses, respirator and
other safety protection device as per check and
maintenance instruction.
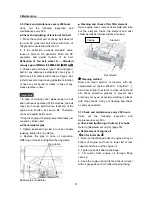
5.2 Inspection before starting up
Carry out inspection of machine before starting up
to prevent any troubles.
1. Walk around the vehicle and check for any
trails oil and water leakage. In case of any
leakage (joint of high-pressure pipe, hydraulic
cylinder and fuel system pipes), find out detailed
position and stop it. If still confusion, please ask
your local distributor or appointed service
company to do so.
2. Check all bolts and nuts for any loosen; if such
loosened parts are found, tighten it immediately
(particularly bolts of wheel hubs).
3. Check electrical wirings for any disconnection,
short circuits and loosened joints.
23
Summary of Contents for KDD03
Page 2: ......


