


10
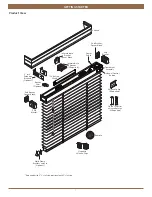
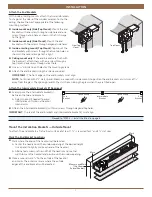
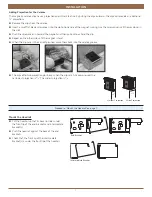
INSTALLATION
OPERATION
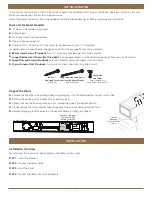
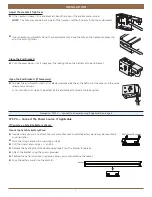
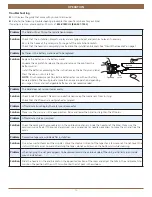
Testing the Blind
Testing the blind with the programming button will allow you to ensure that the
motor and power source are working correctly.
■
■
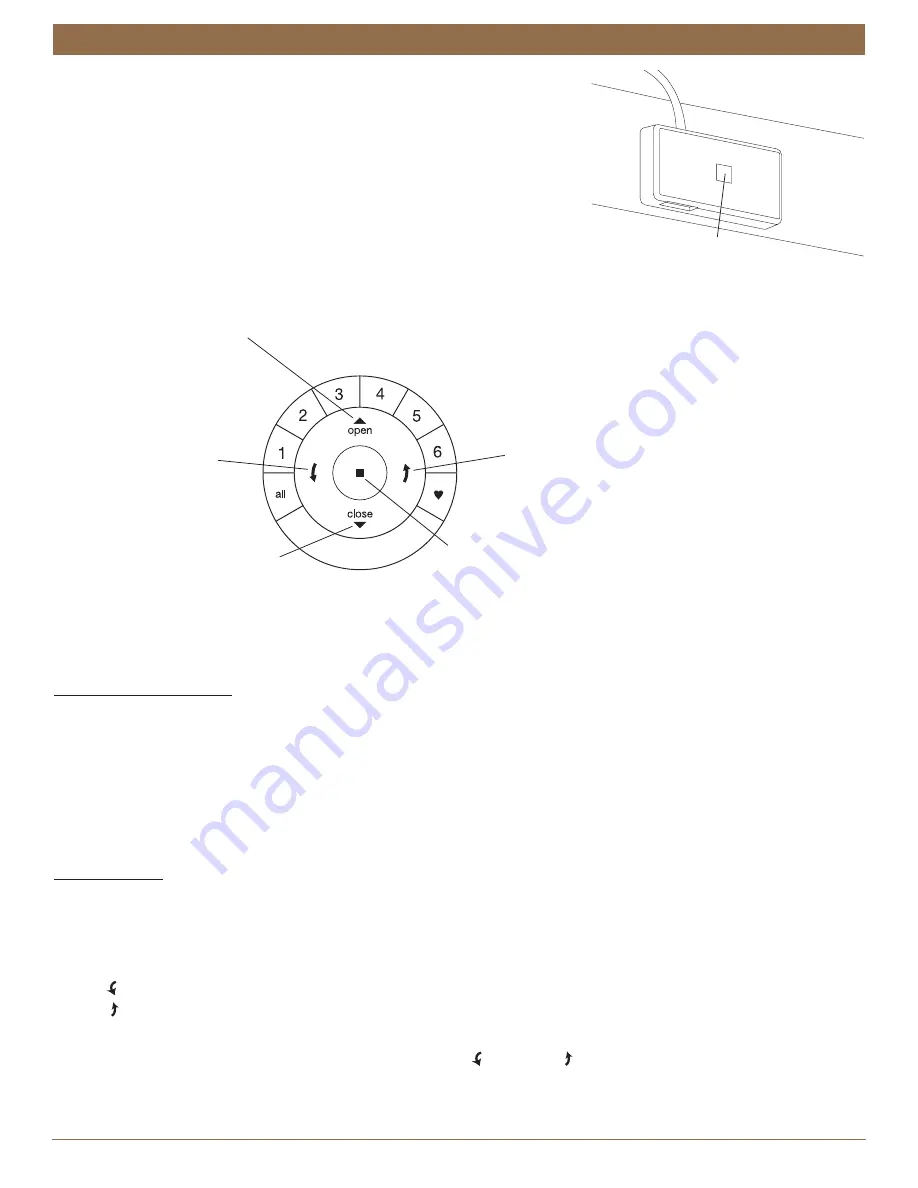
Press the programming button on the front side of the headrail to test operation. If
the blind does not operate see “Troubleshooting” on page 13.
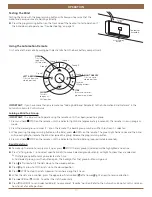
Using the Automation Remote
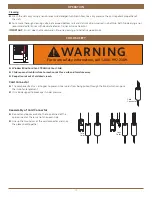
First, activate the remote by pulling both plastic tabs from the back battery compartment.
IMPORTANT:
If you have more than one remote, see “Adding Additional Remote(s) to the Automation Blind Network” in the
Automation Remote Control Guide.
Joining a Blind to a Group
IMPORTANT:
The blind will not operate using the remote until it has been joined to a group.
1. Press and hold
■
STOP on the remote until the indicator lights blink (approximately 6 seconds). The remote is now in program
mode.
2. Press the desired group number (1 – 6) on the remote. The backlit group number will flash to show it is selected.
3. While pressing the programming button on the blind, press
▲
OPEN on the remote. The green light flashes once and the blind
will move slightly to indicate the blind has joined the group. Release the programming button.
4. Press and hold
■
STOP on the remote until the indicator lights stop blinking (approximately 6 seconds).
Basic Operation
■
■
To wake up the remote, simply pick it up or press
■
STOP. The last group(s) selected will be highlighted and active.
■
■
Press “all” or groups 1 – 6 to select specific blind(s) to move. Selected group button(s) will light to show they are selected.
■
➤
Multiple group buttons may be selected at a time.
■
➤
To deselect group, press the button again. The backlight for that group button will go out.
■
■
Press
■■
left arrow to tilt the slats down to the closed position.
■
■
Press
■■
right arrow to tilt the slats up to the closed position.
■
■
Press
■
STOP to stop the slats movement anywhere along their travel.
■
■
While the slats are in motion, press the opposite of slat motion ( left arrow or right arrow) to reverse direction.
■
■
Press
▲
OPEN or
▼■
CLOSE to center the slats horizontally.
■
■
Press
♥
FAVORITE to send selected blind(s) to your preset “favorite” position. Refer to the
Automation Remote Control Guide
on
how to set a favorite position.
Programming
Button
Front of
Blind
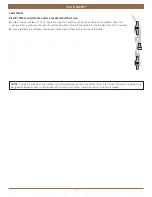
Transceiver
Assembly
Group 1
Group 2
OPEN
Tilt slats
to open at
50% position
CLOSE
Tilt slats
to open at
50% position
Group 3
Group 4
Group 5
Group 6
Favorite
(Blind position)
LEFT ARROW
Tilt slats down to
closed position
RIGHT ARROW
Tilt slats up to
closed position
STOP
(Press and hold for
programming mode)


