


15
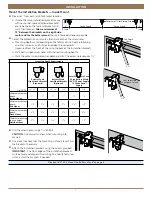
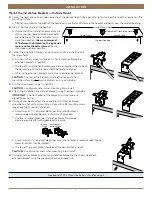
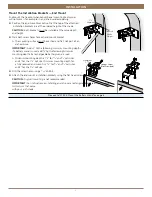
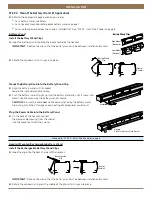
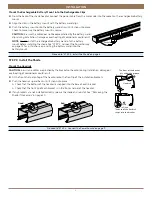
INSTALLATION
OPERATION
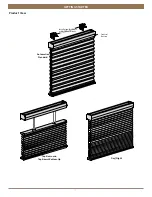
Top-Down Shades
Further Operation and Programming Information
Automation App
The Automation App is required to program Automation III shades, remotes, and gateways. The App is compatible with Apple® and
Android™ smartphones and tablets. For more information regarding setup and operation using the Automation App, refer to
https://www.kirsch.com/window-coverings-product-manuals.
Automation III Gateway
The Automation III Gateway is used to control shades in larger projects as well as integrate Automation III shades with third-
party integration systems. For information regarding programming of Automation III Gateways, refer to the digital Automation III
Automation III Remote
For more information regarding operation and programming of the Automation III Remote, refer to the digital Automation III
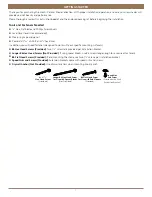
Resetting the Shade, If Necessary
Calibration Reset
The calibration reset is used to recalibrate the shade's travel limits. This action is performed in the Automation App.
■
Select Calibrate Shade in the Advanced Options section of the Shade Settings menu in the Automation App.
■
The shade will touch off on end limits, then finish in the closed position. When the shade stops moving, calibration is complete.
Resetting Shade Programming
The Automation App may be used to modify or reset any shade programming to Automation III Remotes and Gateways. Shades
may be added to or removed from Rooms in the App at any time. If necessary, shades may also be deleted from the Automation
App in the Advanced Options section of the Shade Settings menu.
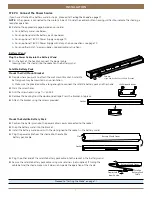
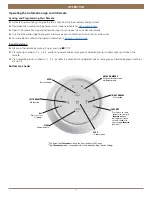
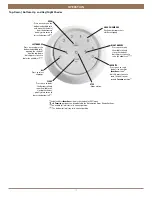
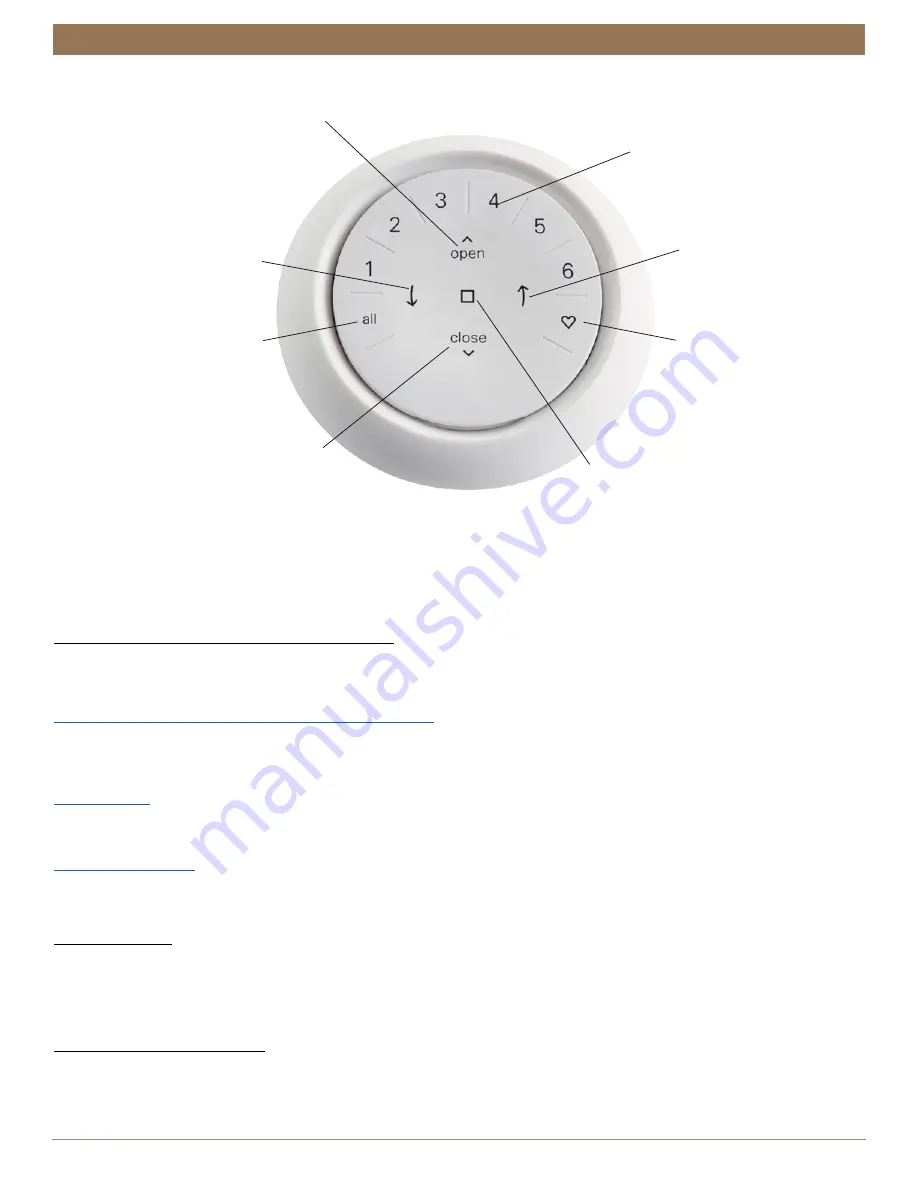
OPEN
LEFT ARROW
RIGHT ARROW
STOP
- Stops motion
GROUP NUMBERS
Each number represents
a different group
CLOSE
ALL
- Press to select
all groups
FAVORITE
- Press once to send
louver section(s) to the
first
Favorite
position*
- Quickly press twice to
send louver section(s)
to the second
Favorite
position**
*The default first
Favorite
position is the shade at 50% open.
**Both
Favorite
positions can be updated in the Automation App > Shade Settings.
- Press to lower
the moving rail and
open the shade(s)
- Press to lower
the moving rail
- Press to raise the
moving rail and
close the shades
- Press once to raise
the moving rail
Summary of Contents for Cellular Shade Automation III
Page 22: ...21 INSTALLATION CHILD SAFETY...


