7
INSTALLATION
INSTALLATION
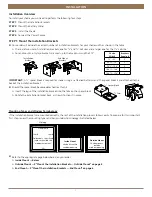
STEP 2: Mount the Battery Wand (If Applicable)
■
Refer to the appropriate page based on your order.
➤
For a battery wand, see below.
➤
For a headrail-mounted rechargeable battery wand, see page 7
➤
For any other power options, the shade is installed first. See "STEP 3: Install the Shade" on page 8..
Battery Wand
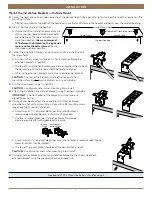
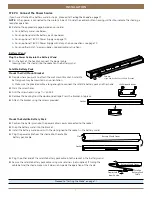
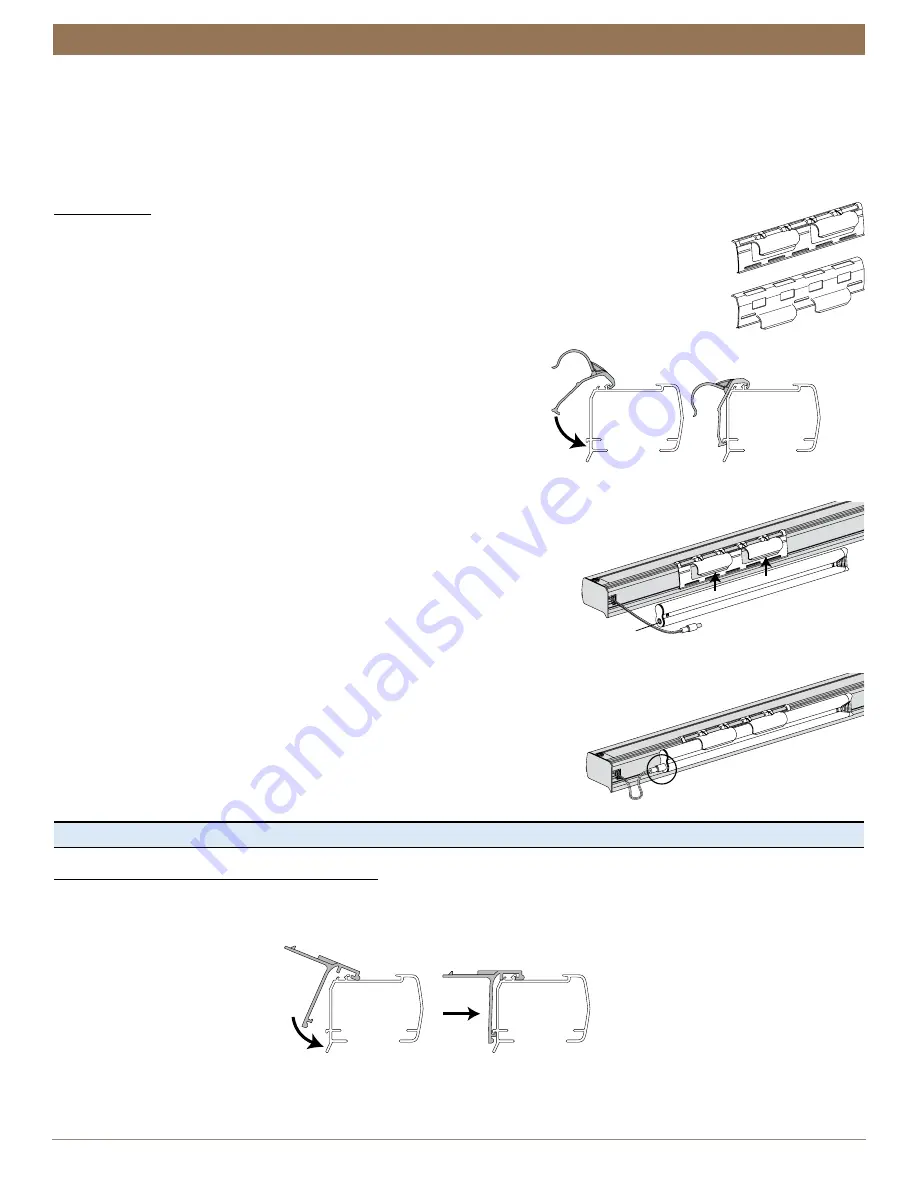
Install the Battery Wand Clips
■
Hook the battery wand clip onto the back channel of the headrail.
IMPORTANT:
Position the clip so that the battery wand will be between installation brackets.
■
Rotate the clip down until it snaps into place.
Mount the Battery Wand into the Battery Wand Clip
■
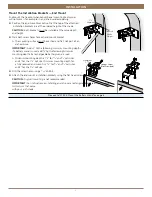
Align the battery wand with its socket
toward the right-side motor end cap.
■
Push the battery wand straight up into the battery wand clip until it snaps into
place. Check to make sure the battery wand is secure.
CAUTION:
Be sure the cable does not become pinched by the battery wand
clip during installation. Damage or overheating of components could result.
Plug the Power Cable into the Battery Wand
■
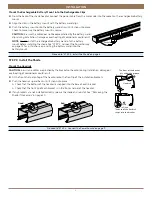
On the back of the headrail, connect
the power cable (coming from the shade)
into the socket on the battery wand.
Proceed to "STEP 3: Install the Shade" on page 8
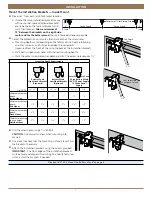
Headrail-Mounted Rechargeable Battery Wand
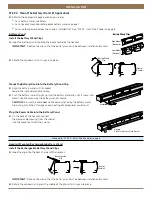
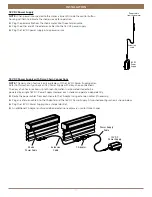
Install the Rechargeable Battery Wand Clips
■
Hook the clip onto the back channel of the headrail.
IMPORTANT:
Position the clip so that the battery wand will be between installation brackets.
■
Rotate the clip down and press the middle of the clip until it snaps into place.
High Mount
(Standard)
Battery Wand Clips
Low Mount
(Optional)
Front of
Headrail
Battery Wand
Clip
Socket
Shown:
High Mount Battery Wand Bracket
Front of
Headrail
Rechargeable
Clip
Summary of Contents for Cellular Shade Automation III
Page 22: ...21 INSTALLATION CHILD SAFETY...


