6
INSTALLATION
INSTALLATION
STEP 2 — Connect the Battery Wand or Rechargeable Battery Wand, If Applicable
NOTE:
When power is connected to the motor, a blue LED inside the control button housing will flash to indicate the blind is
ready for operation.
■
Refer to the appropriate page based on your order.
➤
For a headrail-mounted rechargeable battery wand, see below.
➤
For a battery wand, see below.
➤
For any other power options, the blind is installed first. See page “STEP 3 — Install the Blind” on page 6; and then
continue to Step 4.
NOTE:
The rechargeable battery wand is only available as satellite mount.
For the Battery Wand
Plug the Power Cable into the Battery Wand
■
Inside of the headrail:
Connect the power cable (coming from the motor) into the socket on the battery wand.
Place the Battery Wand Inside the Headrail
■
From the top of the headrail:
Place the battery wand inside the headrail in a location where it will not interfere with the
operation of the blind. Position its smooth, curved side toward the tiltrod.
■
Carefully tuck excess wire into the headrail. Be sure to avoid interference with internal headrail mechanisms.
STEP 3 — Install the Blind
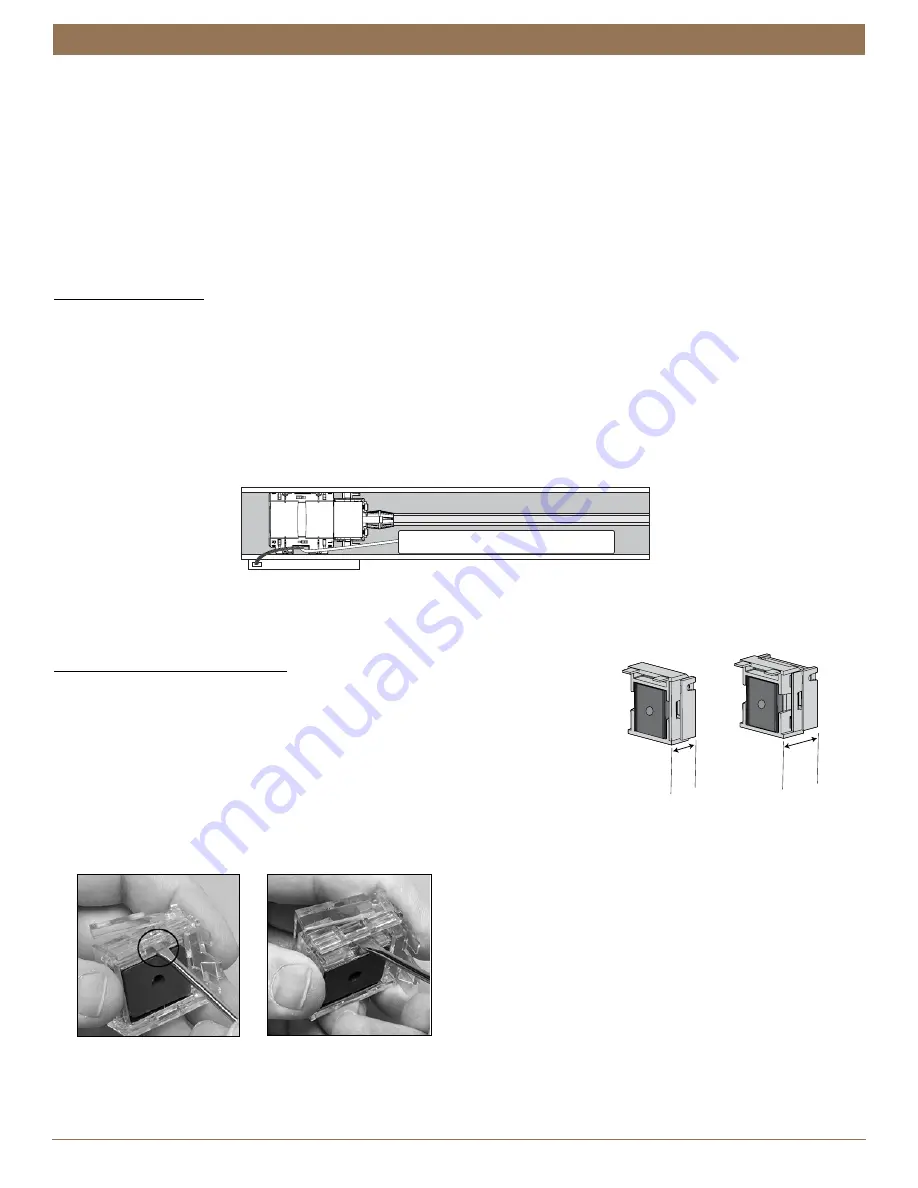
Adding Projection for the Valance
The magnetic valance clips have a projection adjustment feature. By pulling the clips
outward, the clips can provide an additional
1
⁄
4
" projections.
The clips offer two projection positions. When the clips are fully compressed, the
narrowest projection is
5
⁄
8
". The widest projection is
7
⁄
8
".
■
Remove the clips from the valance.
■
Insert a small flat blade screwdriver into the slot on one side of the magnet making
sure the screwdriver is all the way down in the slot.
■
Push the screwdriver in toward the magnet and then pull out to extend the clip.
■
Repeat on the other side until the magnet is level.
Tiltrod
Overhead View
Transceiver
Assembly
Battery Wand
Back
Front
5
∕
8
"
Narrow Projection
7
∕
8
"
Wide Projection


