36
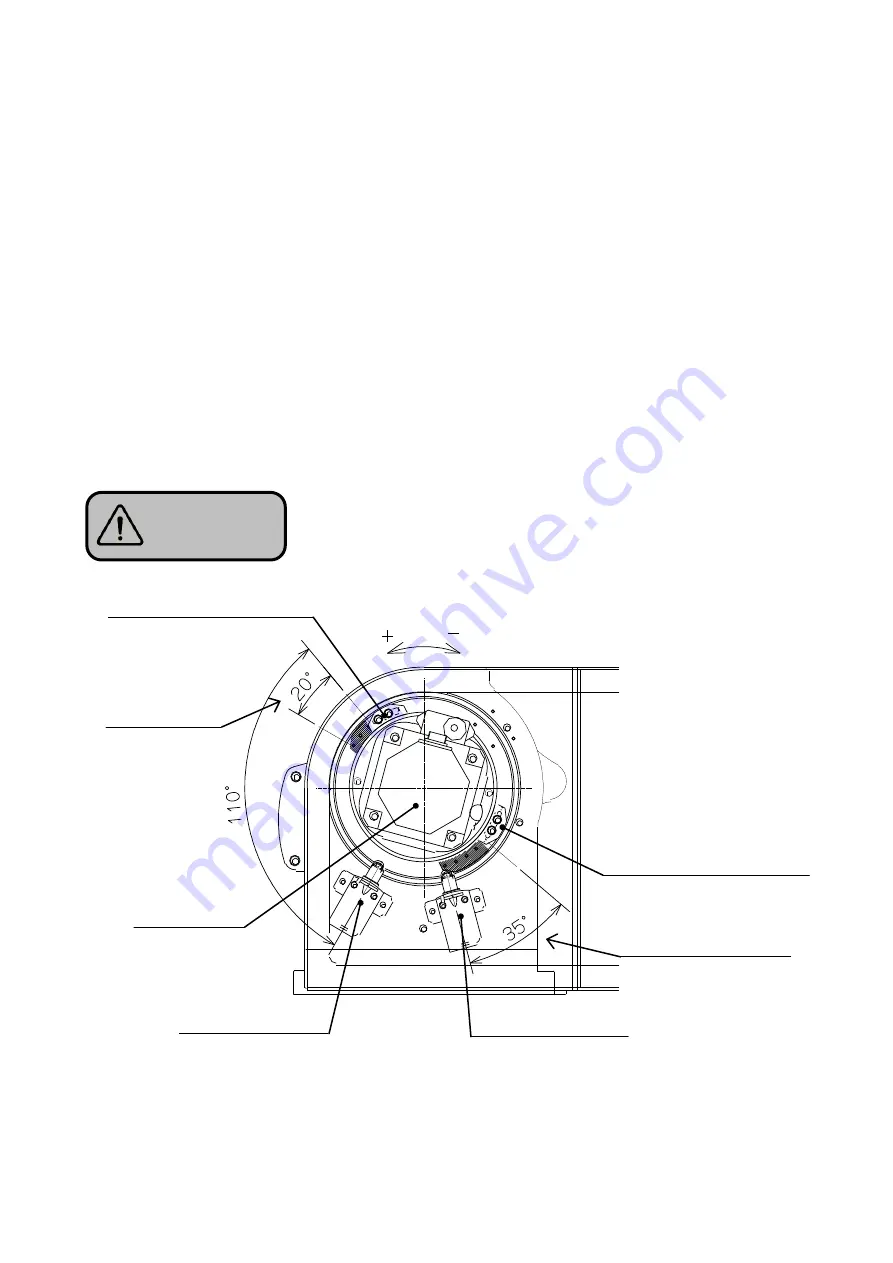
14-3. Adjusting methods of dog for horizontal over-travel
1) When the customer will change position of dog B
②
according to the shape of workpiece and jig,
loosen hexagon socket head cap screw which fix the dog B
②
. Once remove the dog B
②
.
2) Rotate the tilting axis to the tilting angle to be set in the plus direction with the manual pulse
generator or the Manual axis feed key, checking that it does not interfere with the jig or workpiece.
3) After rotating the rotary table to the desired tilting angle, slightly tighten hexagon socket head cap
screws which fix the dog B
②
.
4) Slide the dog B
②
in the reverse direction counterclockwise (CCW) before fixing until the
over-travel alarm lamp lights. Tighten hexagon socket head cap screw that loosened slightly.
5) After fixing the dog B
②
, rotate the tilting axis again with the manual pulse generator or the Manual
axis feed key and check that the tilting axis stops at the desired tilting angle position and alarm lamp
lights.
6) After adjusting, mount the side cover of motor case on the rotating axis side.
When mounting the cover, coat the cover with liquid packing (liquid
gasket 1216 made by THREE BOND) evenly.
CAUTION
Fig.13
Dog A
①
for holiz. (
– side) OT detect
Dog A adjustable range
Limit SW A
③
for holiz.(
– side) OT
Limit SW B
④
for vert.( + side) OT
Dog B
②
for vert. ( + side) OT detect
Dog B
adjustable range
Rotating axis
drive motor


