
4
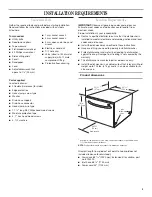
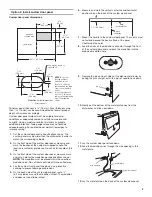
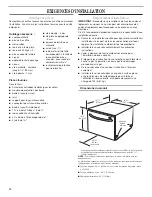
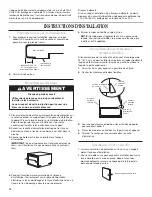
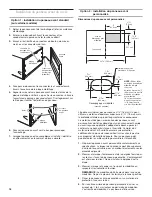
Cabinet dimensions/requirements
4"
(10 cm)
moisture protection
tape
support surface must
be solid and level
Utility hole:
1
¹⁄₂
" (3.8 cm) dia.
hole, either side –
immediately adjacent
to corner.
22
⁷⁄₈
" (58.0 cm)
3
¹³⁄₁₆
"
(9.7 cm)
19
⁷⁄₈
"
(50.5 cm)
2
⁵⁄₈
"
(6.7 cm)
23
⁵⁄₈
"* (60.0 cm)
moisture protection tape
tape
¹⁄₂
" (12.7 mm) from
front of countertop
typical
installation
countertop
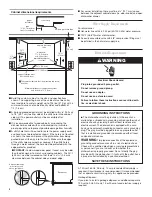
■
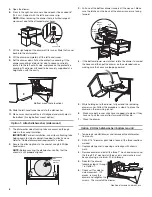
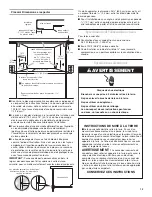
A 3 prong grounded outlet must be installed within 6" (15.2 cm)
to 18" (45.7 cm) to either side of the utility hole in the cabinet
side wall. The power outlet must be accessible after
installation.
■
It is recommended that wood cabinetry surrounding the
dishwasher be sealed with an oil-based paint or moisture-
proof polyurethane to prevent possible damage from humidity.
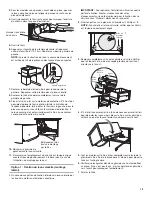
■
A utility hole that will be used to route the power supply cord
and hoses must be located as shown. If the hole is not located
as shown, the hoses will prevent the dishwasher from being
pushed back all the way into the cavity. Make sure the edges
of the utility hole are smooth or covered. If the utility hole is
through a metal cabinet, the hole must be protected with the
edge protector provided.
IMPORTANT:
Custom wood door panel, if used, may be wider
than the dishwasher to match surrounding cabinets. The 23
⁵⁄₈
"
(60.0 cm) must be increased so that there is a
³⁄₃₂
" (2.5 mm)
clearance between the cabinet side and panel edge.
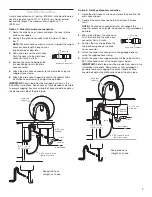
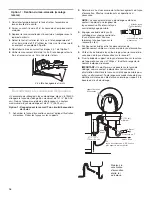
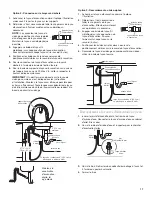
Water Supply Requirements
For dishwasher:
■
Hot water line with 4.3-145 psi (30-1000 kPa) water pressure.
■
120°F (48.8°C) water at dishwasher.
■
An easily accessible valve with 3/8" compression fitting must
be installed in the hot water supply line.
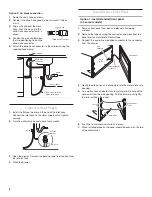
Electrical Requirements
A 120-volt, 60 Hz, AC-only, 15 amp fused electrical supply is
required. (Circuit breaker is recommended.) It is recommended
that a separate circuit serving only this appliance be provided.
Garbage Disposer:
If you plan to install a garbage disposer, an additional separate
120-volt, 60 Hz, AC-only, 15 or 20 amp fused electrical supply is
required.
Electrical Shock Hazard
Plug into a grounded 3 prong outlet.
Do not remove ground prong.
Do not use an adapter.
Do not use an extension cord.
Failure to follow these instructions can result in death,
fire, or electrical shock.
WARNING
16
⁷⁄₃₂
"
(41.2 cm)
Adjacent cabinetry
must not extend
above cavity base.
Dishwasher
GROUNDING INSTRUCTIONS
SAVE THESE INSTRUCTIONS
■
The dishwasher must be grounded. In the event of a
malfunction or breakdown, grounding will reduce the risk of
electric shock by providing a path of least resistance for
electric current. The dishwasher is equipped with a cord
having an equipment-grounding conductor and a grounding
plug. The plug must be plugged into an appropriate outlet
that is installed and grounded in accordance with all local
codes and ordinances.
WARNING:
Improper connection of the equipment-
grounding conductor can result in a risk of electric shock.
Check with a qualified electrician or service representative
or personnel if you are in doubt as to whether the
dishwasher is properly grounded. Do not modify the plug
provided with the dishwasher: if it will not fit the outlet, have
a proper outlet installed by a qualified electrician.
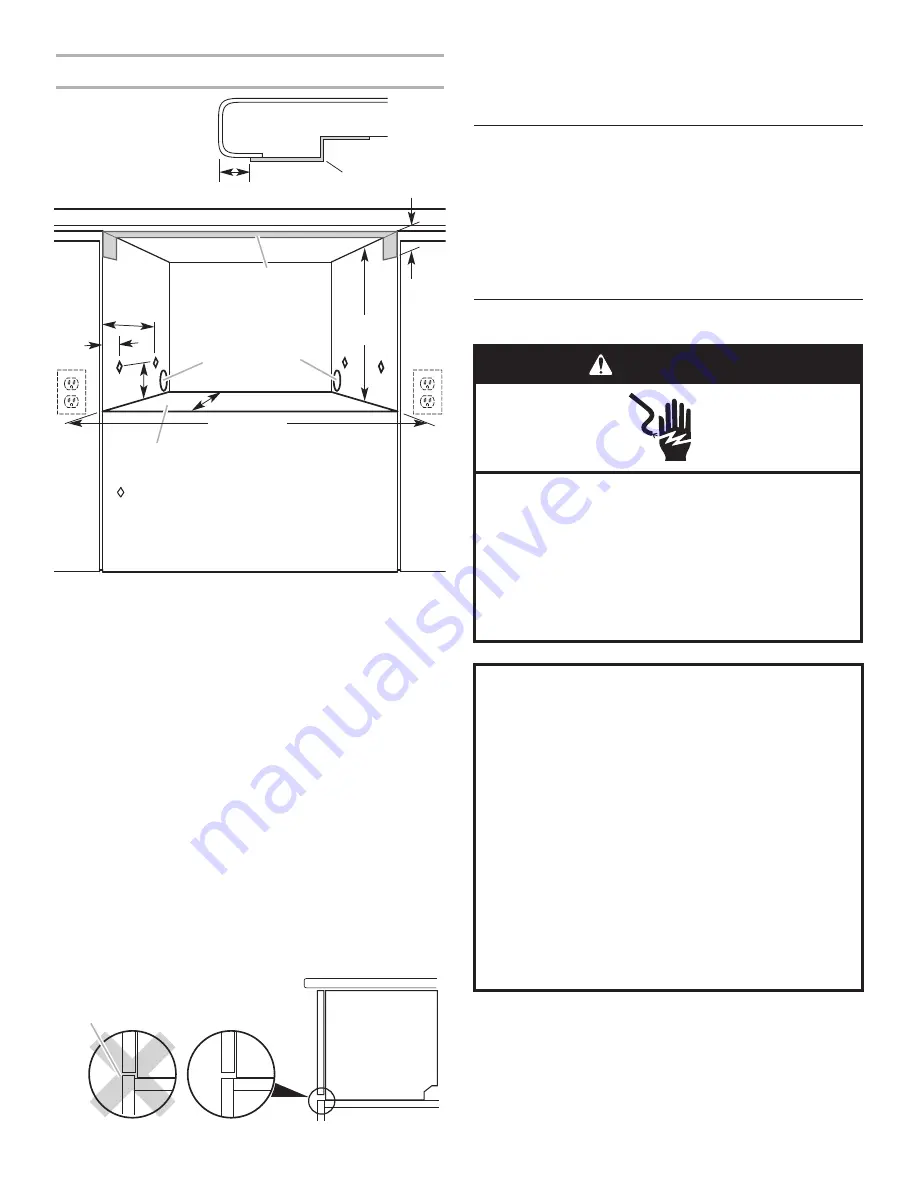
These marks indicate the side mounting tab screw
locations.
Minimum thickness of cabinet/cavity sides
and bottom is
⁵⁄₈
" (1.6 cm)
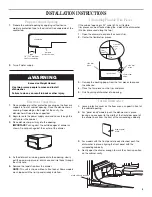
■
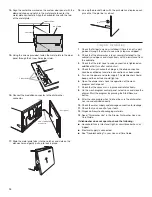
Build the custom cabinet to the size and specifications
shown. The supporting base of the cabinet must be solid,
level and able to sustain weight up to 104 lbs. (47 Kg), with a
minimum thickness of cabinet/cavity sides and bottom of
⁵⁄₈
”
(1.6 cm).
■
For corner installation, there must be a
¹⁄₂
" (12.7 mm) space
between the adjacent cabinet doors (i.e. door knobs) and open
dishwasher drawer.


