
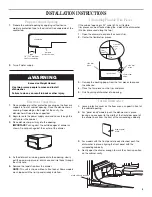
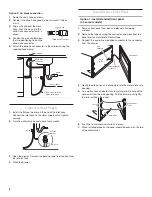
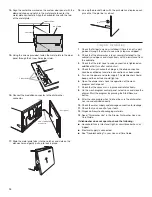
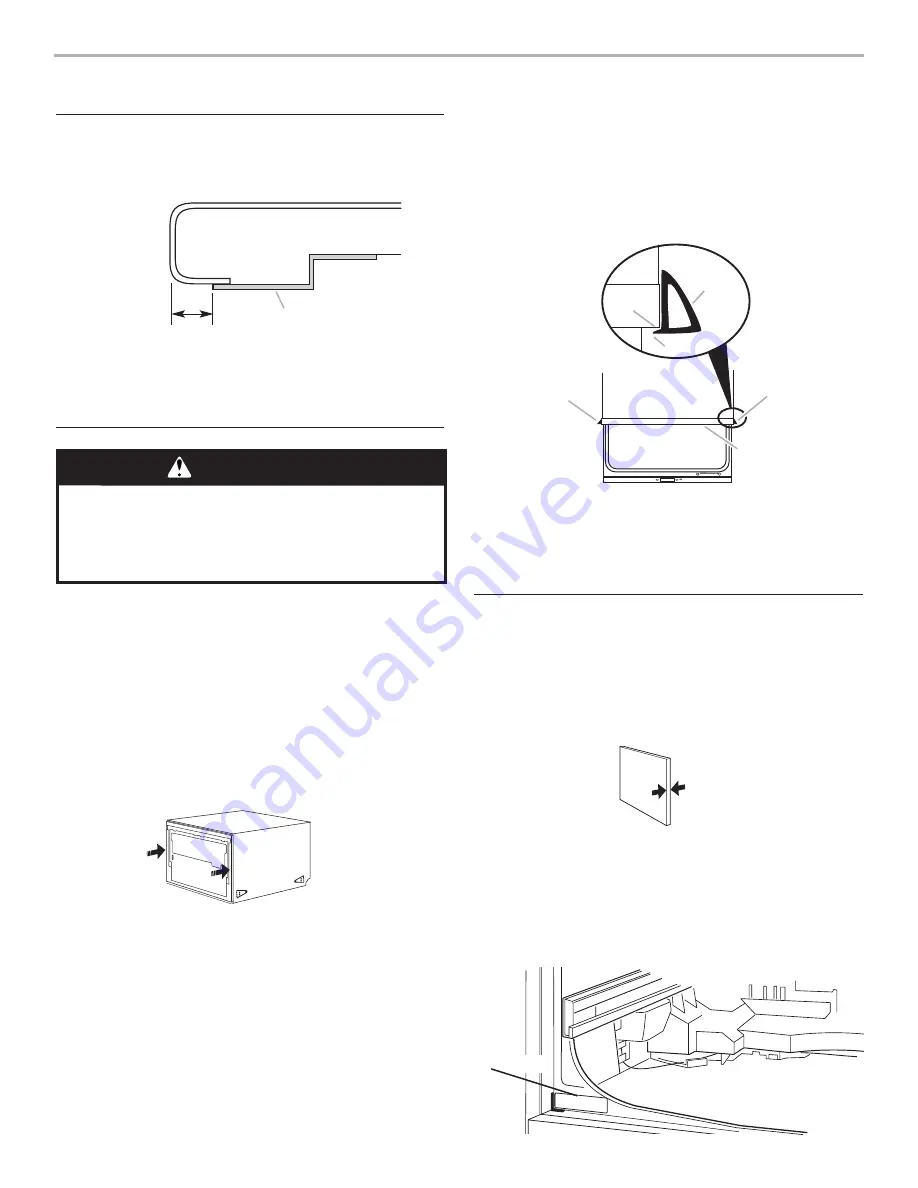
If Installing Flexible Trim Pieces
If the cabinet opening is 24" wide (61.0 cm), flexible
trim pieces can be attached along the sides of the dishwasher.
(No trim piece used along the top.)
1.
Open the drawers to expose the chassis trim .
2.
Center the flexible trim pieces.
3.
Remove the backing paper from the trim pieces to expose
the adhesive.
4.
Place the trim pieces on the trim and press.
5.
Finish pushing dishwasher into opening.
5
INSTALLATION INSTRUCTIONS
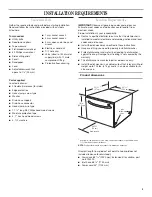
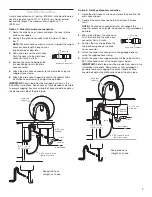
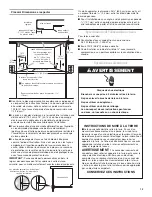
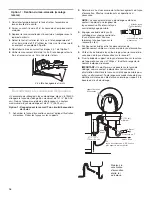
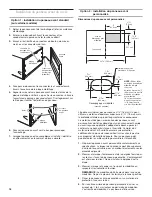
Prepare Cabinet Opening
1.
Prepare the cabinet opening by applying self-adhesive
moisture protection tape to the dry dust-free underside of the
countertop.
2.
Turn off water supply.
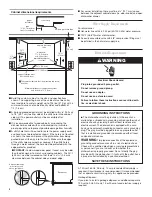
Electrical Connection
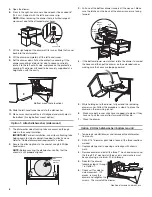
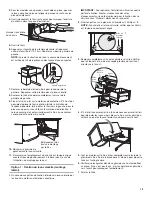
1.
Place cardboard or other protective covering on the floor or a
support in front of cabinet opening. Place the dishwasher on
covering. Depending on the height of the cavity, the
dishwasher will need to be supported.
2.
Begin to route the power supply cord and hoses through the
utility hole in the cabinet.
3.
Place dishwasher part way into the opening.
IMPORTANT:
Push against the outside edges of drawer as
shown. Do not push against the center of the drawer.
4.
As the dishwasher is being pushed into the opening, slowly
pull the power supply cord, drain hose and inlet hose through
the utility hole.
5.
Remove the tape/strap from the drawer.
NOTE:
This unit is shown without a front panel. Some models
are shipped with the front panel already installed.
moisture
protection tape
tape
1/2" (12.7 mm) from
front of countertop
countertop
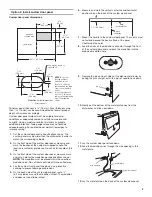
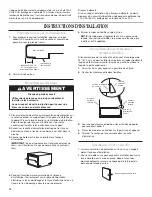
WARNING
Excessive Weight Hazard
Use two or more people to move and install
dishwasher.
Failure to do so can result in back or other injury.
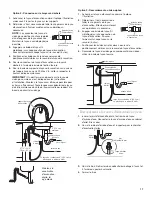
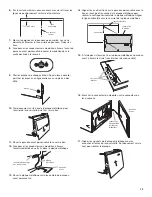
Install Dishwasher
1.
Leave protective cover on the floor or on a support in front of
the cabinet opening.
2.
For “panel ready”models, push the dishwasher in place,
leaving a space equal to the width of the front door panel of
the drawer, back from the front of the surrounding cabinetry.
3.
For models with the front panel already attached, push the
dishwasher in place, aligning the front panel with the
surrounding cabinetry
4.
Gently open the drawer enough to mark the chassis position
on the cabinet cavity.
drawer panel
width
chassis
trim
edge
chassis trim
edge
side trim
piece
side trim
piece
side trim
piece
open drawer
lip
mark chassis position


