background image

5

Power failure

In case of prolonged power failure, the surface burners can be lit 
manually. Hold a lit match near a burner and turn knob 
counterclockwise to HIGH. After burner lights, turn knob to 
setting. The vent fan will not work.

NOTE: The downdraft vent will not operate during a power 
failure.

Pilotless Ignition

Pilotless Ignition eliminates the need for a constant standing pilot 
light. Each burner surface has an electric spark igniter. If your 
burner flame goes out, Pilotless Ignition will automatically spark 
to reignite the burner. 

NOTE: All igniters will spark when any flame is extinguished but 
only the selected burner will reignite.

If intermittent sparking occurs, rotate the knob clockwise until the 
clicking (spark) sound ceases.

Smart Port Burner System

This cooktop is equipped with a Smart Port Burner System. The 
Smart Port Burner System produces a small flame directly under 
each grate finger and a larger flame between each grate finger. 
The visual difference between the ports will be noticeable when 
the burner is used or when adjustments are made to the flame 
length.

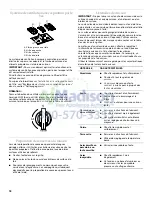
Sealed Surface Burners

IMPORTANT: Do not obstruct the flow of combustion and 
ventilation air around the burner grate edges.

Burner cap: Always keep the burner cap and head in place when 
using a surface burner. A clean burner cap and head will help 
avoid poor ignition and uneven flames. Always clean the burner 
cap and head after a spillover and routinely remove and clean the 
caps according to the “General Cleaning” section.

Gas tube opening: Gas must flow freely throughout the gas tube 
opening for the burner to light properly. Keep this area free of soil 
and do not allow spills, food, cleaning agents or any other 
material to enter the gas tube opening. Keep spillovers out of the 
gas tube opening by always using a burner cap.

Burner ports: Check burner flames occasionally for proper size 
and shape as shown above. A good flame is blue in color, not 
yellow. Keep this area free of soil and do not allow spills, food, 
cleaning agents or any other material to enter the burner ports.

To Clean:

IMPORTANT: Before cleaning, make sure all controls are off and 
cooktop is cool. Do not use oven cleaners, bleach or rust 
removers.

1. Remove the burner cap and head from the burner base and 

clean according to “General Cleaning” section.

2. Clean the gas tube opening with a damp cloth.

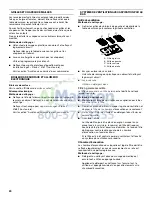
3. Clean clogged burner ports with a straight pin as shown. Do 

not enlarge or distort the port. Do not use a wooden 
toothpick.

4. Replace the burner cap and head, making sure the alignment 

tab and notch are properly aligned with the burner cap.

5. Turn on the burner. If the burner does not light, check burner 

head alignment. If the burner still does not light, do not 
service the burner yourself. Contact a trained repair 
specialist.

A. Burner cap
B. Burner ports

C. Burner base
D. Gas tube opening

E. Igniter head

A

B

C

D

E

A. 1-1

¹⁄₂

" (25-38 mm)

B. Burner ports

A. Incorrect
B. Correct

B

A

B

A

Summary of Contents for GAS DOWNDRAFT COOKTOP

Page 1: ...naid com In Canada call 1 800 807 6777 or visit our website at www KitchenAid ca TABLEDECUISSONÀGAZAVECEXTRACTION PARLEBAS Guided utilisationetd entretien Au Canada pour assistance installation ou service composer le 1 800 807 6777 ou visiter notre site Web au www KitchenAid ca Table of Contents Table des matières 2 Models Modèles KGCD807XBL00 KGCD867XBL00 W10293056A ...

Page 2: ...E CUISSON 19 Nettoyage général 19 DÉPANNAGE 21 ASSISTANCE OU SERVICE 22 Accessoires 22 Au Canada 22 GARANTIE 23 COOKTOP SAFETY You can be killed or seriously injured if you don t immediately You can be killed or seriously injured if you don t follow All safety messages will tell you what the potential hazard is tell you how to reduce the chance of injury and tell you what can happen if the instruc...

Page 3: ...overheating of the cooktop CAUTION Do not store items of interest to children in cabinets above the cooktop children climbing on the cooktop to reach items could be seriously injured Proper Installation The cooktop when installed must be electrically grounded in accordance with local codes or in the absence of local codes with the National Electrical Code ANSI NFPA70 or the Canadian Electrical Cod...

Page 4: ...GH and LOW Use the following chart as a guide when setting heat levels A Right front control knob B Right rear control knob C 2 Speed vent fan control knob D Left rear control knob E Left front control knob A B C D E A Left rear 10 500 Btu h burner B Downdraft vent grille C Right rear 9 200 Btu h burner D Right front 15 000 Btu h burner E Right side grate F Control panel G Left side grate H Left f...

Page 5: ...en flames Always clean the burner cap and head after a spillover and routinely remove and clean the caps according to the General Cleaning section Gas tube opening Gas must flow freely throughout the gas tube opening for the burner to light properly Keep this area free of soil and do not allow spills food cleaning agents or any other material to enter the gas tube opening Keep spillovers out of th...

Page 6: ...department Companies that manufacture home canning products can also offer assistance Cookware IMPORTANT Do not leave empty cookware on a hot surface cooking area element or surface burner Ideal cookware should have a flat bottom straight sides and a well fitting lid and the material should be of medium to heavy thickness Rough finishes may scratch the cooktop Aluminum and copper may be used as a ...

Page 7: ... on surface and scrape Repeat for stubborn spots Polish entire cooktop with creme and paper towel Metal marks from aluminum and copper Cooktop Polishing Creme Clean as soon as cooktop has cooled down Rub creme into surface with a damp paper towel or soft cloth Continue rubbing until white film disappears The marks will not totally disappear but after many cleanings become less noticeable Tiny scra...

Page 8: ...top then lift off the vent grate Wipe clean or wash in sink Nonabrasive plastic scrubbing pad and mildly abrasive cleanser Dishwasher Use mild detergent Removable Grease Filter The filter is a permanent type and should be cleaned when soiled Cleaning Method Turn off the downdraft ventilation system before removing the filter Remove burner grates then vent grate and lift the filter out of the vent ...

Page 9: ...y Contact a service technician or see Assistance or Service section Surface burner makes popping noises Is the burner wet Let it dry Continuous sparking of igniter Is a cross draft drawing the flame away from the igniter This is normal when a cross draft is present Is the power supply cord properly grounded polarized See the Installation Instructions Is the burner cap and head positioned properly ...

Page 10: ...vice company in your area you can also look in your telephone directory Yellow Pages For further assistance If you need further assistance you can write to KitchenAid with any questions or concerns at KitchenAid Brand Home Appliances Customer eXperience Center 553 Benson Road Benton Harbor MI 49022 2692 Please include a daytime phone number in your correspondence Accessories Cooktop Cleaner cerami...

Page 11: ...nce is located in a remote area where service by an authorized KitchenAid servicer is not available 9 The removal and reinstallation of your major appliance if it is installed in an inaccessible location or is not installed in accordance with published installation instructions 10 Major appliances with original model serial numbers that have been removed altered or cannot be easily determined This...

Page 12: ...12 Notes ...

Page 13: ...t AVERTISSEMENT Si les renseignements dans ce manuel ne sont pas exactement observés un incendie ou une explosion peut survenir causant des dommages au produit des blessures ou un décès Ne pas entreposer ni utiliser de l essence ou d autres vapeurs ou liquides inflammables à proximité de cet appareil ou de tout autre appareil électroménager QUE FAIRE DANS LE CAS D UNE ODEUR DE GAZ Ne pas tenter d ...

Page 14: ...lorsqu elle est correctement installée doit être reliée à la terre conformément aux codes locaux ou en l absence de codes locaux selon le Code national électrique ANSI NFPA70 ou le Code canadien des installations électriques Partie 1 S assurer que la table de cuisson est correctement installée et reliée à la terre par un technicien qualifié La table de cuisson est munie d une fiche de liaison à la...

Page 15: ... avant droit B Bouton de commande arrière droit C Bouton de commande du ventilateur d évacuation à 2 vitesses D Bouton de commande arrière gauche E Bouton de commande avant gauche A B C D E A Brûleur arrière gauche de 10 500 BTU h B Grille de ventilation à extraction par le bas C Brûleur arrière droit de 9 200 BTU h D Brûleur avant droit de 15 000 BTU h E Grille de droite F Tableau de commande G G...

Page 16: ...lumeur à étincelle électrique Si la flamme du brûleur s éteint ce système génère automatiquement une étincelle pour rallumer le brûleur REMARQUE Tous les allumeurs génèrent une étincelle lorsqu une flamme s éteint cependant seul le brûleur sélectionné se rallume Si l on observe l apparition intermittente d étincelles tourner le bouton dans le sens horaire jusqu à ce que le cliquetis correspondant ...

Page 17: ... de blanchiment ou de décapants à rouille 1 Enlever le chapeau et la tête de brûleur de la base du brûleur et nettoyer tel qu indiqué à la section Nettoyage général 2 Nettoyer l ouverture du tube d arrivée de gaz avec un chiffon humide 3 Nettoyer les orifices de brûleur obstrués avec une épingle droite tel qu indiqué Ne pas agrandir ni déformer l orifice Ne pas utiliser un cure dents en bois 4 Réi...

Page 18: ...ent avoir un fond plat des parois droites un couvercle qui ferme bien et le matériau doit être d épaisseur moyenne à forte Les surfaces rudes peuvent égratigner la table de cuisson L aluminium et le cuivre peuvent être employés comme fond ou base d un ustensile de cuisson Cependant utilisés comme base ils peuvent laisser des marques permanentes sur la table de cuisson ou les grilles Le matériau d ...

Page 19: ... surface et gratter Répéter pour les taches tenaces Polir toute la table de cuisson avec la crème et un essuie tout Marques métalliques provenant de l aluminium et du cuivre Crème à polir pour table de cuisson Nettoyer dès que la table de cuisson a refroidi Frotter la crème sur la surface avec un essuie tout ou un linge doux humide Continuer de frotter jusqu à ce que la pellicule blanche disparais...

Page 20: ...les grilles des brûleurs de gauche et de droite de la table de cuisson puis soulever la grille de ventilation Essuyer ou laver dans un évier Ustensile de récurage en plastique non abrasif et nettoyant légèrement abrasif Lave vaisselle Utiliser un détergent doux Filtre à graisse amovible Le filtre correspond à un filtre permanent et doit être nettoyé lorsqu il est sale Méthode de nettoyage Éteindre...

Page 21: ...es bruits d éclatement Le brûleur est il mouillé Le laisser sécher Génération constante d étincelles par l allumeur La flamme est elle écartée de l allumeur par un courant d air Ceci est normal en présence d un courant d air Le cordon d alimentation est il correctement relié à la terre polarisé Voir les Instructions d installation Le chapeau et la tête de brûleur sont ils positionnés correctement ...

Page 22: ...sson modèles avec vitrocéramique Commander la pièce numéro WA906B Nettoyant et poli pour acier inoxydable modèles en acier inoxydable Commander la pièce numéro 31462 Nettoyant tout usage pour appareils ménagers Commander la pièce numéro 31682 Filtre à graisse de rechange Commander la pièce numéro 8312P121 60 Nettoyant pour grille à gaz et plateau d égouttement Commander la pièce numéro 31617 AuCan...

Page 23: ...d achat 6 Les coûts associés au transport du gros appareil ménager du domicile pour réparation Ce gros appareil ménager est conçu pour être réparé à domicile et seul le service à domicile est couvert par la présente garantie 7 Les réparations aux pièces ou systèmes résultant d une modification non autorisée faite à l appareil 8 Les frais de transport pour le service d un produit si votre gros appa...

Page 24: ...roduit Nom du marchand ______________________________________________ Adresse ________________________________________________________ Numéro de téléphone ___________________________________________ Numéro de modèle______________________________________________ Numéro de série ________________________________________________ Date d achat____________________________________________________ W1029305...

Reviews: