background image

10

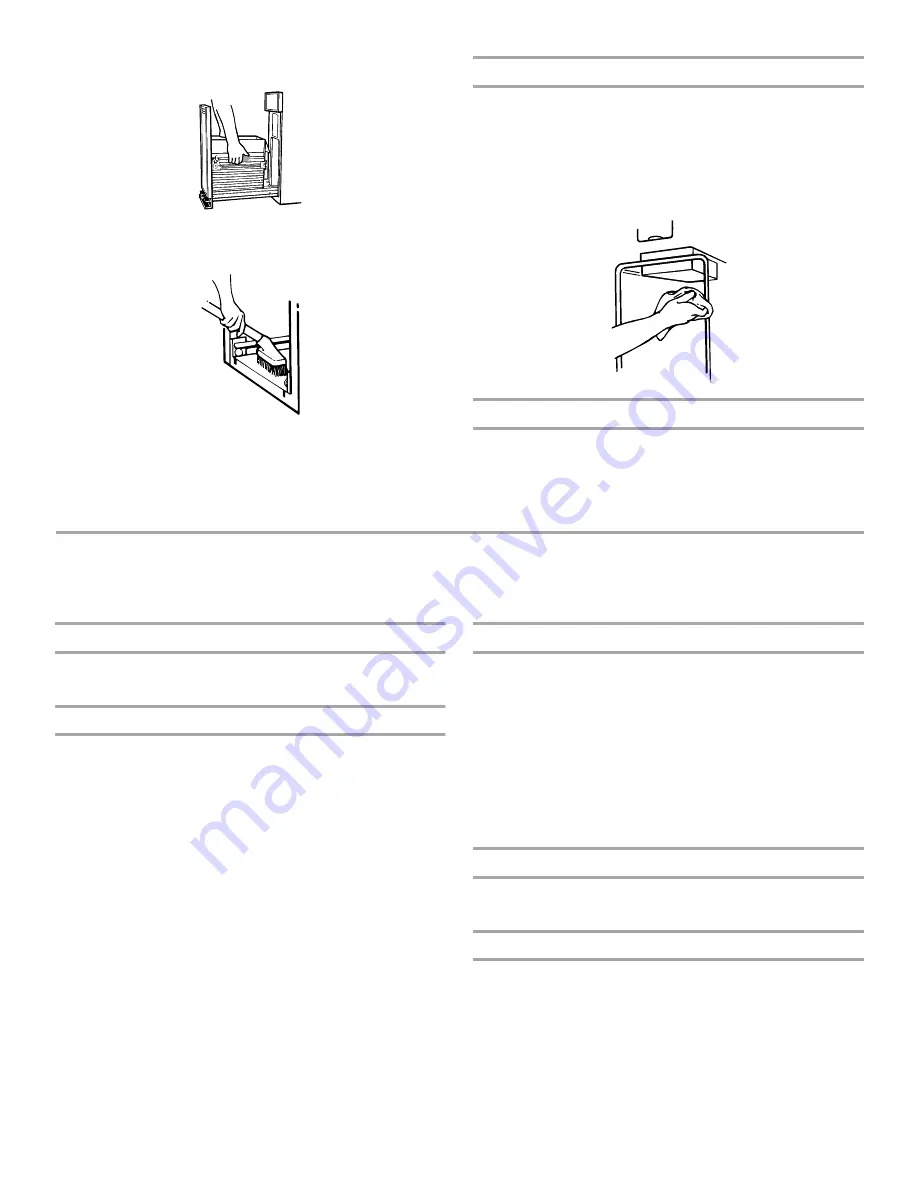
3. Grasp the drawer on the sides and pull it out the rest of the 

way. Set the drawer down gently.

4. Vacuum the inside of the cabinet. Liquid spills or wet trash 

should be cleaned up by hand, or by using a vacuum 
designed to pick up liquids.

5. Wash the inside of the cabinet with a clean sponge or soft 

cloth and a mild detergent in warm water. Rinse and dry 
thoroughly with a soft cloth.

6. To replace the drawer, grasp it by the sides and insert the 

rollers onto the tracks.

7. Lift the front of the drawer and push it in fully past the stops.

Cleaning the Ram

NOTE: You may want to wear protective gloves since there may 
be bits of glass on the ram cover.

1. Wipe glass particles off of the ram cover with a cloth or paper 

towels. 

2. Remove foods with a clean sponge or soft cloth and a mild 

detergent in warm water. Rinse and dry thoroughly with a soft 
cloth.

Cleaning Before a Vacation

If you will be away for more than a couple of days, remove the 
compactor bag. Remove the Key-Knob (or Key-Switch) and store 
it out of children’s reach. 

TROUBLESHOOTING

Try the solutions suggested here first in order to avoid the cost of an unnecessary service call.

Trash is not compacting

Is the drawer less than half-full? Drawer must be more than 
half full before trash is compacted.

Your compactor won’t operate

Is the power supply cord unplugged? Plug into a grounded 
3 prong outlet.

Has a household fuse blown, or has a circuit breaker 
tripped? 
Replace the fuse or reset the circuit breaker. If the 
problem continues, call an electrician.

Is the drawer completely closed? Close the drawer firmly 
and start the compactor again.

Is the Key-Knob turned all the way to START? Turn the 
Key-Knob (Key-Switch) fully to START and release (on some 
models). See “Starting Your Compactor.”

Did you press ON before pressing START? Press ON 
before pressing START (on some models). See “Starting the 
Compactor.”

The drawer won’t open

Is the ram all the way up? Drawer will open only when ram is 
fully raised.

To raise the ram on models with a Key-Knob (or Key-
Switch): 
Turn the Key-Knob (Key-Switch) to START and 
release. See “Starting Your Compactor.”

To raise the ram on models with push button controls:
Press OFF, and then press ON. See “Starting Your 
Compactor.”

Is the Solid Cycle engaged? Drawer remains LOCKED until 
you reset by lifting the foot pedal up.

There is not enough compaction or force

Do you use the compacting cycle frequently enough? 
Compacting works best when only a few items are loaded.

Bottles don’t break

How often do you notice this? Bottles will not break every 
time. The thickness of the bottle’s glass and the content of 
the trash load below it may keep the bottle from breaking.

Summary of Contents for INTEGRATED COMPACTOR

Page 1: ...tures operation performance parts accessories or service call 1 800 422 1230 or visit our website at www kitchenaid com In Canada for assistance installation or service call 1 800 807 6777 or visit our website at www KitchenAid ca Table of Contents 2 9872215 ...

Page 2: ...CTOR SAFETY You can be killed or seriously injured if you don t immediately follow instructions You can be killed or seriously injured if you don t follow instructions All safety messages will tell you what the potential hazard is tell you how to reduce the chance of injury and tell you what can happen if the instructions are not followed Your safety and the safety of others are very important We ...

Page 3: ...trical appliance basic precautions should always be followed including the following Read all instructions before using the compactor Close supervision is necessary when used by or near children Do not allow to be used as a toy or to run unattended at any time Lock Key Switch when not in use and store key out of reach of children Do not touch moving parts Do not operate with a damaged cord set plu...

Page 4: ... Shipping base B A 34 86 7 cm 24 61 cm 15 38 1 cm A Grounded eletrical outlet must be a minimum of 3 7 6 cm away from surrounding cabinets or nearby walls as shown It can be placed either to the left or the right side of the compactor A Leave 6 15 2 cm of clearance space to the right side of the compactor in order to remove the compactor bags B Leave 23 58 4 cm of clearance in front of the compact...

Page 5: ...ard or hardboard before moving compactor across floor to avoid floor covering damage Do not allow the rear frame of the compactor to touch the floor covering when lifting or moving compactor Undercounter Installation NOTE Installation hardware is not provided with full cabinet models 1 Measure the height of your cabinet opening The top of the compactor should be at least 3 mm from the top of the c...

Page 6: ...rtop mounting Cabinet front mounting 8 Grasp sides of compactor drawer and place bottom of drawer into tracks Lift at the handle so drawer will go over drawer stops Close drawer Check to see if drawer opens freely If the toe plate rubs against floor see Adjusting the Toe Plate for further instructions Adjusting the Toe Plate If the toe plate rubs the floor covering the toe plate clearance may be c...

Page 7: ...ng IMPORTANT Do not push items down into compactor with hands or feet NOTE You will not see compacting of trash the first few times you load the compactor The compactor drawer should be about full before the compactor can begin to compress the load 1 Open the drawer Lift and pull the handle or press the toe bar to open the drawer NOTE Pressing the toe bar opens the container only 3 to 6 7 6 cm to ...

Page 8: ...s in the ON position IMPORTANT The air freshener will work with or without the fan 2 Set the Air Filter switch to OFF to turn off the fan RemovingaFilledBag When the trash is compacted to the top of the drawer remove the bag If the bag is too heavy compact less trash before emptying it in the future IMPORTANT Do not push items down into compactor with hands or feet 1 Pull the drawer completely ope...

Page 9: ...the OFF LOCK position and remove it NOTE Any services other than those outlined in this section should be performed by a designated service representative Cleaning Exterior Surfaces 1 Wash exterior surfaces including stainless steel with a clean sponge or soft cloth and a mild detergent in warm water Do not use abrasive or harsh cleaners Rinse and dry thoroughly with a soft cloth 2 Wipe up spills ...

Page 10: ...re than half full before trash is compacted Your compactor won t operate Is the power supply cord unplugged Plug into a grounded 3 prong outlet Has a household fuse blown or has a circuit breaker tripped Replace the fuse or reset the circuit breaker If the problem continues call an electrician Is the drawer completely closed Close the drawer firmly and start the compactor again Is the Key Knob tur...

Page 11: ...oad Benton Harbor MI 49022 2692 Please include a daytime phone number in your correspondence InCanada Call the KitchenAid Canada Customer Interaction Centre toll free 1 800 807 6777 Our consultants provide assistance with Features and specifications on our full line of appliances Warranty information Use and maintenance procedures Accessory and repair parts sales Referrals to local dealers repair ...

Page 12: ...EDIES CUSTOMER S SOLE AND EXCLUSIVE REMEDY UNDER THIS LIMITED WARRANTY SHALL BE PRODUCT REPAIR AS PROVIDED HEREIN IMPLIED WARRANTIES INCLUDING WARRANTIES OF MERCHANTABILITY OR FITNESS FOR A PARTICULAR PURPOSE ARE LIMITED TO ONE YEAR OR THE SHORTEST PERIOD ALLOWED BY LAW KITCHENAID SHALL NOT BE LIABLE FOR INCIDENTAL OR CONSEQUENTIAL DAMAGES SOME STATES AND PROVINCES DO NOT ALLOW THE EXCLUSION OR LI...

Reviews: