background image

Summary of Contents for KESK901SBL04

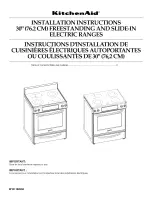
Page 1: ...S INSTRUCTIONS D INSTALLATION DE CUISINIERES ELECTRIQUES AUTOPORTANTES OU COULISSANTES DE 30 76 2 CM Table of Contents Table des matieres 2 iMPORTANT Save for local electrical inspector s use iMPORTANT conserver pour consultation par I inspecteur local des installations electriques W10118260A ...

Page 2: ...ride antibasculement 21 Reglage de I aplomb de la cuisiniere 21 Achever I installation 22 Deplacement de la cuisini_re 22 GABARIT POUR LA BRIDE ANTIBASCULEMENT 23 RANGE SAFETY Your safety and the safety of others are very important We have provided many important safety messages in this manual and on your appliance Always read and obey all safety messages This is the safety alert symbol This symbo...

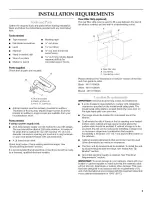
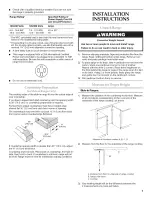
Page 3: ...e terminals with upturned ends A UL listed strain relief Check local codes Check existing electrical supply See Electrical Requirements section It is recommended that all electrical connections should be made by a licensed qualified electrical installer IMPORTANT Observe all governing codes and ordinances It is the installer s responsibility to comply with installation clearances specified on the ...

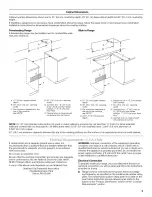
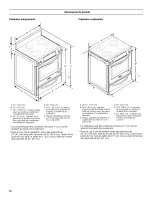
Page 4: ...on Product Dimensions Freestanding Range Slide in Range A B F E A 53 4 14 6 cm B 30 76 2 cm C 413 4 106 cm overall height with levering legs screwed all the way in D 36 91 4 cm cooktop trim height with leveling legs screwed all the way in E 30 76 2 cm F 27W 69 2 cm max from handle to standoff at back of range G Model serial number plate located on the right hand side oven door trim Range can be ra...

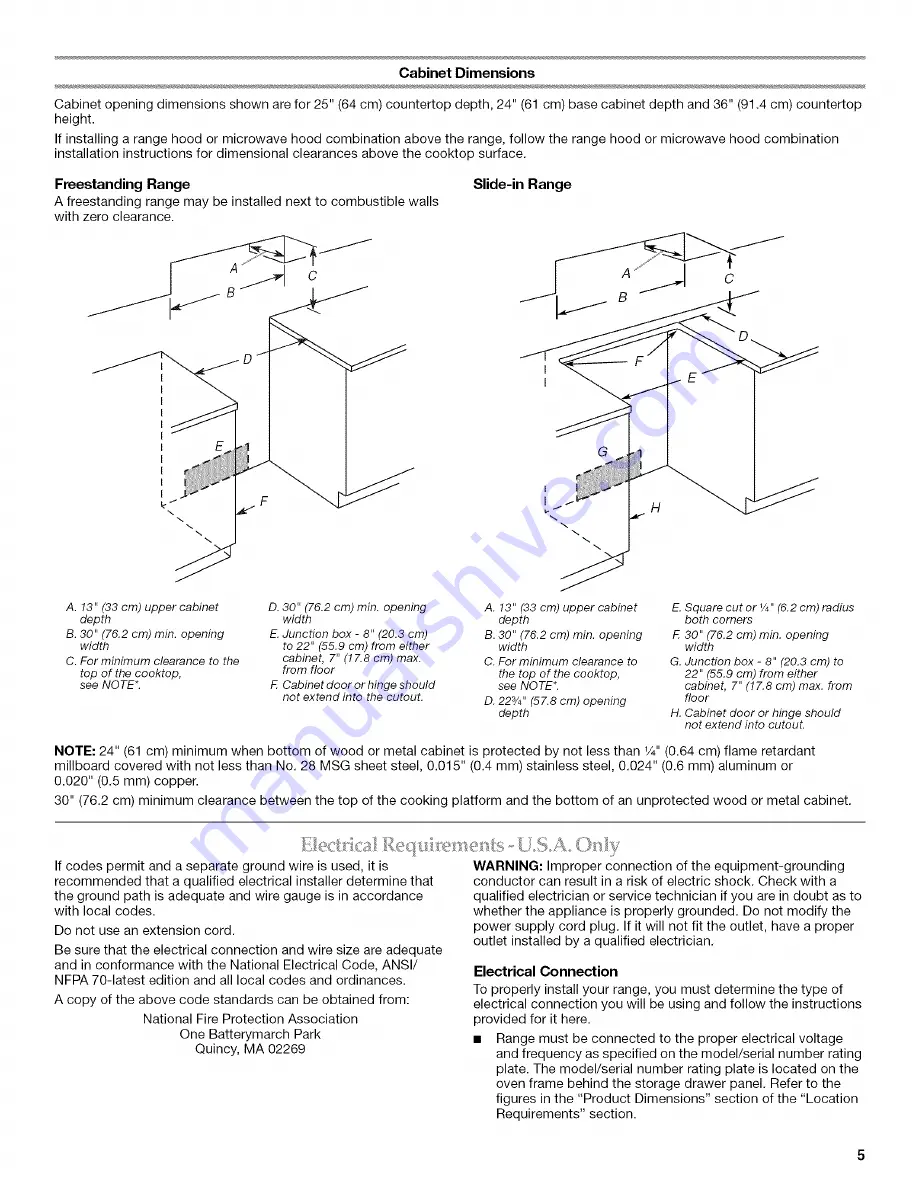
Page 5: ...stainless steel 0 024 0 6 mm aluminum or 0 020 0 5 mm copper 30 76 2 cm minimum clearance between the top of the cooking platform and the bottom of an unprotected wood or metal cabinet If codes permit and a separate ground wire is used it is recommended that a qualified electrical installer determine that the ground path is adequate and wire gauge is in accordance with local codes Do not use an ex...

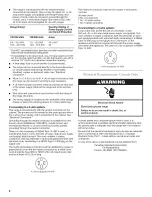
Page 6: ...lations 1996 NEC mobile homes and recreational vehicles or an area where local codes prohibit grounding through the neutral conductor When a 4 wire receptacle of NEMA Type 14 50R is used a matching UL listed 4 wire 250 volt 40 amp range power supply cord pigtail must be used This cord contains 4 copper conductors with ring terminals or open end spade terminals with upturned ends terminating in a N...

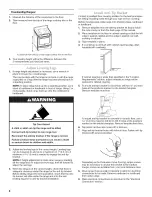
Page 7: ... top of another Repeat with the other 2 corners Place them lengthwise on the floor behind the range to support the range when it is laid on its back Using 2 or more people firmly grasp the range and gently lay it on its back on the cardboard corners 3 Pull cardboard bottom firmly to remove The cooktop sides of the slide in range fit over the cutout edge of your countertop If you have a square fini...

Page 8: ...racket will slide under the range and onto the rear leveling leg prior to anti tip bracket installation __ _ _1 _ _ _ __ __ _ _ __ Contact a qualified floor covering installer for the best procedure for drilling mounting holes through your type of floor covering Before moving range slide range onto shipping base cardboard or hardboard 1 Remove template from the anti tip bracket kit found inside th...

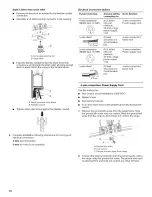
Page 9: ...ange Failure to follow these instructions can result in death fire or electrical shock 1 Disconnect power 2 Remove the terminal block cover screws located on the back of the range Pull cover down and toward you to remove cover 3 A Hold down screws B Terminal block cover Add strain relief Style 1 Power supply cord strain relief Remove the knockout for the 40 amp supply cord Assemble a UL listed str...

Page 10: ...ly cord minimum 40 amp range power supply cord 4 wire direct A fused 4 wire connection disconnect or Direct wire circuit breaker 12 7 crn box 3 wire receptacle NEMA type 10 50R A UL listed 250 volt minimum 40 amp range power supply cord 3 wire connection Power supply cord 3 wire direct A fused disconnect or 2 5 c_ circuit breaker box 3 wire connection Direct wire 4 wire connection Power Supply Cor...

Page 11: ...terminal screws on the terminal block 4 Tighten strain relief screws 5 Replace terminal block cover with screw Direct Wire Installation Copper or Aluminum Wire This range may be connected directly to the fuse disconnect or circuit breaker box Depending on your electrical supply make the required 3 wire or 4 wire connection 1 Strip outer covering back 3 7 6 cm to expose wires Strip the insulation b...

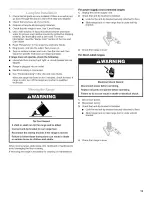
Page 12: ...er electrical connection 4 Tighten the locking ring of the conduit connector 5 Replace the terminal block cover with screw IMPORTANT On models with a warming drawer the rear range foot must be viewed from the front and slightly to one side of the range On models with a storage drawer the drawer may be removed to better view the rear range foot 1 To remove storage drawer Pull drawer straight out to...

Page 13: ... heat If range is cold turn off the range and contact a qualified technician Tip Over Hazard A child or adult can tip the range and be killed Connect anti tip bracket to rear range foot Reconnect the anti tip bracket if the range is moved Failure to follow these instructions can result in death or serious burns to children and adults When moving range slide range onto cardboard or hardboard to avo...

Page 14: ...faire baeculer la cuisiniere ce qui peut causer un deces Joindre la bride antibasculement au pied arriere de la cuieiniere Joindre de nouveau la bride antibaeculement si la cuieiniere est deplac6e Le non respect de cee instructions peut causer un d6cee ou des brt_luree graves aux enfants et aux adultes EXIGENCES D INSTALLATION Rassembler les outils et pi6ces necessaires avant de commencer I instal...

Page 15: ...7 cm au dela du bas des placards Respecter les dimensions indiquees pour les ouvertures decouper dans les placards ces dimensions constituent les valeurs minimales des degagements de separation La bride antibasculement de plancher dolt _tre installee Pour I installation de la bride antibasculement expediee avec la cuisiniere voir la section Installation de la bride antibasculement Une source d ele...

Page 16: ... avec plan de travail de 25 63 5 cm I avant de la porte du four sera en saillie de 1 2 5 cm au dela de la base des placards de 24 61 cm A 3011 16 77 6 cm B 35 90 5 cm Hauteur jusqu a la partie inf_rieure de la table de cuisson avec les pieds de nivellement cempletement abaiss s C Plaque signal_tique situ_e sur la garniture de porte du four c6t_ droit D 30 76 2 cm E 27 69 2 cm Longueur de la poign_...

Page 17: ... cm depuis I un des deux placards 7 17 8 cm max b partir du plancher F La porte ou charniere du placard ne dolt pas d_passer b I int_rieur de I ouverture A Profondeur des placards sup_rieurs 13 33 crn B Largeur de I ouverture 30 76 2 cm min C Pour la distance libre minimale vers la partie sup_rieure de la table de cuisson voir la REMARQUE D Profondeur d ouverture 223 4 57 8 cm E Rayon de basculeme...

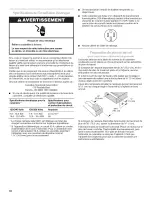
Page 18: ...c cordon d alimentation 50 A utiliser un ensemble specifiant I utilisation avec une ouverture de diametre nominal 1 34 9 mm pour le raccordement On recommande I emploi de fusibles temporises ou disjoncteurs Cette cuisiniere est dotee d un dispositif de branchement homologation CSA International destine a _tre branche sur une prise de courant murale standard 14 50R Veiller ace que la prise de coura...

Page 19: ...a partie posterieure En utilisant au moins deux personnes saisir fermement la cuisiniere et la deposer delicatement sur sa partie posterieure sur les coins de protection 3 Tirer fermement sur le fond du carton pour le retirer A Distance en partant du sol vers la pattie inf_rieure de la table de cuisson B Chbssis lateral de la cuisiniere C Table de cuisson 3 Ajuster la hauteur en fonction des diffe...

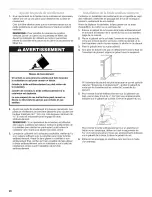
Page 20: ...antibasculement Avant de faire glisser la cuisiniere a son emplacement final v ifier qu il sera possible de faire glisser la bride antibasculement sous la cuisiniere et sur le pied de nivellement arriere avant I installation de la bride antibasculement Contacter un installateur de rev_tements de sol qualifi au sujet des meilleures m hodes de pergage des trous de montage travers le rev_tement de so...

Page 21: ...ans une residence mobile il est imperatif de fixer la cuisiniere au sol Toute methode de fixation de la cuisiniere est adequate dans la mesure ou elle satisfait aux normes indiquees dans la section Exigences d emplacement _ Placer la grille dans le four Placer un niveau sur la grille et contr61er I aplomb d abord transversalement puis dans le sens avant arriere Si la cuisiniere n est pas d aplomb ...

Page 22: ...de antibasculement si la cuisiniere est deplacee Le non respect de ces instructions peut causer un deces ou des brt31ures graves aux enfants et aux adultes Lorsqu on deplace la cuisiniere la faire glisser sur une planche de carton ou en materiau dur pour eviter d endommager le rev_tement du sol Si le deplacement de la cuisiniere est necessaire pour le nettoyage ou I entretien Cuisini_res aliment_e...

Page 23: ...ht edge against rear wall Couper ici et placer le rebord sup6rieur contre le c6t6 gauche du placard et le rebord droit contre la paroi arri_re T Use this template to anchor the left rear leg of range Uti iser ce gabarit pour ancrer le pied arribre gauche de la cuisinibre ANTO TOP BffACKET _THOles in bracket rous dans la bride 23 ...

Page 24: ...tered Trademark TM Trademark of KitchenAid U S A KitchenAid Canada licensee in Canada Printed in U S A Tous droits reserves Marque deposee TM Marque de commerce de KitchenAid U S A Emploi sous licence par KitchenAid Canada au Canada Imprim_ aux E U ...

Reviews: