background image

4

FOOd PROCESSOR SAFETY

FOOd PROCESSOR SAFETY

IMPORTANT SAFEgUARdS

When using electrical appliances, basic safety precautions should always  

be followed, including the following:

1.  Read all instructions.
2.  To protect against risk of electrical shock, do not put Food Processor in water  

or other liquid.

3.  Close supervision is necessary when any appliance is used by or near children.
4.  Unplug from the outlet when not in use, before putting on or taking off parts,  

and before cleaning.

5.  Avoid contacting moving parts.
6.  Do not operate any appliance with a damaged cord or plug, or after the appliance 

malfunctions, or is dropped or damaged in any manner. Return appliance to the nearest 

Authorized Service Facility for examination, repair, or electrical or mechanical adjustment.

7.  The use of attachments not recommended or sold by KitchenAid may cause fire,  

electric shock, or injury.

8.  Do not use outdoors.
9.  Do not let cord hang over edge of table or counter.

10.   Keep hands and utensils away from moving blades or discs while processing food to 

reduce the risk of severe injury to persons or damage to the Food Processor. A scraper 

may be used but must be used only when the Food Processor is not running.

11.  Blades are sharp. Handle carefully.
12.  To reduce the risk of injury, never place cutting blade or discs on base without first 

putting bowl properly in place.

13.  Be certain cover is securely locked in place before operating appliance.
14.  Never feed food by hand. Always use the food pusher.
15.  Do not attempt to defeat the cover interlock mechanism.
16.  This product is designed for household use only.

SAvE ThESE INSTRUCTIONS

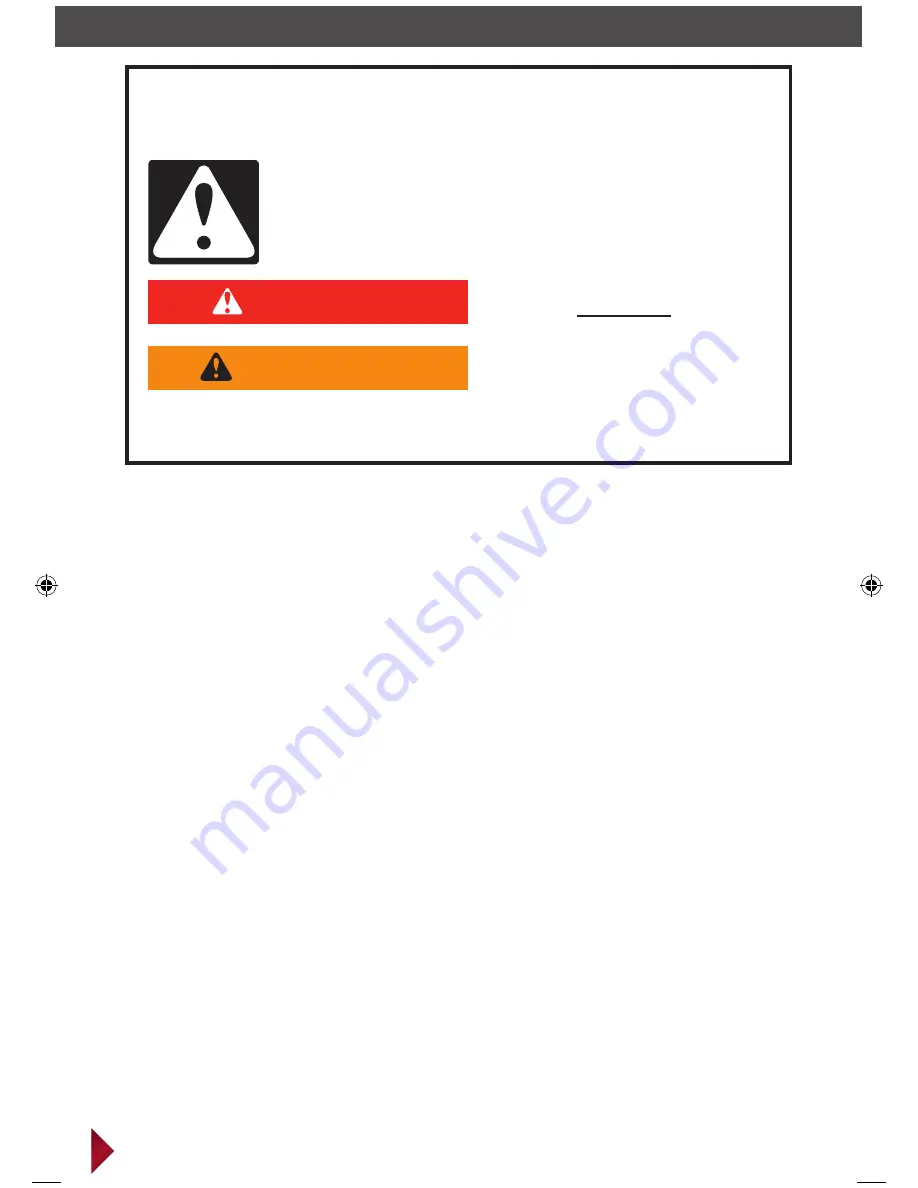
You can be killed or seriously injured 

if you don't immediately follow 

instructions. 

You can be killed or seriously injured 

if you don't follow instructions.

All safety messages will tell you what the potential hazard is, tell you how to reduce 
the chance of injury, and tell you what can happen if the instructions are not followed.

Your safety and the safety of others are very important.

We have provided many important safety messages in this manual and on your 
appliance. Always read and obey all safety messages.

This is the safety alert symbol.
This symbol alerts you to potential hazards that can kill or hurt you 
and others.
All safety messages will follow the safety alert symbol and either the 
word “DANGER” or “WARNING.” These words mean:

DANGER

WARNING

W10545030B_ENv3.indd   4

1/25/13   10:52 AM

Summary of Contents for KFP1642

Page 1: ...KFP1642 INSTRUCTIONS INSTRUCTIONS INSTRUCCIONES ...

Page 2: ...ormance of your appliance keep this guide handy It will empower you with the best way to use and care for your product Your satisfaction is our 1 goal Remember to register your product online at www kitchenaid com or by mail using the attached Product Registration Card KitchenAid com KitchenAid ca Join us in the kitchen at www proline kitchenaid com Scan with your mobile device for recipes tips an...

Page 3: ...ist us in complying with the provisions of the Consumer Product Safety Act This card does not verify your warranty Please complete the following for your personal records FOOD PROCESSOR SAFETY Important safeguards 4 Electrical requirements 5 PARTS AND FEATURES Parts and accessories 6 Selecting the right tools 8 Using YOUR Food Processor Attaching the work bowl 12 Attaching the lid and safety lock ...

Page 4: ...e Food Processor A scraper may be used but must be used only when the Food Processor is not running 11 Blades are sharp Handle carefully 12 To reduce the risk of injury never place cutting blade or discs on base without first putting bowl properly in place 13 Be certain cover is securely locked in place before operating appliance 14 Never feed food by hand Always use the food pusher 15 Do not atte...

Page 5: ...erviceman install an outlet near the appliance Electrical Shock Hazard Plug into a grounded 3 prong outlet Do not remove ground prong Do not use an adapter Do not use an extension cord Failure to follow these instructions can result in death fire or electrical shock WARNING 17 Do not use appliance other than intended use 18 Disconnect from supply circuit before cleaning or servicing 19 CAUTION Do ...

Page 6: ...Dough blade Egg whip select models only 4 Cup 1 L mini bowl and mini blade Die cast base 16 Cup 4 L work bowl Work bowl cover with 3 in 1 feed tube 3 piece food pusher Accessory case Externally adjustable blade control Parts and accessories Spatula Ultratight seal ...

Page 7: ... Externally adjustable slicing disc thin to thick Parmesan Ice shaving disc select models only Disc adapter Use this adapter Julienne disc select models only Dicing kit lid 8mm Dicing kit blade Dicing kit grid 8mm Grid cleanout tool DICING KIT Citrus press select models only Citrus press adapter select models only ...

Page 8: ...h herbs Nuts Meat Vegetables Fruit Pesto Sauces Cake batter Cream Optional Dicing kit with disc adapter used with work bowl and an optional prep bowl Dice Potatoes Tomatoes Onions Cucumbers Fruit Vegetables Mince NOTE For best results when chopping begin with the speed lever set to High then change setting to Low Low High Low High Low High Low High ...

Page 9: ...s Nuts Meat Vegetables Fruit Pesto Sauces Cake batter Pie dough Cream Plastic dough blade used with work bowl Knead Yeast dough Egg whip used with work bowl Whip Eggs Available with select models only Mince NOTE For best results when chopping begin with the speed lever set to High then change setting to Low Low High Low High Low High Low High Low High ...

Page 10: ... thin Potatoes Tomatoes Fruit soft Vegetables soft Fruit hard Vegetables hard Optional Reversible shredding disc used with work bowl and optional prep bowl Shred medium Shred fine Vegetables Cheese freeze 30 min prior Chocolate Fruit hard Use other settings than suggested below to adjust results to your personal preferences Low High Low High Low High ...

Page 11: ...rmesan ice shaving disc used with work bowl and optional prep bowl Grate Shave Hard cheese Ice Chocolate Optional Julienne disc used with work bowl and optional prep bowl Julienne Carrots Zucchini Potatoes Vegetables Available with select models only Low High Low High ...

Page 12: ...aching the lid and safety lock 1 Install the work bowl lid aligning the tabs and locking it into place The Ultratight seal is spill resistant 2 The large feed tube must be inserted into the lid for the Food Processor to run TIP It is easier to attach the lid when the large feed tube is removed After attaching the lid make sure to insert the large feed tube Electrical Shock Hazard Plug into a groun...

Page 13: ... pusher 1 Use entire feed tube and the large food pusher to process large items Medium food pusher 2 Use the medium food pusher in the feed tube to process smaller items 3 Use the small food pusher to slice or shred the smallest thinnest items Small food pusher Drizzle hole 4 Use the drizzle hole in the small food pusher to slowly drizzle oil or other liquid ingredients into the work bowl TIP The ...

Page 14: ... speed lever to High or Low then turn the dial to ON 2 To stop turn the dial to OFF 3 To pulse flip the speed lever to High or Low then turn the dial to PULSE to start processing the dial will automatically go back to OFF position to stop The pulse control allows precise control of the duration and frequency of processing High Low High Low High Low Usin NOTE The speed lever must be in the OFF posi...

Page 15: ...e kit s tab with the groove in the work bowl 3 Rotate the dicing kit lid using the finger tabs until it unlocks 4 Using the handle remove the dicing kit lid from the dicing kit IMPORTANT Follow these directions in order to properly wash all parts of the dicing kit before using it for the first time 5 Clean each part of the dicing kit in the dishwasher or with a soft cloth and warm water ...

Page 16: ...dicing kit and the dicing grid are each fully seated 6 After dicing remove the dicing kid lid and the dicing kit blade and place the dicing kit cleanout tool in the notches on the dicing kit grid then push cleanout tool down into the dicing grid This will push remaining food out of the grid enabling you to wash the dicing kit more efficiently 4 Place the dicing kid lid onto the assembled kit with ...

Page 17: ...leave the blade in the bowl while pouring out the ingredients NOTE The multipurpose blade has a spill resistant seal and can be left in work bowl or removed before the contents are emptied Liquid level graphics on the side of the bowl indicate the maximum recommended levels for thick and thin liquids in the Food Processor 4 Firmly secure the work bowl with one hand using the handle not the rim of ...

Page 18: ...ing the two finger grips 1 To use the prep bowl place into the work bowl using the two finger grips 3 Place the desired disc on the power shaft Do not use any blades with the prep bowl 4 Install the work bowl lid aligning the tabs and locking it into place 2 Place the adapter on the power shaft NOTE The prep bowl can be used only with the discs and the dicing kit Usin ...

Page 19: ... 4 To remove shredding disc and julienne disc remove work bowl lid and using the 2 finger grip holes lift the disc straight up 3 Install the work bowl lid aligning the tabs and locking it into place Installing removing the shredding julienne and parmesan discs 1 Place the adapter on the power shaft 2 Slightly rotate the disc until it drops into place onto the adapter Available with select models o...

Page 20: ...aligning the tabs and locking it into place NOTE Changing thickness settings with other discs or blades installed will have no effect on operation Be aware it is possible to change the thickness of your slices by changing pressure on the food item when guiding it into the feed tube Use more pressure for a thicker slice or use less pressure for a thinner slice Adjusting the slicing thickness Move l...

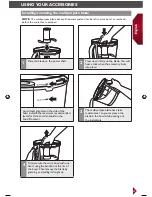
Page 21: ...he mini bowl inside the work bowl making sure the tab on the mini bowl lines up with the notch in the work bowl 5 Using the two finger grips lift the mini bowl up 2 Press down firmly on the mini blade You will hear a click when it locks into place 3 Install the work bowl lid aligning the tabs and locking it into place IMPORTANT Discs and adapters must be removed before removing bowls ...

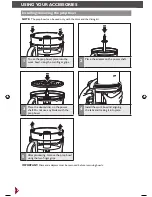
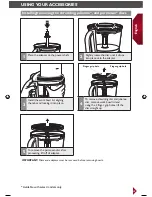
Page 22: ...g whip or dough blade and lift straight up 1 Place the egg whip or dough blade onto power shaft 2 Press down firmly on the egg whip or dough blade You will hear a click when the accessory locks into place Usin Available with select models only IMPORTANT Discs and adapters must be removed before removing bowls ...

Page 23: ...trainer basket turn strainer basket to unlock from the handle as shown and lift from the work bowl Remove the adapter 4 Place the cone inside the strainer basket connecting it to the adapter It may be necessary to rotate the cone until it drops into place 3 Turn the basket counter clockwise until the clip locks into the handle Using Your Accessories Available with select models only IMPORTANT Disc...

Page 24: ...before removing accessories Turn the work bowl and lift to remove and then turn and lift the lid To remove accessories before removing work bowl from Food Processor Turn the work bowl cover to unlock as shown and lift the lid to remove continuing next steps with bowl still attached to Food Processor 2 To remove disc accessories Hold the disc by the 2 finger grips lift it straight up Then remove th...

Page 25: ...n 4 To store push the cord back inside of the Food Processor base 2 Clean the base and cord with a warm sudsy cloth Dry with a soft cloth 1 Be sure the Food Processor is off and unplugged before disassembling 3 All the other parts of the Food Processor are dishwasher safe Load parts away from exposed heating elements in the dishwasher Bowls should be loaded upside down not on their sides Avoid usi...

Page 26: ...To chop nuts or make nut butters Process up to 3 cups 710 ml of nuts to desired texture using short pulses 1 to 2 seconds each time For a coarser texture process smaller batches pulsing 1 or 2 times 1 to 2 seconds each time Pulse more often for finer texture For nut butters process continuously until smooth Store in refrigerator To chop cooked or raw meat poultry or seafood The food should be very...

Page 27: ...les that are long and relatively small in diameter such as celery carrots and bananas To slice uncooked meat or poultry such as stir fry meats Cut or roll food to fit feed tube Wrap and freeze food until hard to the touch 30 minutes to 2 hours depending on thickness of food Check to be sure you can still pierce food with the tip of a sharp knife If not allow to thaw slightly Process using even pre...

Page 28: ...ice To minimize this cut food in several pieces and pack the feed tube with the food For processing small or slender items the small feed tube in the two piece food pusher will prove especially convenient When preparing a cake or cookie batter use the multipurpose blade to cream fat and sugar first Add dry ingredients last Place nuts and fruit on top of flour mixture to prevent overchopping Proces...

Page 29: ...ke sure the dial is in the Off position If your Food Processor should malfunction or fail to operate check the following For easy lid rotation it is possible to remove the seal or just apply vegetable oil to the seal Food Processor not shredding or slicing properly Make sure the raised blade side of the disc is positioned face up on the adapter If using the adjustable slicing blade make sure it is...

Page 30: ...ED WARRANTIES INCLUDING ANY IMPLIED WARRANTY OF MERCHANTABILITY OR IMPLIED WARRANTY OF FITNESS FOR A PARTICULAR PURPOSE ARE LIMITED TO FIVE YEARS OR THE SHORTEST PERIOD ALLOWED BY LAW Some states and provinces do not allow limitations on the duration of implied warranties or merchantability or fitness so this limitation may not apply to you This warranty gives you specific legal rights and you als...

Page 31: ...simply call our toll free Customer eXperience Center at 1 800 832 7173 Monday through Friday Please have your original sales receipt available when you call Proof of purchase will be required to initiate the claim Give the consultant your complete shipping address No P O Box numbers please When you receive your replacement Pro Line product use the carton and packing materials to pack up your origi...

Page 32: ...nAid All rights reserved Used under license in Canada 2013 KitchenAid Tous droits réservés Emploi sous licence au Canada 2013 KitchenAid Todos los derechos reservados Usada en Canadá bajo licencia W10545030B 01 13 ...

Reviews: