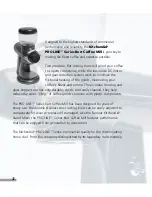
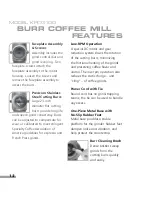
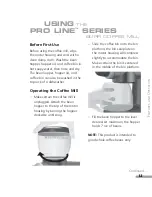
background image

GUIDE 

TO

PROFESSIONAL

RESULTS

P

R O

L

I N E

S

E R I E S

Model KPCG100 Burr Coffee Mill

Summary of Contents for KPCG100OB

Page 1: ...GUIDE TO PROFESSIONAL RESULTS P R O L I N E S E R I E S Model KPCG100 Burr Coffee Mill ...

Page 2: ...S I NTRODUCTION P R O L I N E S E R I E S MODEL KPCG100 BURR COFFEE MILL 1 Table of Contents 3 Proof of Purchase Registration 5 Coffee Mill Safety 6 Important Safeguards 7 Electrical Requirements 8 Introduction Section Contents ...

Page 3: ...using and glass hoppers are not only durable stylish and easily cleaned they help reduce the static cling of coffee grinds common with plastic components The PRO LINE Series Burr Coffee Mill has been designed for years of heavy use the durable stainless steel cutting burrs can be easily adjusted to compensate for wear or replaced if damaged Like the famous KitchenAid Stand Mixer the PRO LINE Serie...

Page 4: ...ffee Mill Features 10 Using the Coffee Mill Before First Use 13 Operating the Mill 13 Grind Setting Table 16 Adjusting the Cutting Burrs 16 Coffee Mill Tips 19 How the Grind Affects Flavor 21 CARE AND CLEANING Cleaning the Motor Housing Hoppers 24 Cutting Burrs Cleaning 25 Adjusting for Wear 28 Replacing 29 Troubleshooting 30 TABLE OF CONTENTS Continued I NTRODUCTION ...

Page 5: ...0 United States District of Columbia 32 Warranty for Puerto Rico 33 Arranging for Hassle Free Replacement 34 Ordering Accessories and Replacement Parts 34 Arranging for Service After the Warranty Expires 35 Arranging for Service Outside the 50 United States Puerto Rico 35 ...

Page 6: ... the unit This card will enable us to contact you in the unlikely event of a product safety notification and assist us in complying with the provisions of the Consumer Product Safety Act This card does not verify your warranty Please complete the following for your personal records Model Number KPCG100 Serial Number ____________________________________________________ Date Purchased_______________...

Page 7: ...can kill or hurt you and others All safety messages will follow the safety alert symbol and either the word DANGER or WARNING These words mean You can be killed or seriously injured if you don t immediately follow instructions You can be killed or seriously injured if you don t follow instructions All safety messages will tell you what the potential hazard is tell you how to reduce the chance of i...

Page 8: ...ng moving parts 6 Do not operate any appliance with a damaged cord or plug or after the appliance malfunctions or is dropped or damaged in any manner Return the appliance to the nearest authorized service facility for examination repair or electrical or mechanical adjustment 7 The use of attachments not recommended or sold by KitchenAid may cause fire electric shock or injury 8 Do not use outdoors...

Page 9: ...able and may be used if care is exercised in their use If a longer extension cord is used The marked electrical rating of the extension cord should be at least as great as the electrical rating of the appliance The extension cord should be a grounding type 3 wire cord The cord should be arranged so it will not drape over the countertop or tabletop where it can be pulled on by children or tripped o...

Page 10: ...res 10 Using the Coffee Mill Before First Use 13 Operating the Coffee Mill 13 Grind Setting Table 16 Adjusting the Cutting Burrs 16 Coffee Mill Tips 19 How the Grind Affects Flavor 21 Features and Operation Section Contents FEATURES AND OPERATION F EATURES AND O PERATION ...

Page 11: ...MODEL KPCG100 BURR COFFEE MILL FEATURES 10 Model KPCG100 Burr Coffee Mill ...

Page 12: ...static cling of coffee grinds Bin is dishwasher safe top rack only Bin Platform Platform pad seats the coffee bin under the grinding spout Bin Seal Plate Plate helps position the coffee bin under the grinding spout and prevents coffee grinds from escaping Grind Control Dial Large easy to use dial selects one of 15 grind levels in half step increments from 1 to 8 Grind Level Ring Metal ring display...

Page 13: ...sso and French Press grinds 12 Low RPM Operation A special DC motor and gear reduction system slows the rotation of the cutting burrs minimizing the frictional heating of the grinds and preserving coffee flavor and aroma The low rpm operation also reduces the static charge and cling of coffee grinds Power Cord with Tie Round cord has no grind trapping seams the tie can be used to bundle any excess...

Page 14: ...only 13 Before First Use Before using the coffee mill wipe the motor housing and cord with a clean damp cloth Wash the bean hopper hopper lid and coffee bin in hot soapy water then rinse and dry The bean hopper hopper lid and coffee bin can also be washed in the top rack of a dishwasher Operating the Coffee Mill 1 Make certain the coffee mill is unplugged Attach the bean hopper to the top of the m...

Page 15: ... level to your brewing process With use you ll be able to refine the settings to match your own tastes NOTE Because partially ground coffee beans may remain between the burrs after the grinder is turned off selecting a finer grind may be easier when the coffee mill is running USING THE PRO LINE SERIES BURR COFFEE MILL WARNING Electrical Shock Hazard Plug into a grounded 3 prong outlet Do not remov...

Page 16: ...TION 15 7 To grind coffee flip the On Off Switch to the On position 8 When the desired amount of coffee has been ground flip the On Off Switch to the Off position remove the coffee container and scoop out the ground coffee ...

Page 17: ...e for your style of brewing With adjustment the PRO LINE Series Burr Coffee Mill will easily meet stringent Specialty Coffee Association of America grind size specifications for espresso 250 micron grind size or French Press brewing 1500 micron grind size Adjusting for Maximum Grind Fineness Adjusting the mill to provide maximum fineness will slightly decrease the grind sizes throughout the grindi...

Page 18: ...be visible once the grind control dial is removed 4 Turn on the mill by flipping the On Off Switch to the On position 5 Rotate the grind control gear clockwise 1 click or detent at a time until you hear the burrs touching one another when they touch the burrs will make a distinct rubbing or grating sound 6 When the burrs are touching turn the grind control gear counter clockwise 1 click or detent ...

Page 19: ...esso To re calibrate the grinder for maximum fineness see page 16 1 Turn the grind control dial to level 1 2 Using a 5 32 inch allen wrench or hex head screwdriver remove the screw located in the front of the grind control dial by turning it counter clockwise Once the screw is free remove the grind control dial The white grind control gear should be visible once the dial is removed 3 Rotate the gr...

Page 20: ...e coffee it s best to brew using a normal amount of ground coffee and then dilute the result with hot water Doing this will maximize flavor and minimize bitterness PRO LINE SERIES BURR COFFEE MILL TIPS Select the correct grind for the brew process you are using 15 grind levels are available in half step increments from 1 to 8 Level 8 produces a very fine grind perfect for espresso 41 2 to 6 are me...

Page 21: ...the grinder s bean hopper for a prolonged period 6 Grinding flavored coffee beans will impart an off taste to any other coffee that is ground in the mill If you enjoy flavored coffee it s best to add flavored syrups or creamers to your coffee after brewing or dedicate another mill for grinding flavored beans only NOTE The burrs will require more frequent cleaning when grinding flavored coffee bean...

Page 22: ...offee that is too coarsely ground for a particular process will result in the under extraction of the oils and essences resulting in a very thin and weak flavor If the correct grind is used adding more coffee simply makes a brew stronger without making it excessively bitter The consistency of the grind is also an important factor in the flavor of coffee and absolutely critical when making great es...

Page 23: ...while grinding resulting in lost flavor and aroma The PRO LINE Series Burr Coffee Mill uses a pair of large commercial style cutting burrs to grind coffee with precision Frictional heating is minimized with a gear reduction system that slows burr rotation and uniformity is enhanced with a helical gear that transports beans to the burrs at a controlled rate The result is a superb grind that makes y...

Page 24: ...ING P R O L I N E S E R I E S CARE AND CLEANING 23 Cleaning the Housing Hoppers 24 Cutting burrs Cleaning 25 Adjusting for Wear 28 Replacing 29 Troubleshooting 30 Care and Cleaning Section Contents C ARE AND C LEANING ...

Page 25: ...utting burrs burr shaft assembly or face plate assembly in water Keep them dry at all times Do not use abrasive cleansers or scouring pads Wipe the motor housing and cord with a clean damp cloth Dry with a soft cloth Wash the coffee bin bean hopper and hopper lid in hot soapy water then rinse and dry The bean hopper hopper lid and coffee bin can also be washed in the top rack of a dishwasher ...

Page 26: ...pebbles or twigs sometimes find their way into whole bean coffee These objects may cause the mill to jam If this happens follow the burr cleaning procedure to remove the foreign material 1 Make sure the mill is switched off and unplugged Remove the coffee bin and bean hopper from the mill 2 Using a flat head screwdriver turn the two faceplate screws counter clockwise until the faceplate assembly i...

Page 27: ...the faceplate assembly is removed If the burr shaft assembly does not slide out with the face plate assembly grasp the center shaft of the burr shaft assembly and remove it from the housing 4 Using the burr cleaning brush clean the burr mounted on the burr shaft assembly and the burr mounted within the motor housing NOTE Never wash the burrs or burr shaft assembly in water Keep them dry at all tim...

Page 28: ...nsert the burr shaft assembly into the grinder Keep the burr shaft assembly level so the tip of the auger shaft will line up with the small socket in the motor housing 7 Once the burr shaft assembly is in the motor housing rotate the assembly until it falls into place When correctly positioned the burr shaft assembly cannot be rotated Continued C ARE AND C LEANING ...

Page 29: ...r tightened use a flat head screwdriver to tighten them until snug 10 Place the grinder upright It is now ready for use Adjusting The Cutting Burrs For Wear The cutting burrs are made of high quality stainless steel for exceptional longevity After prolonged use however the burrs might require adjustment to compensate for wear If your grinds especially espresso are not as fine as they used to be an...

Page 30: ...wdriver remove the burr from the burr shaft assembly by turning the two burr mounting screws counter clockwise until free 3 Remove the burr from the motor housing by turning the two burr mounting screws counter clockwise until free 4 Attach the replacement burrs to the burr shaft assembly and motor housing using the burr mounting screws Make certain the cutting surfaces of the burrs face outward a...

Page 31: ...cutting burrs require cleaning or are worn See Cleaning the Cutting Burrs on page 25 or Replacing the Cutting Burrs on page 29 for more information If the mill is operating normally but stops abruptly Immediately turn off the grinder A foreign object such as a pebble or twig may have jammed the cutting burrs See Cleaning the Cutting Burrs on page 25 for more information If the grind is too coarse ...

Page 32: ...AND SERVICE INFORMATION 31 Warranty for the U S 32 Warranty for Puerto Rico 33 Arranging for Hassle Free Replacement 34 Ordering Accessories and Replacement Parts 34 Arranging for Service After the Warranty Expires 35 Arranging for Service Outside the U S Puerto Rico 35 Warranty Information Section Contents ...

Page 33: ...Hassle Free Replacement for details or call the KitchenAid Customer Satisfaction Center toll free at 1 800 541 6390 OR The replacement parts and repair labor costs to correct defects in materials and workmanship Service must be provided by an Authorized KitchenAid Service Center See the KitchenAid PRO LINE Series Burr Coffee Mill Warranty for Puerto Rico for details on how to arrange for service K...

Page 34: ...g the warranty period all service must be handled by an Authorized KitchenAid Service Center Please bring the Coffee Mill or ship it prepaid and insured to the nearest Authorized Service Center Call toll free 1 800 541 6390 Monday through Friday 8 a m to 8 p m Eastern Time or Saturday 10 a m to 5 p m to learn the location of a Service Center near you Your repaired Coffee Mill will be returned to y...

Page 35: ... your failed Coffee Mill returned to us Your replacement unit will also be covered by our two year full warranty When you receive your replacement PRO LINE Series Burr Coffee Mill use the carton and packing materials to pack up your failed Coffee Mill In the carton include your name and address on a sheet of paper along with a copy of the proof of purchase register receipt credit card charge slip ...

Page 36: ...e to Customer Satisfaction Center KitchenAid Portable Appliances P O Box 218 St Joseph MI 49085 0218 ARRANGING FOR SERVICE OUTSIDE THE 50 UNITED STATES AND PUERTO RICO Consult your local KitchenAid dealer or the store where you purchased your PRO LINE Series Burr Coffee Mill for information on how to obtain service WARNING Electrical Shock Hazard Unplug before servicing Failure to do so can result...

Page 37: ......

Page 38: ...FOR THE WAY IT S MADE Registered Trademark Trademark of KitchenAid U S A 2003 All rights reserved Specifications subject to change without notice dZw703 ...

Reviews: